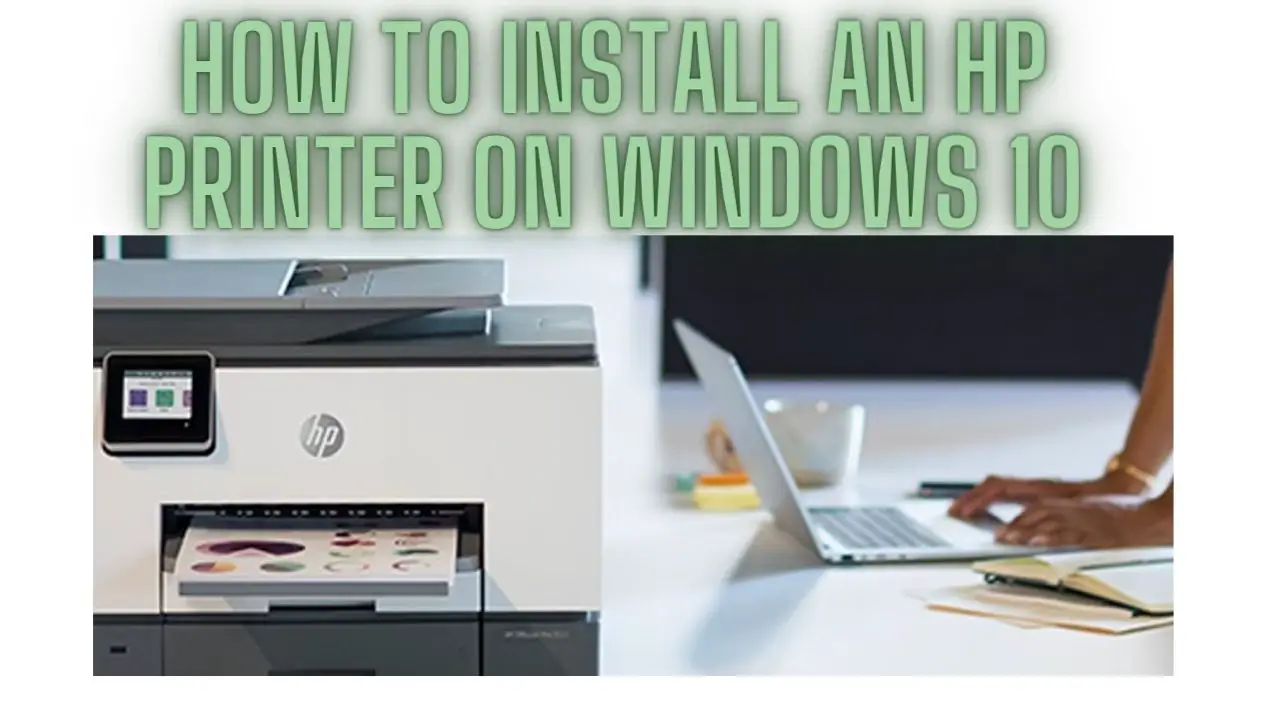
How To Install An HP Printer On Windows 10: A Comprehensive Guide
Introduction
Setting up an HP printer on a Windows 10 computer is a straightforward process, thanks to the user-friendly interface and compatibility of HP printers with Windows operating systems. Whether you’ve just purchased a new HP printer or need to reinstall one, this step-by-step guide will walk you through the installation process. From unpacking your printer to installing drivers and configuring settings, you’ll have your HP printer up and running in no time.
Checking Compatibility
Before installing an HP printer on a Windows 10 computer, it’s essential to check if the printer model is compatible with the Windows 10 operating system. Here’s how you can do it:
- Visit HP’s Official Website:
- Go to the official HP website (https://www.hp.com/) using a web browser on your computer.
- Navigate to Support:
- Look for a “Support” or “Customer Support” section on the HP website.
- You may find it under the “Support & Drivers” or “Customer Support” tab.
- Enter Printer Model:
- Enter the model number of your HP printer into the search bar or navigate through the website’s menus to find your printer model.
- Check Compatibility:
- Once you’ve located your printer model, look for compatibility information.
- HP’s website should specify which operating systems the printer is compatible with, including Windows 10.
- Verify that Windows 10 is listed among the compatible operating systems.
- Review System Requirements:
- Check if there are any specific system requirements or recommendations for using the printer with Windows 10.
- Ensure that your computer meets these requirements, such as available disk space, processor speed, and memory.
- Download Drivers and Software:
- If your printer is compatible with Windows 10, you can proceed with downloading the necessary drivers and software.
- HP’s website usually provides a download link for drivers and software tailored for Windows 10.
- Optional: Contact Support:
- If you’re unsure about compatibility or need assistance, you can contact HP’s customer support for further guidance.
- HP’s support team can provide information about compatibility, driver downloads, and any other questions you may have regarding your HP printer and Windows 10.
By checking compatibility before installation, you can ensure a smoother setup process and avoid compatibility issues or driver conflicts.
Connecting Printer
Before installing an HP printer on your Windows 10 computer, you need to connect the printer to your computer either via a USB cable or through a wireless network. Here’s how to do it:
- USB Connection:
- Ensure your HP printer is powered on.
- Locate the USB cable that came with your printer.
- Connect one end of the USB cable to the USB port on your printer.
- Connect the other end of the USB cable to an available USB port on your Windows 10 computer.
- Wireless Connection:
- Ensure your HP printer is connected to the same wireless network as your Windows 10 computer.
- Refer to your printer’s user manual or the manufacturer’s website for instructions on how to connect your printer to a wireless network.
- Once connected, verify that your printer is connected to the network by printing a network configuration report or performing a test print.
- Printer Setup (Optional):
- Depending on your printer model, you may need to complete the initial setup process directly on the printer’s control panel or touchscreen.
- Follow the on-screen instructions to set the language, country/region, date, time, and other settings as required.
- Verify Connection:
- After connecting your printer to your computer via USB or wireless network, ensure that the connection is stable and established.
- Check the printer’s display or control panel for any error messages or indicators that may indicate connectivity issues.
- If using a wireless connection, ensure that both the printer and computer are connected to the same network and that the wireless signal is strong and stable.
Once your HP printer is successfully connected to your Windows 10 computer, you can proceed with the installation of printer drivers and software to enable printing functionality.
Powering On Printer
Before you connect your HP printer to your Windows 10 computer, it’s essential to ensure that the printer is powered on and in a ready state. Here’s how you can power on your HP printer:
- Plug in Power Cord:
- Locate the power cord of your HP printer.
- Plug one end of the power cord into the power port on the back or side of the printer.
- Plug the other end of the power cord into a power outlet or surge protector.
- Turn on Power Switch:
- Locate the power button or power switch on your HP printer.
- Press the power button or flip the power switch to turn on the printer.
- Wait for the printer to power on completely.
- Check Control Panel:
- Look at the printer’s control panel or display screen.
- Verify that the printer’s status lights are illuminated, indicating that the printer is powered on and in a ready state.
- Some printers may display a startup message or logo on the control panel screen when powered on.
- Wait for Initialization:
- Depending on the model of your HP printer, it may take a few moments for the printer to initialize and perform self-checks.
- Allow the printer to complete its startup sequence before proceeding.
- Check Ready State:
- Once the printer has powered on and completed its initialization, verify that it is in a ready state.
- The printer should not display any error messages or warning lights indicating issues with ink cartridges, paper jams, or other issues.
- If there are any error messages or warning lights, refer to the printer’s user manual for troubleshooting steps.
By following these steps, you can power on your HP printer and ensure that it is ready to be connected to your Windows 10 computer. Once the printer is powered on and in a ready state, you can proceed with connecting it to your computer using a USB cable or setting up a wireless connection.
Windows Update
Before installing your HP printer on Windows 10, it’s essential to ensure that your operating system is up-to-date by checking for Windows updates. Here’s how you can do it:
- Open Windows Settings:
- Click on the “Start” menu icon in the bottom-left corner of your screen.
- Select the gear icon to open “Settings.”
- Go to Update & Security:
- In the Windows Settings window, click on “Update & Security.”
- Check for Updates:
- In the Update & Security window, select the “Windows Update” tab on the left-hand side.
- Click on the “Check for updates” button.
- Windows will now check for any available updates for your system.
- Download and Install Updates:
- If there are any updates available, Windows will display them on the screen.
- Click on the “Download” button to start downloading the updates.
- Once the updates are downloaded, click on the “Install now” button to begin the installation process.
- Restart Your Computer:
- After the updates have been installed, Windows may prompt you to restart your computer to complete the update process.
- Click on the “Restart now” button if prompted, or you can choose to restart your computer later.
- Repeat if Necessary:
- Sometimes, installing updates may require multiple restarts or additional checks for updates.
- If prompted, repeat the process of checking for updates and installing them until Windows reports that your system is up-to-date.
- Verify Update Status:
- Once all updates have been installed, verify that Windows reports that your system is up-to-date.
- You can do this by going back to the Windows Update tab in the Update & Security settings and ensuring that Windows indicates that no updates are available.
By ensuring that your Windows 10 operating system is up-to-date, you can ensure that your computer has the latest security patches, bug fixes, and driver updates that may be necessary for the proper functioning of your HP printer and other devices. Once Windows is updated, you can proceed with installing your HP printer on Windows 10.
Add Printer Wizard
The Add Printer Wizard in Windows 10 allows you to easily install and set up a printer on your computer. Here’s how you can use the Add Printer Wizard to install your HP printer:
- Open Settings:
- Click on the “Start” menu icon in the bottom-left corner of your screen.
- Select the gear icon to open “Settings.”
- Navigate to Devices:
- In the Settings window, click on “Devices.”
- Select Printers & scanners:
- In the Devices window, select the “Printers & scanners” tab on the left-hand side.
- Click Add a printer or scanner:
- Under the Printers & scanners section, click on the “Add a printer or scanner” button.
- Wait for Detection:
- Windows will automatically search for available printers and scanners connected to your computer or network. This may take a few moments.
- Select Your HP Printer:
- If your HP printer is detected, it will appear in the list of available devices.
- Click on the name of your HP printer to select it.
- Install Printer Driver:
- After selecting your HP printer, Windows will attempt to install the necessary drivers automatically.
- If the drivers are successfully installed, Windows will display a confirmation message.
- Test Printer:
- Once the installation is complete, you can test the printer by printing a test page.
- Select your HP printer from the list of installed printers in the Printers & scanners settings.
- Click on “Manage” and then select “Print a test page” to print a test page and verify that the printer is working correctly.
- Manual Installation (if necessary):
- If your HP printer is not detected automatically, you may need to install it manually.
- Click on the “The printer that I want isn’t listed” link below the list of detected devices.
- Follow the on-screen instructions to manually add your HP printer by entering its IP address, hostname, or network location.
- Complete Installation:
- Follow any additional on-screen prompts to complete the installation process.
- Once the installation is complete, your HP printer should be successfully set up and ready to use on your Windows 10 computer.
By following these steps, you can use the Add Printer Wizard in Windows 10 to easily install and set up your HP printer on your computer. If you encounter any issues during the installation process, refer to the troubleshooting steps provided by Windows or consult the user manual for your HP printer.
Installing Printer Driver
To install the printer driver for your HP printer on Windows 10, you can use the built-in driver installation wizard or download the driver from the HP website. Here’s how to install the printer driver:
- Automatic Driver Installation (via Windows Update):
- Connect your HP printer to your Windows 10 computer and ensure it is powered on.
- Open the “Settings” app by clicking on the Start menu and selecting the gear icon (or by pressing Win + I).
- Go to “Devices” and select “Printers & scanners” from the left-hand menu.
- Click on the “Add a printer or scanner” button. Windows will automatically search for available printers.
- If your HP printer is detected, Windows will attempt to install the necessary drivers automatically. Follow the on-screen instructions to complete the installation.
- Manual Driver Installation (via HP Website):
- Go to the HP Support website (https://support.hp.com/).
- Enter the model number of your HP printer and click on “Search” to find the support page for your printer model.
- On the support page, navigate to the “Drivers” or “Downloads” section.
- Select your operating system (Windows 10) and download the latest printer driver package.
- Once the driver package is downloaded, locate the downloaded file and double-click to run it.
- Follow the on-screen instructions in the installation wizard to install the printer driver.
- Connect your HP printer to your computer when prompted, and Windows will automatically detect the printer and complete the installation process.
- Windows Update (Optional):
- If the driver for your HP printer is not available through automatic detection or manual installation, you can try checking for driver updates through Windows Update.
- Open the “Settings” app, go to “Update & Security,” and select “Windows Update.”
- Click on “Check for updates” to search for available driver updates.
- If a driver update for your HP printer is found, Windows will download and install it automatically.
By following these steps, you can install the printer driver for your HP printer on Windows 10 either through automatic detection, manual installation from the HP website, or by checking for updates via Windows Update. Once the driver is installed, your HP printer should be ready to use with your Windows 10 computer.
Completing Installation
After installing the printer driver for your HP printer on Windows 10, you may need to complete the installation process by performing a few additional steps. Here’s what you can do to ensure that the installation is complete:
- Test Printing:
- Once the printer driver is installed, you can test if your HP printer is working correctly by printing a test page.
- Open the “Settings” app, go to “Devices,” and select “Printers & scanners” from the left-hand menu.
- Select your HP printer from the list of installed printers, then click on “Manage.”
- Click on “Print a test page” to print a test page and verify that the printer is functioning properly.
- If the test page prints successfully, it indicates that the installation was successful.
- Set as Default Printer (Optional):
- If you want your HP printer to be the default printer for your Windows 10 computer, you can set it as the default printer.
- In the “Printers & scanners” settings, select your HP printer from the list of installed printers.
- Click on “Manage” and then select “Set as default” to make your HP printer the default printer.
- This ensures that your HP printer is automatically selected when you print from any application on your computer.
- Configure Printer Settings (Optional):
- You can customize various printer settings such as paper size, print quality, and color preferences according to your preferences or requirements.
- Open the “Printers & scanners” settings, select your HP printer, and click on “Manage.”
- From the printer management options, you can access printer properties to configure settings.
- Software Installation (Optional):
- Depending on your HP printer model and the installation options, you may have additional software or utilities that you can install for enhanced functionality.
- Check the HP website or the software installation wizard for any additional software or utilities that you can install.
- Check for Updates (Optional):
- Periodically check for driver updates or firmware updates for your HP printer to ensure that you have the latest features and fixes.
- You can do this by visiting the HP Support website or using the HP printer software installed on your computer.
Once you have completed these steps, your HP printer should be fully installed and configured on your Windows 10 computer. You can now start using your HP printer to print documents, photos, and other materials as needed. If you encounter any issues during the installation process, refer to the troubleshooting steps provided by Windows or consult the user manual for your HP printer.
Setting Default Printer (Optional)
Setting your HP printer as the default printer on Windows 10 ensures that it is automatically selected whenever you print from any application. Here’s how you can set your HP printer as the default printer:
- Open Settings:
- Click on the “Start” menu icon in the bottom-left corner of your screen.
- Select the gear icon to open “Settings.”
- Go to Devices:
- In the Settings window, click on “Devices.”
- Select Printers & scanners:
- In the Devices window, select the “Printers & scanners” tab on the left-hand side.
- Choose Default Printer:
- Scroll down to the “Printers & scanners” section and locate your HP printer in the list of installed printers.
- Click on your HP printer to select it.
- Set as Default:
- Once your HP printer is selected, click on the “Manage” button that appears below the list of printers.
- In the printer management options, click on “Set as default.”
- Confirmation:
- Windows will confirm that your HP printer is now set as the default printer. You should see a checkmark next to your HP printer indicating that it is the default.
- Close Settings:
- After setting your HP printer as the default printer, you can close the Settings window.
Now, whenever you print from any application on your Windows 10 computer, your HP printer will be automatically selected as the default printer. This streamlines the printing process and ensures that your documents are sent to the correct printer without needing to manually select it each time. If you ever want to change the default printer in the future, you can follow these steps again to select a different printer as the default.
Additional Configuration (Optional)
After installing your HP printer on Windows 10, you may want to perform additional configuration to customize settings according to your preferences or specific requirements. Here are some optional configurations you can consider:
- Printer Properties:
- Open the “Printers & scanners” settings in Windows 10.
- Select your HP printer from the list of installed printers and click on “Manage.”
- In the printer management options, click on “Printer properties” to access additional configuration options.
- Here, you can adjust settings such as paper size, print quality, color management, and advanced printer settings.
- Printer Preferences:
- Within the printer properties window, navigate to the “Preferences” or “Printing Preferences” tab.
- Customize printer preferences such as paper type, duplex printing, ink settings, and other printing options.
- You can save your preferred settings as presets for easy access in the future.
- Driver Settings:
- Some HP printers come with additional software or utilities that allow you to configure advanced settings directly from your computer.
- Check if your printer has any specific software or utilities installed and explore the available settings options.
- Wireless Printing (if applicable):
- If your HP printer supports wireless printing, you can configure wireless connectivity settings to print wirelessly from your Windows 10 computer.
- Open the printer’s control panel or use the HP printer software to set up a wireless connection.
- Follow the on-screen instructions to connect your printer to your wireless network.
- Print Queue Management:
- Access the print queue to view, manage, or cancel print jobs that are in the queue.
- Open the “Printers & scanners” settings, select your HP printer, and click on “Open queue” to access the print queue.
- From the print queue window, you can view the status of print jobs, pause or resume printing, and cancel print jobs if necessary.
- Software Updates:
- Periodically check for software updates or firmware updates for your HP printer.
- Visit the HP Support website or use the HP printer software installed on your computer to check for updates.
- Install any available updates to ensure that your printer has the latest features, performance enhancements, and bug fixes.
By performing these additional configurations, you can customize your HP printer settings to suit your preferences and optimize printing performance on your Windows 10 computer. If you encounter any issues or have specific requirements, refer to the user manual for your HP printer or contact HP support for assistance.
Troubleshooting
If you encounter any issues during the installation or use of your HP printer on Windows 10, here are some troubleshooting steps you can try:
- Check Connections:
- Ensure that your HP printer is properly connected to your computer via USB cable or connected to the same wireless network.
- Verify that the printer is powered on and in a ready state.
- Restart Devices:
- Restart your HP printer and your Windows 10 computer.
- Sometimes, a simple restart can resolve connectivity or communication issues.
- Update Printer Drivers:
- Make sure you have installed the latest printer drivers for your HP printer.
- Visit the HP Support website to download and install the latest drivers for your printer model.
- Check for Windows Updates:
- Ensure that your Windows 10 operating system is up-to-date by checking for Windows updates.
- Open the Settings app, go to Update & Security, and click on Check for updates.
- Run Printer Troubleshooter:
- Windows 10 has a built-in printer troubleshooter that can help diagnose and resolve common printer issues.
- Open the Settings app, go to Update & Security, and click on Troubleshoot.
- Select Printer and click on Run the troubleshooter.
- Verify Printer Settings:
- Check the printer settings on your computer to ensure they are configured correctly.
- Open the Devices and Printers settings, right-click on your HP printer, and select Printer properties.
- Verify settings such as default printer, paper size, print quality, and other preferences.
- Reinstall Printer:
- If troubleshooting steps fail to resolve the issue, you may need to reinstall the HP printer.
- Go to Devices and Printers settings, right-click on your HP printer, and select Remove device.
- Disconnect the printer from your computer and reinstall it using the Add Printer Wizard.
- Contact HP Support:
- If you are unable to resolve the issue on your own, contact HP support for assistance.
- Visit the HP Support website or call HP customer support for troubleshooting help or to schedule a repair if needed.
By following these troubleshooting steps, you should be able to diagnose and resolve common issues with your HP printer on Windows 10. If the problem persists, consider seeking help from HP support or a professional technician for further assistance.
FAQS
How do I identify my HP printer model?
You can typically find your HP printer model on the printer itself, in the user manual, or on the original packaging. If the printer is already installed on your computer, you can also check the “Devices and Printers” section in the Windows Control Panel.
Can I install an HP printer on Windows 10 wirelessly?
Yes, most modern HP printers support wireless connectivity. During the setup process, you can connect your HP printer to your Wi-Fi network, allowing you to print from your Windows 10 computer without the need for a USB cable.
Do I need to install HP printer drivers on Windows 10?
Yes, it’s essential to install HP printer drivers on Windows 10 to ensure the printer functions correctly. Drivers help your computer communicate with the printer and enable you to access various printing features.
Where can I find HP printer drivers for Windows 10?
You can find the latest HP printer drivers for Windows 10 on the official HP website (www.hp.com). Enter your printer model and select the Windows 10 operating system to access the appropriate driver downloads.
What if the HP printer driver installation fails?
If the driver installation fails, ensure you’re using the correct driver package for your printer model and Windows 10 version. Uninstall any partially installed drivers, disconnect your printer, and restart the installation process. You may also need to update Windows 10 to the latest version before trying again.
How can I connect my HP printer to a wireless network?
To connect your HP printer to a wireless network, access the printer’s control panel, navigate to the “Wireless” or “Network” settings, and select your Wi-Fi network from the available options. Enter the network’s password, and your printer should be connected wirelessly.
What should I do if my HP printer is not found during installation?
If your printer isn’t detected during installation, check the USB connection (if applicable) or the wireless network connection. Ensure the printer is powered on and correctly connected. Restart your computer to refresh the device list and try the installation process again.
Can I install my HP printer on multiple Windows 10 computers?
Yes, you can install your HP printer on multiple Windows 10 computers. Simply repeat the installation process on each computer. When connecting wirelessly, ensure that each computer is on the same network.
What do I do if my HP printer is printing slowly?
If your HP printer is printing slowly, ensure your printer settings match your document requirements. If using a wireless connection, check for a strong Wi-Fi signal. Upgrading your printer’s memory or using a higher-quality USB cable may also improve print speed.
How can I access advanced features on my HP printer, such as double-sided printing or scanning to a specific folder?
To access advanced features on your HP printer, consult the user manual or online resources for your specific printer model. Some features may require additional software installation. The HP printer software may include options for advanced printing and scanning.
Conclusion
Installing an HP printer on Windows 10 is a relatively simple process that can greatly enhance your productivity. From unboxing and connecting your printer to your network to installing the necessary drivers and performing a test print, following these steps will ensure a successful installation.
If you encounter any issues during the setup, don’t hesitate to consult the HP support website, reach out to their customer support, or refer to your printer’s user manual for guidance. With your HP printer properly installed, you can enjoy hassle-free printing on your Windows 10 computer.

