Installing a Printer on Windows: Common Problems and Solutions
Introduction
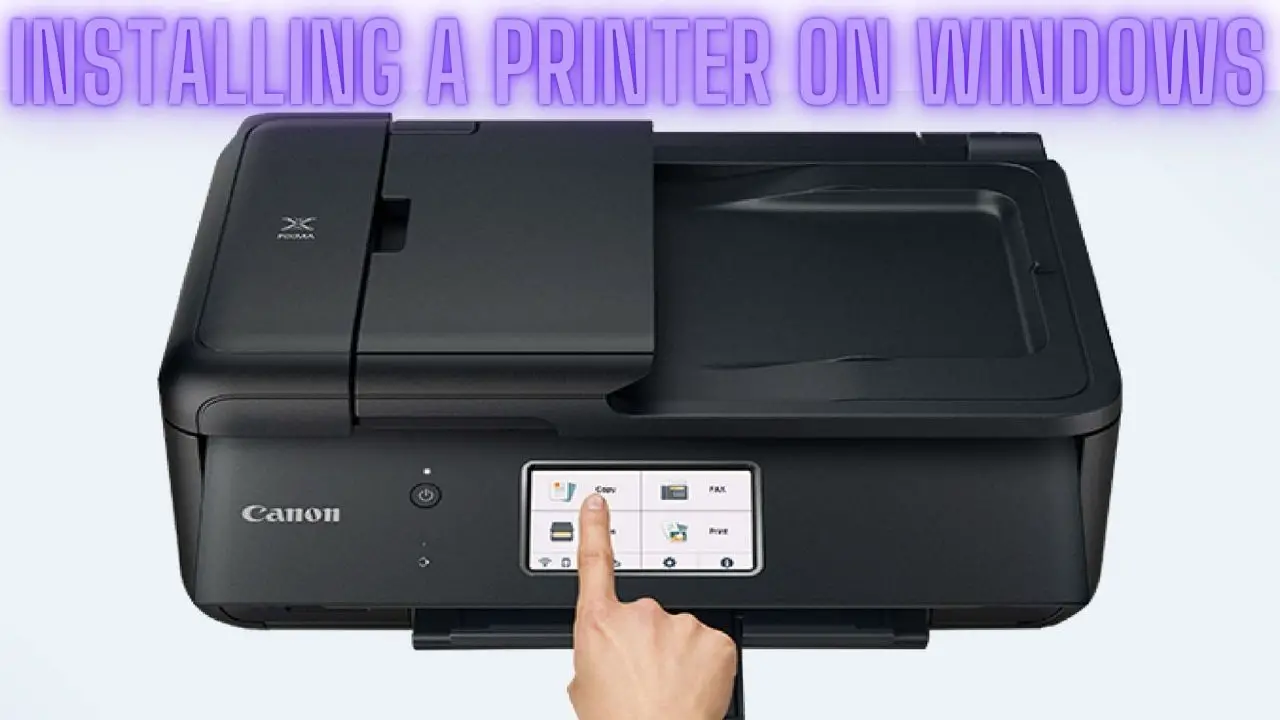
Installing a printer on a Windows computer is a fundamental task for users who need to print documents, photos, or other materials. While the process is usually straightforward, it can sometimes be accompanied by common problems that hinder successful installation. This guide aims to provide users with a comprehensive overview of installing a printer on Windows systems, as well as troubleshooting solutions for common issues that may arise during the installation process.
In this guide, we will cover the necessary steps to prepare for printer installation, including checking compatibility and gathering materials. We’ll then explore methods for installing printer drivers, both automatically and manually, to ensure proper communication between the printer and the computer. Additionally, we’ll discuss different methods for connecting the printer to the computer, whether through a wired or wireless connection.
Furthermore, this guide will address common problems that users may encounter during printer installation, such as issues with printer detection, driver installation failures, printer offline status, print spooler errors, and print quality problems. For each problem, we’ll provide troubleshooting steps and solutions to help users resolve the issue and successfully install their printer.
By following the guidance provided in this guide, users can overcome common challenges and successfully install their printers on Windows-based systems. Whether you’re setting up a new printer or troubleshooting an existing installation, this guide will equip you with the knowledge and tools needed to ensure a smooth and hassle-free printing experience. Let’s begin with the preparation for printer installation.
Preparing for Printer Installation
Before installing a printer on your Windows computer, it’s essential to make necessary preparations to ensure a smooth and successful installation process. Here are some steps to take when preparing for printer installation:
- Checking Printer Compatibility:
- Ensure that the printer you intend to install is compatible with your Windows operating system version. Check the printer manufacturer’s website or documentation for compatibility information and driver availability for your specific Windows version. Verify compatibility with both the printer model and your computer’s operating system architecture (32-bit or 64-bit).
- Gathering Necessary Materials:
- Gather all the materials and components required for printer installation. This includes the printer itself, power cable, USB or network cable (if applicable), installation CD or driver download link from the manufacturer’s website, and any additional accessories or documentation provided with the printer. Having these materials on hand will streamline the installation process and ensure you have everything you need.
- Preparing Printer Location:
- Choose an appropriate location for the printer that provides easy access and sufficient space for operation. Ensure that the printer is placed on a stable surface and positioned near a power outlet and, if applicable, a network connection. Consider factors such as cable length and proximity to the computer when determining the printer’s placement.
- Checking Printer Packaging:
- Inspect the printer packaging for any damage or missing components before proceeding with installation. Verify that all accessories, such as ink cartridges, paper trays, and user manuals, are included and in good condition. Address any issues or concerns with the printer manufacturer or retailer before installation.
- Downloading Latest Drivers:
- Visit the printer manufacturer’s website to download the latest drivers for your printer model and Windows operating system version. Downloading the latest drivers ensures compatibility and may include updates or enhancements to improve printer performance and functionality. Save the driver installation file to a location where you can easily access it during the installation process.
- Reviewing Installation Instructions:
- Review the installation instructions provided by the printer manufacturer or included with the printer documentation. Familiarize yourself with the steps involved in setting up the printer, installing drivers, and connecting the printer to your computer. Follow the manufacturer’s guidelines and recommendations to ensure a successful installation.
By taking these preparatory steps, you can ensure that you’re ready to proceed with the printer installation process smoothly. Checking compatibility, gathering necessary materials, preparing the printer location, downloading the latest drivers, and reviewing installation instructions will help streamline the installation process and minimize potential issues or challenges. Once you’ve completed these preparations, you’re ready to proceed with installing the printer drivers and connecting the printer to your Windows computer.
Installing Printer Drivers
Printer drivers are essential software components that allow your Windows computer to communicate with and control the functions of your printer. Before you can use your printer effectively, you’ll need to install the appropriate drivers. Here’s how to install printer drivers on your Windows computer:
- Automatic Driver Installation:
- Windows operating systems often include a built-in feature that automatically detects and installs compatible printer drivers when you connect a new printer to your computer. Follow these steps to install drivers automatically:
- Connect your printer to your computer using a USB cable or ensure it’s connected to the same network.
- Turn on the printer and wait for Windows to detect the new hardware.
- Windows will attempt to search for and install the appropriate drivers automatically. Follow any on-screen prompts to complete the installation process.
- Once the installation is complete, your printer should be ready to use.
- Windows operating systems often include a built-in feature that automatically detects and installs compatible printer drivers when you connect a new printer to your computer. Follow these steps to install drivers automatically:
- Manual Driver Installation:
- If Windows doesn’t automatically detect and install the printer drivers, or if you prefer to install them manually, you can download and install the drivers from the printer manufacturer’s website. Here’s how:
- Visit the website of the printer manufacturer and navigate to the support or drivers section.
- Enter your printer model number or select it from a list of available models.
- Choose your Windows operating system version (e.g., Windows 10, Windows 8.1, Windows 7) and system architecture (32-bit or 64-bit).
- Download the latest driver software package for your printer model and Windows version.
- Once the download is complete, locate the downloaded driver installation file and double-click it to start the installation wizard.
- Follow the on-screen instructions to complete the driver installation process.
- After the installation is complete, restart your computer to apply any changes.
- If Windows doesn’t automatically detect and install the printer drivers, or if you prefer to install them manually, you can download and install the drivers from the printer manufacturer’s website. Here’s how:
- Windows Update:
- Another way to install printer drivers is through Windows Update. Sometimes, newer printer drivers may become available through Windows Update after you’ve connected your printer to your computer. Here’s how to check for updates:
- Go to “Settings” > “Update & Security” > “Windows Update.”
- Click on “Check for updates” to search for available updates.
- If any printer driver updates are found, download and install them.
- After the updates are installed, restart your computer if prompted.
- Another way to install printer drivers is through Windows Update. Sometimes, newer printer drivers may become available through Windows Update after you’ve connected your printer to your computer. Here’s how to check for updates:
- Printer Setup Wizard:
- Some printer manufacturers provide a setup wizard or installation software that guides you through the process of installing drivers and setting up your printer. If available, you can use this wizard to simplify the installation process and configure printer settings.
By following these steps, you can install the necessary printer drivers on your Windows computer, ensuring that your printer is recognized and ready for use. If you encounter any issues during the installation process, refer to the troubleshooting steps provided by the printer manufacturer or consult online support resources for assistance.
Connecting the Printer
Once you have installed the printer drivers on your Windows computer, the next step is to connect the printer physically or wirelessly. Here are the steps to connect the printer to your computer:
- Wired Connection:
- If your printer supports a wired connection (such as USB), follow these steps to connect it to your computer:
- Turn off your printer and computer.
- Connect one end of the USB cable to the printer’s USB port and the other end to an available USB port on your computer.
- Turn on your printer and wait for it to initialize.
- Turn on your computer.
- Windows should automatically detect the connected printer and configure it for use.
- If prompted, follow any on-screen instructions to complete the setup process.
- If your printer supports a wired connection (such as USB), follow these steps to connect it to your computer:
- Wireless Connection:
- If your printer supports wireless connectivity, follow these steps to connect it to your computer wirelessly:
- Turn on your printer and make sure it is connected to your Wi-Fi network. Refer to your printer’s manual for instructions on how to connect it to Wi-Fi.
- On your computer, open the “Settings” app and navigate to “Devices” > “Printers & scanners.”
- Click on “Add a printer or scanner.”
- Windows will search for available printers on the network. Select your printer from the list of available devices.
- Follow any on-screen instructions to complete the setup process.
- If prompted, download and install any additional drivers or software required for wireless printing.
- If your printer supports wireless connectivity, follow these steps to connect it to your computer wirelessly:
- Network Connection:
- If your printer is connected to a network (wired or wireless) and shared on the network, you can connect to it from your Windows computer as follows:
- Open the “Settings” app on your computer and navigate to “Devices” > “Printers & scanners.”
- Click on “Add a printer or scanner.”
- Windows will search for available printers on the network. Select your printer from the list of available devices.
- Follow any on-screen instructions to complete the setup process.
- If prompted, download and install any additional drivers or software required for network printing.
- If your printer is connected to a network (wired or wireless) and shared on the network, you can connect to it from your Windows computer as follows:
- Manual Configuration:
- If your printer requires manual configuration for network printing, consult your printer’s manual for instructions on how to set it up manually. You may need to configure network settings such as IP address, subnet mask, and gateway address on the printer and your computer to establish a connection.
Once you have successfully connected your printer to your Windows computer, you should be able to print documents, photos, or other materials from your computer to the printer. If you encounter any issues during the connection process, refer to the troubleshooting steps provided by the printer manufacturer or consult online support resources for assistance.
Common Problems and Solutions
During the process of installing and connecting a printer to a Windows computer, users may encounter various common problems. Here are some of the most frequent issues and their solutions:
- Printer Not Detected:
- Solution:
- Ensure the printer is powered on and properly connected to the computer via USB cable, network, or wireless connection.
- Check the printer’s status lights for any error indicators.
- Restart both the printer and the computer.
- If using a USB connection, try a different USB port on the computer.
- If using a wireless connection, ensure the printer is connected to the correct Wi-Fi network.
- Solution:
- Driver Installation Failure:
- Solution:
- Uninstall any previously installed printer drivers.
- Reboot the computer and try reinstalling the drivers.
- Download the latest drivers from the printer manufacturer’s website and ensure they are compatible with your Windows version.
- Run the driver installation program as an administrator.
- Disable antivirus or firewall software temporarily during the installation process.
- Solution:
- Printer Offline or Not Responding:
- Solution:
- Check the printer’s status on the computer. If it shows as offline, right-click on the printer icon and select “Use Printer Online.”
- Restart the print spooler service:
- Open the “Services” app by typing “services.msc” in the Windows search bar and pressing Enter.
- Locate the “Print Spooler” service, right-click on it, and select “Restart.”
- Power cycle the printer by turning it off and then back on.
- Check the printer’s paper and ink levels to ensure it’s not out of supplies.
- Solution:
- Print Spooler Errors:
- Solution:
- Clear the print queue:
- Open the “Services” app by typing “services.msc” in the Windows search bar and pressing Enter.
- Locate the “Print Spooler” service, right-click on it, and select “Stop.”
- Open File Explorer and navigate to C:\Windows\System32\spool\PRINTERS.
- Delete all files in the PRINTERS folder.
- Go back to the Services app, right-click on the “Print Spooler” service, and select “Start.”
- Update or reinstall printer drivers as outdated or corrupt drivers can cause print spooler errors.
- Clear the print queue:
- Solution:
- Poor Print Quality:
- Solution:
- Check the ink or toner levels and replace cartridges if they are low.
- Run the printer’s maintenance utilities, such as print head cleaning or alignment.
- Adjust print quality settings in the printer properties or settings menu.
- Ensure the paper type and size settings match the paper loaded in the printer.
- Solution:
These solutions address some of the common problems users may encounter when installing and connecting a printer to a Windows computer. If you continue to experience issues, consult the printer manufacturer’s support resources or seek assistance from online forums or technical support.
Troubleshooting Steps
When encountering problems with your printer on a Windows computer, troubleshooting steps can help identify and resolve the underlying issues. Here are some common troubleshooting steps to follow:
- Restart Printer and Computer:
- Turn off the printer and computer, then turn them back on. Restarting both devices can reset any temporary glitches or communication errors.
- Check Printer Connections:
- Ensure the printer is properly connected to the computer via USB cable, network connection, or wireless connection. Verify cables are securely plugged in and wireless connections are stable.
- Verify Printer Status:
- Check the printer’s status lights or display panel for any error messages. Resolve any hardware issues, such as paper jams or low ink/toner levels, indicated by the printer.
- Check Printer Queue:
- Open the print queue on your computer to check for any pending or stuck print jobs. Cancel any queued jobs that may be causing issues.
- Restart Print Spooler Service:
- Open the “Services” app by typing “services.msc” in the Windows search bar and pressing Enter.
- Locate the “Print Spooler” service, right-click on it, and select “Restart.” This action can clear print spooler errors and help resume printing functionality.
- Update or Reinstall Printer Drivers:
- Ensure you have the latest printer drivers installed for your printer model and Windows version. Download and install updated drivers from the printer manufacturer’s website. Alternatively, uninstall and reinstall the printer drivers to address any driver-related issues.
- Run Printer Troubleshooter:
- Use the built-in printer troubleshooter tool in Windows to automatically diagnose and fix common printer problems. Open the “Settings” app, go to “Update & Security” > “Troubleshoot,” and select the “Printer” troubleshooter.
- Check Printer Compatibility:
- Ensure your printer is compatible with your Windows operating system version. Verify compatibility and driver availability on the printer manufacturer’s website.
- Update Windows:
- Ensure your Windows operating system is up-to-date with the latest updates and patches. Updates may include fixes for printer-related issues.
- Disable Antivirus or Firewall Temporarily:
- Antivirus or firewall software may interfere with printer communication. Temporarily disable antivirus or firewall software and attempt to print again to see if the issue persists.
- Check Network Configuration:
- If using a network printer, ensure the printer is connected to the correct network and has a valid IP address. Verify network settings and troubleshoot network connectivity issues if necessary.
- Consult Printer Documentation or Support:
- Refer to the printer’s user manual or documentation for specific troubleshooting steps recommended by the manufacturer. If the issue persists, contact the printer manufacturer’s support for further assistance.
By following these troubleshooting steps, you can effectively diagnose and resolve common printer issues on your Windows computer. If the problem persists after attempting these steps, consider seeking assistance from technical support resources or online forums dedicated to printer troubleshooting.
Additional Considerations
In addition to the basic installation and troubleshooting steps, there are several additional considerations to keep in mind when dealing with printer issues on Windows computers. Here are some important points to consider:
- Printer Firmware Updates:
- Check if there are any firmware updates available for your printer. Firmware updates can improve printer performance, fix bugs, and add new features. Visit the printer manufacturer’s website or use the printer’s control panel menu to check for and install firmware updates.
- Configuring Printer Settings:
- Explore and configure printer settings to suit your preferences and requirements. Adjust settings such as paper size, print quality, color options, and duplex printing (if supported) to optimize printing output and conserve resources.
- Print Management Software:
- Consider using print management software to monitor and manage printing tasks more effectively. Print management tools offer features such as print job tracking, cost analysis, quota management, and secure printing options. Evaluate available options and choose software that best fits your needs.
- Printer Maintenance and Cleaning:
- Regularly perform maintenance tasks and cleaning routines to keep your printer in optimal condition. Clean the printer’s exterior and interior components, such as paper trays, rollers, and print heads, according to the manufacturer’s guidelines. Replace ink or toner cartridges as needed to maintain print quality.
- Paper and Supplies Quality:
- Use high-quality paper and supplies compatible with your printer to ensure optimal print results. Low-quality paper or incompatible supplies can lead to print quality issues, paper jams, and premature wear on printer components. Choose paper and supplies recommended by the printer manufacturer for best results.
- Energy Efficiency:
- Configure printer power management settings to conserve energy and reduce operating costs. Enable sleep or standby modes when the printer is not in use for extended periods. Consider using ENERGY STAR certified printers that meet energy efficiency standards and consume less power during operation.
- Printer Security:
- Implement printer security measures to protect sensitive data and prevent unauthorized access. Configure printer security settings such as user authentication, access control, and encryption to safeguard confidential information. Regularly update printer firmware and software to patch security vulnerabilities.
- Printer Warranty and Support:
- Familiarize yourself with the printer’s warranty coverage and support options provided by the manufacturer. Register your printer to activate warranty benefits and access technical support resources. Keep documentation, purchase receipts, and warranty information in a safe place for future reference.
By considering these additional factors, you can enhance the overall performance, reliability, and longevity of your printer while maximizing its functionality and efficiency. Stay proactive in managing your printer setup and maintenance to ensure smooth printing operations and minimize potential issues over time.
FAQS
How do I install a printer on Windows?
- To install a printer on Windows, follow these steps:
- Connect the printer to your computer via USB or over the network (if it’s a network printer).
- Turn on the printer and make sure it’s in a ready state.
- Go to “Settings” > “Devices” > “Printers & scanners” in Windows.
- Click “Add a printer or scanner” and let Windows search for the printer.
- If Windows doesn’t find the printer, click “The printer that I want isn’t listed” and follow the on-screen instructions to install it manually.
- Once Windows detects the printer, click on it and follow the prompts to complete the installation.
Why is my printer not detected by Windows during installation?
- There could be several reasons for this issue, including loose connections, outdated drivers, or compatibility problems. Check the physical connections, update drivers, and ensure the printer is compatible with your Windows version.
What should I do if Windows Update doesn’t find the printer driver?
- If Windows Update fails to locate a driver, you can try to manually install the driver by selecting “Add a local printer” or “Add a network, wireless, or Bluetooth printer” when adding the printer. Follow the on-screen instructions and choose to install the driver manually.
How can I check if my printer is compatible with my Windows version?
- Check the printer manufacturer’s website for compatibility information. Most manufacturers provide a list of supported Windows versions for each printer model. Make sure to download the correct driver for your Windows version (32-bit or 64-bit).
What do I do if my printer appears as “offline” in Windows?
- If your printer is listed as “offline,” right-click on it in “Devices and Printers,” and select “See what’s printing.” Then, click “Printer” in the menu bar and uncheck “Use Printer Offline.” This should bring the printer online.
Can I install a wireless printer on Windows?
- Yes, you can install a wireless printer on Windows by connecting it to your Wi-Fi network. During the installation process, choose the networked printer option, and Windows should detect it on your network.
How can I share a printer on a Windows network?
- To share a printer on a Windows network, follow these steps:
- Go to “Settings” > “Devices” > “Printers & scanners.”
- Click on the printer you want to share.
- Click “Manage” and then select “Printer properties.”
- Go to the “Sharing” tab and check “Share this printer.”
- Configure the sharing options and permissions.
- Click “Apply” and “OK” to save the changes.
What should I do if my printer installation process freezes or crashes my computer?
- If the printer installation process causes freezing or crashing, ensure your computer meets the printer’s system requirements. Disable unnecessary background applications during installation, and consider trying the installation in Safe Mode.
How can I update my printer driver on Windows?
- To update your printer driver on Windows, you can:
- Visit the manufacturer’s website and download the latest driver for your printer model.
- Use the “Update driver” option in the “Printers & scanners” settings in Windows, which may automatically search for and install updated drivers if available.
Conclusion
Installing and troubleshooting printers on Windows computers can sometimes be challenging, but with the right knowledge and approach, most issues can be resolved effectively. In this guide, we’ve covered the essential steps for installing a printer, addressing common problems, and troubleshooting issues that may arise during the process.
By following the steps outlined in this guide, users can:
- Prepare for printer installation by checking compatibility, gathering necessary materials, and reviewing installation instructions.
- Install printer drivers either automatically through Windows, manually from the manufacturer’s website, or via Windows Update.
- Connect the printer to the computer using wired (USB) or wireless (Wi-Fi) connections.
- Address common printer problems such as detection issues, driver installation failures, offline status, print spooler errors, and poor print quality.
- Troubleshoot printer issues by restarting devices, checking connections, verifying printer status, updating drivers, and running printer troubleshooters.
- Consider additional factors such as firmware updates, printer settings configuration, maintenance, supplies quality, energy efficiency, security, warranty, and support.
By taking a systematic approach and utilizing the troubleshooting steps provided, users can overcome challenges and ensure their printers function smoothly on Windows computers. Regular maintenance and proactive management of printer settings can further optimize performance and reliability.
In conclusion, installing and troubleshooting printers on Windows involves a combination of preparation, patience, and problem-solving skills. With the guidance provided in this guide, users can tackle printer-related issues confidently and enjoy hassle-free printing experiences on their Windows computers.

