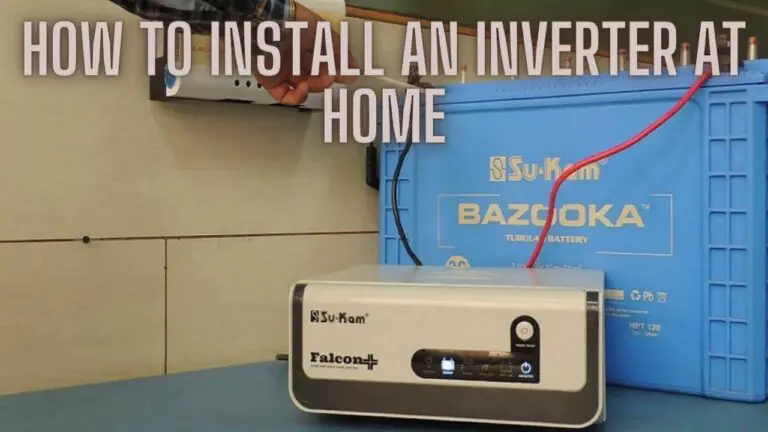
Common Inverter Problems and Solutions: Troubleshooting Guide
Introduction
Inverters are essential devices that convert DC (Direct Current) electricity into AC (Alternating Current) electricity, allowing for the operation of various electrical appliances and devices in homes, vehicles, and off-grid settings. While inverters are generally reliable, they may encounter occasional issues that can affect their performance and functionality. In this guide, we will explore some common problems that users may encounter with inverters and provide practical solutions to troubleshoot and resolve these issues effectively. By understanding these common problems and their solutions, users can ensure the optimal operation of their inverters and avoid disruptions to their power supply.
Overloading
Problem:
One common issue with inverters is overloading. This occurs when the total power demand from connected appliances exceeds the maximum power capacity of the inverter.
Symptoms:
- Inverter shuts off abruptly.
- Inverter emits warning beeps or alarms.
- Appliances connected to the inverter may not function properly or may stop working altogether.
Causes:
- Connecting too many appliances or devices with high power requirements to the inverter.
- Sudden spikes in power demand from certain appliances, such as refrigerators or air conditioners, during startup.
- Exceeding the maximum continuous power rating of the inverter.
Solutions:
- Reduce Load: Disconnect some appliances or devices from the inverter to reduce the overall power demand. Prioritize essential appliances and avoid running multiple high-power devices simultaneously.
- Upgrade Inverter: If overloading is a recurring issue, consider upgrading to a higher-capacity inverter that can handle the power requirements of all connected appliances.
- Use Power Strips: Use power strips or surge protectors with built-in circuit breakers to limit the power draw from individual outlets. This can help prevent overloading by automatically shutting off power to specific outlets if the load exceeds a certain threshold.
- Distribute Load Evenly: Spread out the power load evenly across multiple outlets or circuits to avoid overloading any single outlet or circuit.
- Check Appliance Ratings: Ensure that the power ratings of all connected appliances and devices are within the capacity of the inverter. Avoid connecting appliances with higher power requirements than the inverter can handle.
Preventive Measures:
- Regularly check the power ratings of connected appliances and ensure they are compatible with the inverter’s capacity.
- Educate users about the limitations of the inverter and the importance of avoiding overloading.
- Implement load shedding or prioritization strategies during times of high power demand to prevent overloading.
By addressing overloading issues promptly and implementing preventive measures, users can ensure the safe and efficient operation of their inverters while avoiding potential damage and disruptions to their power supply.
Battery Drainage
Problem:
Battery drainage is a common issue with inverters, especially in off-grid or backup power systems. It occurs when the batteries connected to the inverter discharge too quickly, resulting in reduced battery life and potential power interruptions.
Symptoms:
- Inverter shuts off unexpectedly or fails to provide power.
- Reduced runtime of connected appliances during power outages.
- Batteries require frequent recharging or replacement.
Causes:
- Excessive power consumption by connected appliances or devices.
- Inefficient charging or discharging of batteries.
- Overuse of the inverter without proper monitoring or maintenance.
- Aging or damaged batteries that cannot hold a charge effectively.
Solutions:
- Reduce Power Consumption: Identify and address sources of high power consumption, such as inefficient appliances or devices, unnecessary standby power, or excessive use of high-power appliances.
- Optimize Battery Charging: Ensure that the batteries are charged properly and efficiently. Use a suitable charging method (e.g., bulk, absorption, float) and charging parameters recommended by the battery manufacturer.
- Monitor Battery Health: Regularly monitor the state of charge (SoC) and health of the batteries using a battery monitor or management system. This allows for early detection of issues and proactive maintenance.
- Avoid Deep Discharges: Prevent deep discharges of the batteries, as these can reduce battery life and capacity over time. Set low-voltage cutoff limits on the inverter to prevent excessive discharge.
- Invest in High-Quality Batteries: Use high-quality batteries with adequate capacity and performance characteristics for the intended application. Consider factors such as battery chemistry, capacity, cycle life, and temperature tolerance.
- Implement Energy Management: Implement energy management strategies to prioritize essential loads, optimize usage patterns, and reduce unnecessary power consumption during peak demand periods.
- Perform Regular Maintenance: Perform regular maintenance tasks such as cleaning battery terminals, checking electrolyte levels (for flooded lead-acid batteries), and tightening connections to ensure optimal battery performance.
Preventive Measures:
- Educate users about proper battery maintenance and usage practices to minimize drainage and extend battery life.
- Implement battery health monitoring systems to track performance metrics and detect issues early.
- Invest in energy-efficient appliances and devices to reduce overall power consumption and strain on the batteries.
By addressing battery drainage issues and implementing preventive measures, users can optimize the performance and longevity of their battery-based inverters, ensuring reliable power supply during emergencies or off-grid operations.
Overheating
Problem:
Overheating is a common issue with inverters, especially during prolonged use or under high load conditions. It occurs when the internal components of the inverter generate excessive heat, potentially leading to performance issues, damage, or even failure.
Symptoms:
- Inverter shuts off automatically or enters a thermal shutdown mode.
- The casing or external surfaces of the inverter feel hot to the touch.
- Reduced efficiency or performance of the inverter over time.
Causes:
- High ambient temperatures, especially in poorly ventilated or confined spaces.
- Continuous operation at maximum or near-maximum load capacity.
- Accumulation of dust, dirt, or debris inside the inverter, obstructing airflow and heat dissipation.
- Faulty or worn-out internal components, such as cooling fans or heat sinks.
Solutions:
- Ensure Proper Ventilation: Place the inverter in a well-ventilated area with sufficient airflow to dissipate heat effectively. Avoid enclosing the inverter in tight spaces or covering it with objects that obstruct airflow.
- Reduce Load: Avoid operating the inverter at maximum load capacity for extended periods. Distribute the load evenly across multiple outlets or circuits to reduce heat generation.
- Monitor Ambient Temperature: Keep track of ambient temperatures in the vicinity of the inverter. Install temperature sensors or use external temperature monitoring devices to detect overheating conditions early.
- Clean and Maintain: Regularly clean the exterior and interior of the inverter to remove dust, dirt, and debris that can impede airflow and heat dissipation. Use compressed air or a soft brush to clean vents, cooling fans, and heat sinks.
- Install Cooling Fans: Consider installing additional cooling fans or heat sinks to improve heat dissipation and thermal management, especially in high-temperature environments or during heavy usage.
- Use Thermal Shutdown Protection: Ensure that the inverter is equipped with thermal shutdown protection mechanisms to automatically shut off or reduce output power when internal temperatures exceed safe limits.
- Allow Cooling Periods: If the inverter becomes excessively hot during operation, allow it to cool down before resuming use. Turn off non-essential appliances or devices to reduce the load and alleviate heat buildup.
Preventive Measures:
- Position the inverter in a well-ventilated location away from direct sunlight and heat sources.
- Regularly inspect and maintain the inverter, including cleaning vents and filters, checking fan operation, and monitoring internal temperatures.
- Avoid overloading the inverter and ensure that connected appliances are within the rated capacity of the device.
- Consider installing temperature monitoring and alarm systems to provide early warning of overheating conditions.
By implementing these solutions and preventive measures, users can mitigate the risk of overheating in their inverters and ensure reliable and safe operation over the long term.
Output Voltage Fluctuations
Problem:
Output voltage fluctuations refer to variations in the voltage level supplied by the inverter to connected appliances and devices. These fluctuations can occur due to various factors and may result in unstable or unreliable operation of electrical equipment.
Symptoms:
- Appliances experiencing flickering lights or intermittent power supply.
- Inconsistent performance or malfunctions of sensitive electronic devices.
- Overheating or damage to appliances due to voltage spikes or drops.
Causes:
- Inadequate battery capacity or charging voltage, leading to fluctuations in the input voltage supplied to the inverter.
- Overloading of the inverter, causing voltage drops when demand exceeds capacity.
- Poor quality or damaged internal components within the inverter affecting voltage regulation.
- External factors such as fluctuations in grid power supply or changes in load conditions.
Solutions:
- Check Battery Capacity and Charging: Ensure that the batteries connected to the inverter are adequately sized and charged to provide stable input voltage. Monitor battery health and charging parameters to prevent fluctuations in input voltage.
- Reduce Load: Avoid overloading the inverter by distributing the load evenly and disconnecting non-essential appliances or devices. This helps maintain stable output voltage during operation.
- Inspect and Maintain: Regularly inspect the inverter for signs of damage or wear and tear. Clean and tighten connections, replace damaged components, and perform firmware updates as needed to improve voltage regulation.
- Use Voltage Stabilizers or Regulators: Install voltage stabilizers or regulators between the inverter and sensitive appliances to smooth out fluctuations and ensure consistent voltage supply. These devices help protect sensitive equipment from damage due to voltage spikes or drops.
- Monitor Grid Power: If the inverter is grid-tied, monitor grid power quality and voltage levels to identify any issues that may affect the output voltage of the inverter. Consider installing power conditioning equipment if necessary to improve grid stability.
- Implement Power Management: Implement power management strategies to prioritize essential loads and prevent sudden changes in power demand that can lead to voltage fluctuations. Use timers or load shedding devices to control power consumption during peak periods.
Preventive Measures:
- Regularly inspect and maintain the inverter and battery system to ensure optimal performance and voltage regulation.
- Educate users about proper load management practices and the importance of avoiding overloading the inverter.
- Install voltage monitoring and protection devices to detect and mitigate voltage fluctuations before they impact connected appliances.
By addressing the underlying causes of voltage fluctuations and implementing preventive measures, users can ensure stable and reliable operation of their inverters and protect sensitive equipment from damage due to voltage instability.
Noise and Interference
Problem:
Noise and interference can be disruptive issues associated with inverters, especially in sensitive electronic environments. Inverter-generated noise and electromagnetic interference (EMI) can affect the performance of nearby electronic devices and communication systems.
Symptoms:
- Audible noise or buzzing emitted from the inverter during operation.
- Interference with audio/video equipment, radio reception, or communication devices.
- Malfunctions or errors in sensitive electronic equipment caused by electromagnetic interference.
Causes:
- Inverter internal components, such as transformers, cooling fans, or circuitry, generating audible noise during operation.
- Electromagnetic interference generated by the inverter’s switching circuits or high-frequency operation.
- Improper grounding or shielding of the inverter, allowing electromagnetic interference to propagate to nearby devices.
- External factors such as nearby electrical equipment or radio frequency (RF) interference sources contributing to noise and interference.
Solutions:
- Isolate Inverter: Place the inverter in a location away from sensitive electronic devices and communication equipment to minimize the impact of noise and interference.
- Use Shielded Cables: Use shielded cables and wiring for connections between the inverter and sensitive equipment to reduce the propagation of electromagnetic interference.
- Improve Grounding: Ensure proper grounding of the inverter and connected equipment to minimize ground loops and reduce noise interference. Use dedicated grounding rods or grounding straps for optimal grounding.
- Install Filters: Use line filters or EMI suppression filters between the inverter and sensitive loads to attenuate electromagnetic interference and reduce noise.
- Upgrade Components: Consider upgrading internal components of the inverter, such as cooling fans or transformers, to quieter or more efficient alternatives that produce less noise and interference.
- Implement RF Shielding: Install RF shielding or enclosures around the inverter to contain electromagnetic emissions and prevent interference with nearby devices and systems.
- Use Ferrite Beads: Attach ferrite beads or chokes to power cables and signal lines to suppress high-frequency noise and interference.
Preventive Measures:
- Select inverters with low-noise design features and EMI shielding for use in sensitive environments.
- Conduct site surveys and electromagnetic compatibility (EMC) testing to identify potential sources of noise and interference and implement mitigation measures.
- Educate users about the proper placement and installation of inverters to minimize noise and interference issues.
By implementing these solutions and preventive measures, users can minimize the impact of noise and interference from inverters on nearby electronic devices and communication systems, ensuring smooth operation and reliability in sensitive environments.
Faulty Wiring or Connections
Problem:
Faulty wiring or connections are common issues that can affect the performance and safety of inverters. Poorly installed or damaged wiring can result in electrical hazards, power interruptions, and equipment damage.
Symptoms:
- Intermittent power supply or frequent power outages.
- Overheating or burning smell near wiring or connection points.
- Sparking, arcing, or visible damage to wiring or connectors.
- Inconsistent performance or malfunctions of connected appliances or devices.
Causes:
- Loose, corroded, or damaged wiring connections between the inverter, batteries, and electrical loads.
- Improper sizing or gauge of wiring, leading to voltage drops, overheating, or excessive resistance.
- Incorrect installation of wiring or connectors, including improper termination, insufficient insulation, or inadequate strain relief.
- Physical damage to wiring due to bending, crushing, or exposure to environmental factors such as moisture or heat.
Solutions:
- Inspect Wiring: Conduct a visual inspection of all wiring and connections associated with the inverter, including battery cables, DC input terminals, AC output terminals, and grounding connections. Look for signs of damage, corrosion, or loose connections.
- Tighten Connections: Ensure all wiring connections are secure and properly tightened to their respective terminals. Use appropriate tools and torque specifications to prevent over-tightening or under-tightening.
- Replace Damaged Wiring: Replace any damaged or worn-out wiring with new, properly sized cables rated for the intended application. Use high-quality, stranded copper wire with adequate insulation for optimal conductivity and safety.
- Use Proper Connectors: Use high-quality connectors and terminals rated for the voltage and current requirements of the inverter system. Ensure proper crimping or soldering techniques are used to create secure and reliable connections.
- Install Strain Relief: Use strain relief devices or cable glands to secure wiring and prevent mechanical stress or tension on connections. This helps prevent damage to wiring caused by movement or vibration.
- Check Grounding: Verify that the inverter and associated equipment are properly grounded according to local electrical codes and manufacturer guidelines. Ensure grounding connections are secure and free from corrosion or damage.
- Perform Regular Maintenance: Schedule periodic inspections and maintenance checks to ensure the integrity of wiring and connections. Clean terminals, apply corrosion inhibitors, and tighten connections as needed to prevent future issues.
Preventive Measures:
- Follow manufacturer guidelines and local electrical codes when installing wiring and connections for inverters.
- Use high-quality materials and components rated for the intended voltage, current, and environmental conditions.
- Train personnel on proper installation techniques and safety practices to minimize the risk of faulty wiring or connections.
By addressing faulty wiring or connections promptly and implementing preventive measures, users can ensure the safety, reliability, and performance of their inverter systems while minimizing the risk of electrical hazards and equipment damage.
Component Failures
Problem:
Component failures are a common issue that can affect the performance and reliability of inverters. Failures in internal components such as transistors, capacitors, or circuit boards can lead to malfunctions, power interruptions, or complete inverter failure.
Symptoms:
- Inverter fails to power on or provide output.
- Unusual noises, smells, or visual signs of damage from the inverter.
- Erratic behavior or inconsistent performance of connected appliances or devices.
- Error codes or fault indicators displayed on the inverter’s control panel.
Causes:
- Age-related degradation of electronic components over time.
- Exposure to environmental factors such as heat, humidity, or dust.
- Voltage spikes or surges from the input power source.
- Overloading or excessive stress on internal components due to high load conditions.
- Manufacturing defects or quality control issues in component assembly.
Solutions:
- Diagnose Faulty Components: Use diagnostic tools or techniques such as multimeters, oscilloscopes, or thermal imaging cameras to identify failed components within the inverter. Check for visible signs of damage or abnormal behavior in suspect components.
- Replace Failed Components: Once faulty components are identified, replace them with new, compatible replacements. Use components from reputable manufacturers and ensure they meet the specifications and ratings of the original parts.
- Perform Repairs: If feasible, repair or re-solder damaged connections or components on the circuit board. Exercise caution when working with electronic components and follow proper safety procedures to avoid further damage.
- Update Firmware: Check for firmware updates or patches released by the inverter manufacturer to address known issues or vulnerabilities that may contribute to component failures. Follow instructions carefully when updating firmware to avoid potential data loss or corruption.
- Improve Cooling: Enhance cooling and thermal management within the inverter to reduce stress on internal components and prolong their lifespan. Install additional cooling fans, heat sinks, or ventilation systems as needed to dissipate heat effectively.
- Implement Surge Protection: Use surge protectors or transient voltage suppressors to protect the inverter from voltage spikes or surges originating from the input power source. These devices help safeguard sensitive electronic components from damage caused by electrical transients.
- Perform Regular Maintenance: Schedule periodic inspections and maintenance checks to detect and address potential issues before they escalate into component failures. Clean internal components, check for loose connections, and verify proper operation of cooling systems regularly.
Preventive Measures:
- Follow manufacturer recommendations for maintenance intervals and procedures to minimize the risk of component failures.
- Avoid overloading or operating the inverter beyond its rated capacity to reduce stress on internal components.
- Monitor input and output voltages, temperatures, and other operating parameters to detect abnormalities indicative of potential component failures.
- Invest in high-quality inverters from reputable manufacturers with a track record of reliability and durability.
By implementing these solutions and preventive measures, users can minimize the risk of component failures in their inverters and ensure reliable performance and longevity over time.
Inverter Not Turning On
Problem:
One common issue with inverters is when they fail to turn on or provide power output when expected. This can be frustrating and may indicate underlying issues with the inverter or its components.
Symptoms:
- Inverter does not respond when the power button is pressed or the input power source is connected.
- No power output or indication of operation from the inverter’s display panel or indicator lights.
- Complete lack of functionality, including failure to charge batteries or supply power to connected appliances.
Causes:
- Faulty or damaged power switch or control circuitry preventing the inverter from powering on.
- Low or depleted battery voltage below the inverter’s minimum operating threshold.
- Blown fuse or tripped circuit breaker interrupting power flow to the inverter.
- Internal component failures, such as blown capacitors, defective transistors, or damaged circuit boards.
- Incorrect or insufficient input power from the external power source, such as a battery bank or grid connection.
Solutions:
- Check Power Source: Verify that the inverter is receiving adequate input power from the connected battery bank or grid connection. Check battery voltage levels and ensure they are within the operating range specified by the inverter manufacturer.
- Inspect Power Switch: Check the power switch or control circuitry for signs of damage or malfunction. Ensure that the switch is in the “ON” position and that any safety interlocks or bypass switches are engaged properly.
- Reset Circuit Breaker or Fuse: If the inverter is equipped with a circuit breaker or fuse, check for tripped breakers or blown fuses that may be interrupting power flow. Reset or replace the breaker/fuse as needed.
- Test External Connections: Inspect all external connections, including battery terminals, DC input cables, and AC output connections, for signs of damage or corrosion. Clean and tighten connections as necessary to ensure proper contact and conductivity.
- Perform Component Diagnostics: Use diagnostic tools or techniques to identify potential component failures within the inverter. Check for blown capacitors, defective transistors, or damaged circuit boards that may be preventing the inverter from powering on.
- Reset Inverter: Some inverters may have a reset function or procedure that can be used to restore operation after a fault condition. Consult the user manual or manufacturer documentation for instructions on how to perform a reset.
- Contact Manufacturer Support: If troubleshooting steps fail to resolve the issue, contact the manufacturer’s technical support or customer service for further assistance. Provide detailed information about the symptoms and any troubleshooting steps taken to help diagnose the problem.
Preventive Measures:
- Perform regular maintenance checks and inspections of the inverter to detect and address potential issues before they escalate.
- Keep the inverter and its components clean and free from debris, dust, or corrosion that may interfere with operation.
- Follow manufacturer guidelines and recommendations for installation, operation, and maintenance to ensure optimal performance and reliability.
By following these solutions and preventive measures, users can effectively troubleshoot and resolve issues when their inverters fail to turn on, restoring power supply and ensuring uninterrupted operation of connected appliances and devices.
Inverter Alarm or Error Codes
Problem:
Inverters often have built-in alarm systems or error code indicators to alert users to potential issues or malfunctions. Understanding these alarm codes is essential for diagnosing and resolving problems with the inverter.
Symptoms:
- Audible alarms or visual indicators displayed on the inverter’s control panel.
- Error codes or alphanumeric messages indicating specific fault conditions or system failures.
- Inverter may enter a protection mode or shut down to prevent further damage.
Causes:
- Various internal or external factors can trigger alarm codes, including overvoltage, undervoltage, overloading, overheating, short circuits, or component failures.
- Environmental factors such as temperature extremes, humidity, or dust accumulation may also contribute to alarm conditions.
Solutions:
- Refer to User Manual: Consult the user manual or manufacturer documentation for a list of alarm codes and their corresponding meanings. Most inverters include a troubleshooting section that guides interpreting and resolving common error conditions.
- Check Alarm Display: Note the specific alarm code or message displayed on the inverter’s control panel. Pay attention to any accompanying indicators or warning lights that may provide additional information about the fault condition.
- Address Immediate Concerns: If the alarm indicates a critical fault condition, such as overvoltage or overheating, take immediate action to address the issue. Disconnect power sources, reduce load, or implement corrective measures as needed to prevent damage to the inverter or connected equipment.
- Perform Diagnostic Checks: Use diagnostic tools or techniques to identify the underlying cause of the alarm condition. Check input and output voltages, battery levels, wiring connections, and internal components for signs of damage or malfunction.
- Reset Inverter: Some alarm conditions may be resolved by resetting the inverter or cycling power. Follow manufacturer instructions for performing a reset procedure and clearing alarm codes.
- Address Root Cause: Once the immediate alarm condition is addressed, investigate the root cause of the issue to prevent recurrence. Take corrective actions such as replacing damaged components, adjusting settings, or improving environmental conditions to prevent future alarms.
- Contact Manufacturer Support: If troubleshooting steps fail to resolve the alarm condition or if the cause of the alarm is unclear, contact the manufacturer’s technical support or customer service for further assistance. Provide detailed information about the alarm code and any troubleshooting steps taken.
Preventive Measures:
- Regularly monitor the inverter’s alarm system and address alarm conditions promptly to prevent further damage or system failures.
- Conduct periodic maintenance checks and inspections to detect potential issues before they escalate into alarm conditions.
- Follow recommended operating procedures and environmental conditions specified by the manufacturer to minimize the risk of alarm codes.
By understanding and responding to alarm codes effectively, users can diagnose and resolve issues with their inverters quickly, ensuring reliable operation and minimizing downtime.
Inverter Fan Issues
Problem:
Inverter fans play a crucial role in maintaining optimal operating temperatures by dissipating heat generated during operation. Issues with inverter fans can lead to overheating, reduced efficiency, and potential damage to internal components.
Symptoms:
- Audible noise or unusual vibrations from the inverter fan during operation.
- Inconsistent fan operation, such as intermittent spinning or failure to start.
- Overheating indicators or alarm codes displayed on the inverter’s control panel.
- Reduced cooling performance or increased internal temperatures.
Causes:
- Accumulation of dust, dirt, or debris obstructing the fan blades or impeding airflow.
- Mechanical wear or damage to the fan motor, bearings, or blades.
- Electrical issues such as faulty wiring, connections, or control circuitry affecting fan operation.
- Environmental factors such as high temperatures, humidity, or exposure to moisture.
Solutions:
- Clean Fan and Vents: Remove dust, dirt, or debris from the fan blades and surrounding ventilation openings using compressed air, a soft brush, or a vacuum cleaner with a brush attachment. Ensure proper airflow around the fan for optimal cooling performance.
- Inspect Fan Motor: Check the fan motor, bearings, and blades for signs of wear, damage, or obstruction. Replace damaged components or lubricate bearings as needed to restore proper fan operation.
- Test Fan Operation: Manually test the fan by gently spinning the blades to ensure they rotate freely. Check for any unusual resistance, noise, or vibration that may indicate mechanical issues.
- Verify Electrical Connections: Inspect wiring connections, terminals, and control circuitry associated with the fan for signs of damage or loose connections. Ensure proper voltage supply and continuity to the fan motor.
- Replace Faulty Components: If the fan motor or associated components are found to be faulty, replace them with new, compatible replacements. Use high-quality components rated for the intended operating conditions of the inverter.
- Improve Ventilation: Ensure adequate ventilation around the inverter by providing sufficient clearance space and avoiding obstruction of ventilation openings. Install additional cooling fans or ventilation systems if necessary to enhance airflow and heat dissipation.
- Monitor Temperature: Use temperature monitoring devices or thermal sensors to track internal temperatures and detect potential overheating conditions. Implement automatic shutdown or cooling strategies to prevent damage in case of overheating.
Preventive Measures:
- Regularly clean and inspect inverter fans and ventilation openings to prevent dust buildup and obstruction.
- Schedule periodic maintenance checks to verify fan operation and address any issues before they escalate.
- Monitor ambient temperatures and environmental conditions to ensure optimal cooling performance and prevent overheating.
By addressing fan issues promptly and implementing preventive maintenance measures, users can ensure optimal cooling performance and prolong the lifespan of their inverters while minimizing the risk of overheating and component damage.
FAQs
- What are some common issues with inverters?
- Common issues with inverters include overheating, component failures, output voltage fluctuations, inverter not turning on, alarm or error codes, fan issues, and faulty wiring or connections.
- How can I troubleshoot an inverter that is not turning on?
- First, check the power source to ensure the inverter is receiving adequate input power. Inspect the power switch, reset circuit breakers or fuses, and verify external connections. If the issue persists, refer to the user manual for troubleshooting steps or contact the manufacturer for assistance.
- What should I do if my inverter displays alarm or error codes?
- Consult the user manual or manufacturer documentation to interpret the meaning of alarm or error codes. Address immediate concerns such as overvoltage or overheating, perform diagnostic checks to identify the root cause, and follow recommended troubleshooting steps to resolve the issue.
- How can I prevent inverter fan issues?
- Prevent inverter fan issues by regularly cleaning and inspecting the fan and ventilation openings to remove dust and debris. Test fan operation, verify electrical connections, and ensure proper ventilation around the inverter. Monitor temperatures and implement cooling strategies to prevent overheating.
- What are some preventive measures for common inverter problems?
- Prevent common inverter problems by following recommended maintenance procedures, monitoring operating conditions, and addressing issues promptly. Schedule periodic maintenance checks, keep the inverter clean and well-ventilated, and monitor input and output parameters for abnormalities.
- When should I contact technical support for inverter problems?
- Contact technical support for inverter problems if troubleshooting steps fail to resolve the issue, or if the cause of the problem is unclear. Provide detailed information about the symptoms, any error codes displayed, and the troubleshooting steps taken for efficient diagnosis and resolution.
Conclusion
A well-maintained inverter is a reliable source of power, providing backup during outages and enabling the use of renewable energy. By understanding common inverter problems and following the troubleshooting steps outlined in this guide, you can address issues promptly and ensure the longevity of your inverter system. Regular inspections, preventive maintenance, and awareness of load management are key elements in keeping your inverter operating smoothly. If challenges persist or if you have safety concerns, don’t hesitate to seek professional assistance to ensure the continued efficiency and safety of your inverter system.