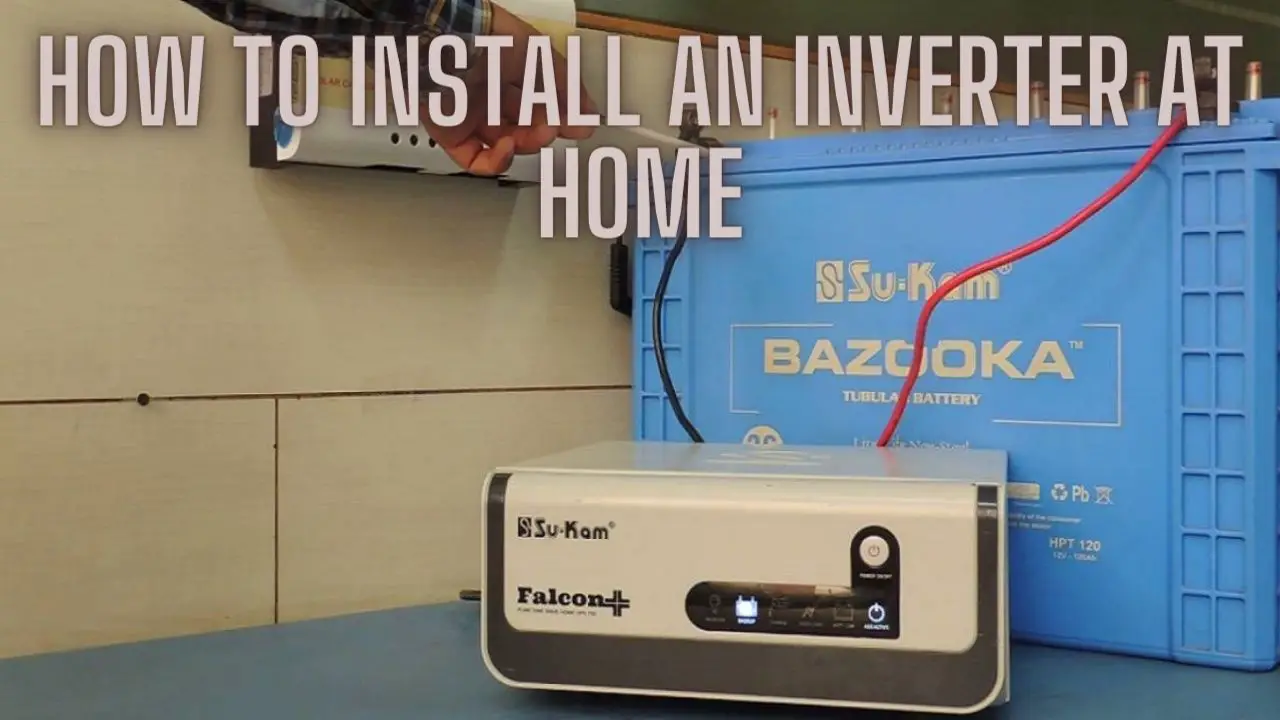
How to Install an Inverter at Home: A Comprehensive Guide
Introduction
Installing an inverter at home can provide backup power during outages, enabling you to continue using essential appliances and devices. This guide will walk you through the process of installing an inverter safely and effectively, ensuring reliable operation and peace of mind. From selecting the right equipment to connecting it to your home’s electrical system, each step is essential for a successful installation. By following these instructions and safety precautions, you can set up your inverter system with confidence and enjoy uninterrupted power supply when you need it most.
Safety Precautions
- Turn off Power: Before starting the installation process, ensure that the main power supply to your home is turned off. This will prevent the risk of electric shock while working on electrical components.
- Use Personal Protective Equipment (PPE): Wear appropriate PPE such as insulated gloves, safety goggles, and non-conductive footwear to protect yourself from electrical hazards.
- Read the Manual: Carefully read the instruction manual provided with the inverter and other components to understand their installation requirements and safety precautions.
- Choose a Well-Ventilated Area: Select a well-ventilated area for installing the inverter to prevent overheating. Avoid locations near flammable materials or in areas prone to moisture.
- Secure the Area: Ensure that the installation area is clear of obstacles and clutter. Use ladders or scaffolding if needed, and secure them properly to prevent falls.
- Disconnect Batteries: If you’re connecting the inverter to batteries, disconnect them from the power source before installation to prevent accidental electrical discharge.
- Follow Codes and Regulations: Adhere to local building codes and regulations governing electrical installations. If you’re unsure about any aspect of the installation, consult with a qualified electrician.
- Use Proper Tools: Use insulated tools specifically designed for electrical work to minimize the risk of electric shock. Avoid using damaged or worn-out tools.
- Avoid Overloading: Ensure that the inverter is not overloaded with too many appliances or devices. Follow the manufacturer’s recommendations for maximum load capacity.
- Test Before Use: After installation, perform a thorough test of the inverter system to ensure proper functionality and safety. Check for any loose connections or abnormalities before energizing the system.
By following these safety precautions, you can minimize the risk of accidents and injuries during the installation process and ensure a safe and reliable inverter setup for your home.
Choosing the Right Location
- Accessibility: Select a location for the inverter that is easily accessible for installation, maintenance, and troubleshooting. Avoid areas that are difficult to reach or obstructed by other equipment.
- Ventilation: Choose a well-ventilated area with sufficient airflow to dissipate heat generated by the inverter during operation. Avoid enclosed spaces or areas with poor ventilation, as this can lead to overheating and reduced efficiency.
- Protection from Environmental Factors: Install the inverter in a location protected from environmental factors such as rain, direct sunlight, extreme temperatures, and humidity. Consider using a weatherproof enclosure or mounting the inverter indoors to protect it from the elements.
- Proximity to Batteries: If the inverter is connected to batteries, place it close to the battery bank to minimize voltage drop and reduce the length of DC wiring. Ensure that the location is suitable for installing and maintaining the batteries as well.
- Distance from Electrical Loads: Position the inverter close to the electrical loads it will power to minimize the length of AC wiring and reduce voltage drop. However, ensure that the location is safe and complies with local electrical codes.
- Mounting Surface: Choose a sturdy and level mounting surface for installing the inverter. Avoid surfaces that are prone to vibrations or movement, as this can affect the performance and lifespan of the inverter.
- Safety Considerations: Ensure that the chosen location is safe for installing electrical equipment, with no risk of accidental contact or exposure to moisture, chemicals, or other hazards.
- Aesthetics: Consider the aesthetics of the installation location, especially if the inverter will be visible to occupants or visitors. Choose a location that blends well with the surroundings and minimizes visual impact.
- Future Expansion: Plan for future expansion or additional equipment when selecting the location for the inverter. Leave sufficient space for potential upgrades or the installation of other components such as charge controllers or solar panels.
By considering these factors, you can choose the right location for installing the inverter, ensuring optimal performance, safety, and convenience for your home energy system.
Selecting the Inverter
Selecting the right inverter is crucial for ensuring reliable and efficient operation of your home power system. Here are some factors to consider when choosing an inverter:
- Power Rating: Determine the total power requirements of your home appliances and devices to select an inverter with adequate power capacity. Choose an inverter with a power rating that exceeds the total wattage of your loads to accommodate surges and peak demands.
- Waveform Type: Decide whether you need a pure sine wave, modified sine wave, or square wave inverter based on the types of appliances you’ll be powering. Pure sine wave inverters provide clean and stable power suitable for sensitive electronics, while modified sine wave or square wave inverters are more affordable but may cause issues with certain devices.
- Efficiency: Look for an inverter with high efficiency to minimize power loss during conversion. Efficiency ratings typically range from 85% to 95% or higher, with higher efficiency inverters being more energy-efficient and cost-effective in the long run.
- Input Voltage: Consider the input voltage requirements of the inverter and ensure compatibility with your battery bank or power source. Common input voltages for residential applications include 12V, 24V, or 48V DC systems.
- Output Voltage: Verify that the inverter provides the appropriate output voltage for your electrical system. Most residential inverters produce standard AC voltages of 120V or 240V, depending on regional standards and requirements.
- Features and Protections: Look for additional features such as overload protection, short circuit protection, low voltage shutdown, and over-temperature protection to safeguard the inverter and connected devices from damage. Advanced features like remote monitoring and grid-tie capabilities may also be desirable depending on your needs.
- Brand and Quality: Choose a reputable brand known for producing high-quality inverters with reliable performance and durability. Read customer reviews and consider factors such as warranty coverage and customer support when evaluating different brands.
- Budget: Set a budget for your inverter purchase and balance cost considerations with the desired features and performance. Compare prices from different manufacturers and suppliers to find the best value for your investment.
- Future Expansion: Consider future expansion plans such as adding solar panels or integrating with a backup generator when selecting an inverter. Choose a flexible and scalable system that can accommodate future upgrades and changes to your home energy setup.
- Certifications and Compliance: Ensure that the inverter complies with relevant safety standards and regulations, such as UL (Underwriters Laboratories) certification in the United States or CE (Conformité Européenne) marking in Europe, to guarantee safe and reliable operation.
By carefully considering these factors and selecting an inverter that meets your specific requirements, you can build a robust and efficient power system for your home.
Selecting the Batteries
Selecting the right batteries is essential for ensuring reliable backup power supply and maximizing the performance of your inverter system. Here are some factors to consider when choosing batteries for your home energy storage system:
- Battery Type:
- Lead-Acid Batteries: Traditional lead-acid batteries are cost-effective and widely used for residential energy storage systems. They are available in two main types:
- Flooded Lead-Acid Batteries: These batteries require periodic maintenance and watering to maintain electrolyte levels.
- Sealed Lead-Acid Batteries (AGM, Gel): Maintenance-free batteries that are sealed and do not require watering. AGM (Absorbent Glass Mat) and gel batteries are suitable for applications where maintenance is challenging.
- Lithium-Ion Batteries: Lithium-ion batteries offer higher energy density, longer cycle life, and faster charging compared to lead-acid batteries. Although more expensive upfront, they provide better performance and require minimal maintenance.
- Lead-Acid Batteries: Traditional lead-acid batteries are cost-effective and widely used for residential energy storage systems. They are available in two main types:
- Capacity:
- Determine the total energy storage capacity (in kilowatt-hours, kWh) required for your backup power needs. Calculate the total watt-hours (Wh) consumed by your critical loads per day and multiply by the desired backup time (hours) to determine the required battery capacity.
- Voltage and Configuration:
- Choose batteries with the appropriate voltage and configuration to match the input voltage of your inverter system. Common voltages for residential systems include 12V, 24V, and 48V DC. Configure batteries in series (to increase voltage) and parallel (to increase capacity) to meet your system requirements.
- Cycle Life:
- Consider the cycle life of the batteries, which refers to the number of charge-discharge cycles they can withstand before reaching the end of their usable life. Lithium-ion batteries typically offer a higher cycle life compared to lead-acid batteries.
- Depth of Discharge (DoD):
- Determine the acceptable depth of discharge (DoD) for your batteries, which refers to the percentage of the total capacity that can be safely discharged without causing damage. Higher DoD values provide more usable energy but may reduce battery lifespan.
- Temperature Range:
- Choose batteries with a wide operating temperature range suitable for your climate conditions. Extreme temperatures can affect battery performance and lifespan.
- Maintenance Requirements:
- Consider the maintenance requirements of the batteries, especially if you opt for flooded lead-acid batteries. AGM and gel batteries are maintenance-free and may be preferred for ease of use.
- Warranty and Support:
- Look for batteries from reputable manufacturers that offer a warranty and reliable customer support. A longer warranty period indicates confidence in the product’s quality and performance.
- Budget:
- Set a budget for your battery purchase and compare prices from different manufacturers and suppliers. Consider the total cost of ownership, including upfront costs, maintenance expenses, and expected lifespan, to make an informed decision.
- Compatibility:
- Ensure that the batteries are compatible with your inverter system and meet the voltage, current, and communication requirements specified by the manufacturer.
By considering these factors and choosing batteries that meet your specific requirements, you can build a robust and reliable energy storage system for your home.
Selecting the Wiring and Cables
Selecting the right wiring and cables is essential for ensuring safe and efficient operation of your inverter system. Here are some factors to consider when choosing wiring and cables for your home energy system:
- Wire Size (Gauge):
- Determine the appropriate wire size (gauge) based on the maximum current (amperage) that will flow through the cables. Use a wire size calculator or consult the inverter manufacturer’s specifications to determine the recommended wire size for your system.
- Choose larger wire sizes for longer cable runs or higher current loads to minimize voltage drop and ensure optimal performance.
- Material and Conductor Type:
- Select cables with high-quality conductors made of copper or aluminum for low electrical resistance and efficient power transmission. Copper is preferred for its superior conductivity and corrosion resistance, especially in DC wiring applications.
- Use stranded conductors instead of solid conductors for flexibility and easier installation, particularly in environments with vibration or movement.
- Insulation Type:
- Choose cables with insulation rated for the voltage and temperature requirements of your system. Common insulation materials include PVC (Polyvinyl Chloride), XLPE (Cross-linked Polyethylene), and THHN (Thermoplastic High Heat-resistant Nylon).
- Ensure that the insulation material is suitable for indoor or outdoor use, depending on the installation location and environmental conditions.
- Voltage Rating:
- Verify that the cables have a voltage rating compatible with the operating voltage of your inverter system. Common voltage ratings for residential systems include 12V, 24V, and 48V DC.
- Choose cables with insulation and jacketing designed to withstand the maximum voltage expected in your system to prevent electrical breakdown and safety hazards.
- Cable Length:
- Measure the distance between the inverter, batteries, and electrical loads to determine the required cable lengths. Minimize cable lengths to reduce voltage drop and power losses, especially for DC wiring between the inverter and batteries.
- Allow for additional slack or margin when cutting cables to accommodate bends, terminations, and future adjustments.
- Strain Relief and Protection:
- Use strain relief devices such as cable glands, clamps, or fittings to secure cables and prevent tension or damage at termination points. Install protective conduit or raceways to shield cables from physical damage and environmental hazards.
- Ensure that cables are routed and supported properly to prevent sagging, abrasion, or interference with other components.
- Code Compliance:
- Adhere to local electrical codes and regulations governing wiring installations to ensure compliance with safety standards. Consult with a licensed electrician or building inspector if you’re unsure about code requirements or installation practices.
- Cost and Availability:
- Consider the cost and availability of wiring and cables when selecting materials for your inverter system. Compare prices from different suppliers and choose reputable brands known for quality and reliability.
By considering these factors and selecting wiring and cables that meet your specific requirements, you can ensure safe and efficient power transmission in your home energy system.
Installing the Batteries
Installing the batteries for your inverter system is a crucial step in setting up your home energy storage solution. Here’s a step-by-step guide to help you install the batteries safely and effectively:
- Choose the Installation Location: Select a suitable location for the batteries that meets the following criteria:
- Adequate ventilation to dissipate heat generated during charging and discharging.
- Protection from environmental factors such as rain, direct sunlight, extreme temperatures, and humidity.
- Accessibility for maintenance and inspection.
- Prepare the Mounting Surface: Ensure that the mounting surface is sturdy, level, and capable of supporting the weight of the batteries. Use mounting brackets, racks, or stands to secure the batteries in place if necessary.
- Position the Batteries: Place the batteries in the chosen location, ensuring proper orientation and alignment. Arrange the batteries in a configuration that maximizes space utilization and minimizes cable lengths.
- Connect the Batteries in Series or Parallel:
- Series Connection: Connect the positive terminal of one battery to the negative terminal of the next battery in series to increase the total voltage while maintaining the same capacity. Ensure that the connections are tight and secure to prevent voltage drop.
- Parallel Connection: Connect the positive terminals of all batteries together and the negative terminals together in parallel to increase the total capacity while maintaining the same voltage. Use heavy-duty bus bars or cables for parallel connections to ensure balanced current flow.
- Install Battery Interconnect Cables:
- Use appropriately sized battery interconnect cables to connect the batteries in series or parallel. Ensure that the cables are rated for the maximum current and voltage of the battery bank.
- Install cable lugs or terminals securely onto the battery terminals using a crimping tool or lug crimper. Apply anti-corrosion grease or terminal protectant to prevent oxidation and ensure good electrical contact.
- Secure the Batteries: Once the batteries are connected and positioned correctly, secure them in place using mounting brackets, straps, or clamps. Ensure that the batteries are stable and cannot tip over or move during operation.
- Check Polarity and Connections: Double-check the polarity of all connections to ensure that positive terminals are connected to positive terminals and negative terminals to negative terminals. Verify that all connections are tight, secure, and free from corrosion or oxidation.
- Test the Battery Bank: Perform a thorough test of the battery bank to verify proper installation and functionality. Measure the voltage across each battery and the entire battery bank to ensure that they are within the expected range.
- Labeling and Documentation: Label each battery and connection point with clear, descriptive labels to facilitate future maintenance and troubleshooting. Keep a record of the battery specifications, installation date, and maintenance history for reference.
- Safety Precautions: Adhere to safety precautions such as wearing appropriate personal protective equipment (PPE), following manufacturer instructions, and observing electrical safety practices throughout the installation process.
By following these steps and precautions, you can install the batteries for your inverter system safely and effectively, ensuring reliable backup power supply for your home. If you’re unsure about any aspect of the installation process, consider consulting with a qualified electrician or professional installer for assistance.
Connecting the Inverter
Connecting the inverter to your home’s electrical system is a critical step in setting up your power backup solution. Here’s a step-by-step guide to help you connect the inverter safely and effectively:
- Turn Off Power: Before proceeding with the installation, ensure that the main power supply to your home is turned off at the circuit breaker or main electrical panel. This will prevent the risk of electric shock while working on the electrical wiring.
- Choose the Connection Point: Identify a suitable connection point where the inverter will be installed. This is typically near the main electrical panel or distribution board, where it can be easily connected to the grid and your home’s electrical circuits.
- Mount the Inverter: Securely mount the inverter in the chosen location using mounting brackets, screws, or other hardware provided by the manufacturer. Ensure that the inverter is installed in an upright position and that there is sufficient clearance around it for ventilation.
- Prepare the Wiring: Gather the necessary wiring and cables for connecting the inverter to your home’s electrical system. Use cables with the appropriate gauge, insulation, and voltage rating to handle the load and ensure safety.
- Connect the DC Input: If the inverter is connected to a battery bank, connect the positive (+) and negative (-) terminals of the battery bank to the corresponding DC input terminals on the inverter. Use properly sized battery cables and ensure tight, secure connections.
- Connect the AC Output: Identify the AC output terminals on the inverter, which may be labeled as “AC Out” or similar. Connect the live (hot) wire from the inverter’s AC output to the appropriate circuit breaker in your home’s electrical panel. Use a properly sized and rated wire for this connection.
- Grounding: Ensure that the inverter is properly grounded according to local electrical codes and regulations. Connect the grounding lug on the inverter to a grounding rod or other approved grounding point using a suitable grounding conductor.
- Commissioning: Once all connections are made, turn on the main power supply to your home and switch on the inverter. Follow the manufacturer’s instructions for commissioning and testing the inverter to ensure proper operation.
- Testing: Test the inverter by powering on connected appliances or devices to verify that it is supplying power correctly. Monitor the inverter’s display or indicators for any error codes or abnormalities.
- Final Checks: Conduct a final inspection of all connections to ensure they are tight, secure, and free from damage or defects. Label all wires and breakers associated with the inverter for easy identification in the future.
- Documentation: Keep a record of the inverter installation, including wiring diagrams, specifications, and any maintenance or troubleshooting procedures. This documentation will be useful for future reference and maintenance.
- Safety Precautions: Adhere to safety precautions throughout the installation process, including wearing appropriate personal protective equipment (PPE) and following electrical safety practices.
By following these steps and precautions, you can connect the inverter to your home’s electrical system safely and effectively, ensuring reliable backup power supply when needed. If you’re unsure about any aspect of the installation process, consider consulting with a qualified electrician or professional installer for assistance.
Connecting to the Electrical Panel
Connecting the inverter to your home’s electrical panel is a crucial step in integrating it into your power backup system. Here’s a step-by-step guide to help you connect the inverter safely and effectively:
- Turn Off Power: Before working on the electrical panel, ensure that the main power supply to your home is turned off at the circuit breaker or main disconnect switch. This will prevent the risk of electric shock while working on the electrical wiring.
- Identify Suitable Circuit Breaker: Determine which circuit breaker in your electrical panel will be used to connect the inverter’s output to your home’s electrical circuits. This breaker should be dedicated to the backup power system and sized appropriately for the inverter’s output capacity.
- Prepare the Wiring: Gather the necessary wiring and cables for connecting the inverter output to the electrical panel. Use cables with the appropriate gauge, insulation, and voltage rating to handle the load and ensure safety.
- Install Breaker and Interlock: Install a dedicated circuit breaker in the electrical panel for the inverter output if one is not already present. Ensure that the breaker is rated to handle the maximum output current of the inverter and is compatible with the panel.
- Wire Connection: Connect the live (hot) wire from the inverter’s AC output to the line side of the dedicated circuit breaker in the electrical panel. Use a properly sized and rated wire for this connection, typically a stranded copper wire with appropriate insulation.
- Grounding: Ensure that the inverter is properly grounded according to local electrical codes and regulations. Connect the grounding lug on the inverter to the grounding bus bar or other approved grounding point in the electrical panel using a suitable grounding conductor.
- Labeling and Documentation: Label the circuit breaker and associated wiring to clearly indicate that it is connected to the backup power system. Keep a record of the installation, including wiring diagrams, specifications, and any maintenance or troubleshooting procedures for future reference.
- Final Checks: Conduct a final inspection of all connections to ensure they are tight, secure, and free from damage or defects. Verify that the breaker is properly installed and labeled according to local codes and regulations.
- Commissioning: Once all connections are made, turn on the main power supply to your home and switch on the inverter. Follow the manufacturer’s instructions for commissioning and testing the inverter to ensure proper operation.
- Testing: Test the backup power system by powering on connected appliances or devices to verify that it is supplying power correctly. Monitor the inverter’s display or indicators for any error codes or abnormalities.
- Safety Precautions: Adhere to safety precautions throughout the installation process, including wearing appropriate personal protective equipment (PPE) and following electrical safety practices.
By following these steps and precautions, you can connect the inverter to your home’s electrical panel safely and effectively, ensuring reliable backup power supply when needed. If you’re unsure about any aspect of the installation process, consider consulting with a qualified electrician or professional installer for assistance.
Grounding the System
Grounding the inverter system is essential for electrical safety and proper operation. Here’s how to ground your inverter system effectively:
- Understand Grounding Requirements: Familiarize yourself with local electrical codes and regulations regarding grounding practices for inverter systems. Different regions may have specific requirements that must be followed to ensure compliance and safety.
- Select Grounding Point: Identify a suitable grounding point near the inverter system where you can connect the grounding conductor. This could be a dedicated grounding rod driven into the earth or an existing grounding point such as a metal water pipe or grounding electrode system.
- Prepare Grounding Conductor: Obtain a suitable grounding conductor with the appropriate gauge and material for grounding your inverter system. Copper conductors are commonly used for grounding due to their excellent conductivity and corrosion resistance.
- Connect Grounding Conductor:
- Strip the insulation from both ends of the grounding conductor to expose the bare copper wire.
- Connect one end of the grounding conductor to the grounding lug or terminal on the inverter. Follow the manufacturer’s instructions for proper grounding connections.
- Connect the other end of the grounding conductor to the chosen grounding point. If using a grounding rod, drive the rod into the earth near the inverter system and attach the conductor securely to the rod using a grounding clamp.
- Ensure Secure Connections:
- Ensure that all grounding connections are tight, secure, and free from corrosion or oxidation. Use appropriate tools to crimp or tighten connections as needed.
- Inspect the grounding conductor and connections regularly to ensure they remain in good condition and maintain proper electrical continuity.
- Test Grounding System:
- After grounding the inverter system, perform a continuity test to verify that the grounding conductor is properly connected and provides a low-resistance path to ground.
- Use a multimeter or continuity tester to check for continuity between the grounding conductor and the grounding point. The resistance should be minimal, indicating a good ground connection.
- Label Grounding Connections:
- Label all grounding connections and components to clearly indicate their purpose and ensure easy identification during installation, maintenance, or troubleshooting.
- Document Grounding Installation:
- Keep detailed records of the grounding installation, including the location of grounding points, conductor sizes, and connection methods. This documentation will be useful for future reference and maintenance.
- Comply with Regulations:
- Ensure that your grounding installation complies with local electrical codes and regulations. Consult with a qualified electrician or building inspector if you’re unsure about specific requirements.
By following these steps and guidelines, you can effectively ground your inverter system to ensure electrical safety and compliance with regulations. Proper grounding is essential for protecting equipment and personnel from electrical hazards and ensuring the reliable operation of your inverter system.
Testing the System
Testing your inverter system is essential to ensure that it functions properly and provides reliable backup power when needed. Here’s a step-by-step guide to testing your inverter system:
- Preparation:
- Turn off the main power supply to your home at the circuit breaker or main electrical panel to prevent electrical hazards during testing.
- Ensure that all connections, including DC input, AC output, and grounding, are secure and properly installed.
- Verify that all appliances and devices connected to the inverter system are turned off to avoid potential damage during testing.
- Initial Power-Up:
- Turn on the inverter and verify that it powers up correctly. Check the display panel or indicators for any error codes or abnormalities.
- Monitor the inverter’s status and ensure that it operates within normal parameters, such as voltage output, frequency, and temperature.
- Load Testing:
- Gradually increase the load on the inverter by powering on connected appliances or devices, starting with low-power loads and gradually adding more.
- Monitor the inverter’s performance under load, ensuring that it can handle the total load capacity without exceeding its rated power output or overheating.
- Test different types of loads, including resistive, inductive, and capacitive loads, to ensure compatibility and proper operation.
- Battery Operation:
- If the inverter is connected to a battery bank, test its ability to charge and discharge the batteries effectively.
- Monitor battery voltage, state of charge, and charging/discharging current to ensure proper battery management and protection.
- Verify that the inverter’s charging algorithm is functioning correctly and that the batteries are being charged at the appropriate voltage and current levels.
- Switching Time:
- Test the switching time of the inverter’s transfer switch or automatic transfer switch (ATS) if applicable. This is the time it takes for the inverter to switch from grid power to battery power during a power outage.
- Simulate a power outage by disconnecting the main power supply and observe how quickly the inverter switches to backup power.
- Voltage Regulation:
- Measure the voltage output of the inverter under different load conditions to ensure that it remains stable and within acceptable limits.
- Use a multimeter or voltage meter to measure the AC output voltage at various points in your home’s electrical system.
- Frequency Stability:
- Check the frequency stability of the inverter’s output to ensure that it remains consistent under varying load conditions.
- Use a frequency meter or oscilloscope to measure the AC output frequency and verify that it matches the standard grid frequency (e.g., 50 Hz or 60 Hz).
- Safety Checks:
- Conduct safety checks to ensure that all wiring, connections, and components are secure and free from damage or defects.
- Test the effectiveness of grounding and insulation to prevent electrical hazards and ensure compliance with safety standards.
- Documentation:
- Keep detailed records of the testing process, including test results, observations, and any issues encountered during testing.
- Document any adjustments or corrections made to the system based on testing results for future reference.
- Final Verification:
- Once testing is complete, verify that the inverter system meets your requirements for reliability, performance, and safety.
- Address any issues or deficiencies identified during testing and make necessary adjustments or repairs to ensure optimal system operation.
By following these steps and conducting thorough testing of your inverter system, you can identify any potential issues or weaknesses and ensure that your backup power solution is ready to provide reliable power when needed. If you encounter any problems during testing that you cannot resolve, consider consulting with a qualified electrician or professional installer for assistance.
Troubleshooting Common Issues
Troubleshooting common issues with your inverter system is essential to ensure its reliable operation and address any problems that may arise. Here are some common issues and troubleshooting steps to help you diagnose and resolve them:
- Inverter Not Turning On:
- Check the input power source (battery or grid) to ensure it is connected and providing power to the inverter.
- Verify that the power switch or circuit breaker on the inverter is turned on.
- Check for blown fuses or tripped circuit breakers in the inverter system and replace/reset them if necessary.
- Inspect the wiring connections for loose or damaged wires and reconnect or repair as needed.
- Test the voltage output of the battery or grid power to ensure it meets the inverter’s input requirements.
- Low Battery Voltage or Capacity:
- Check the battery bank for signs of damage, corrosion, or sulfation, and clean or replace as needed.
- Measure the voltage of each battery in the bank to identify any weak or faulty batteries and replace them.
- Verify that the charging system (solar panels, wind turbines, etc.) is functioning correctly and providing sufficient charge to the batteries.
- Adjust the charging parameters or settings on the inverter to optimize battery charging and prevent overcharging or undercharging.
- Overload or Overheating:
- Reduce the load on the inverter by disconnecting non-essential appliances or devices to prevent overloading.
- Check the inverter’s rated power output and ensure that the total connected load does not exceed this capacity.
- Improve ventilation around the inverter to dissipate heat more effectively and prevent overheating.
- Verify that the cooling fans or ventilation slots are not blocked or obstructed, and clean or remove any debris or dust buildup.
- Output Voltage Fluctuations:
- Check the input voltage from the battery or grid power to ensure it is stable and within the inverter’s operating range.
- Test the output voltage of the inverter under different load conditions to identify any fluctuations or irregularities.
- Inspect the wiring connections for loose or corroded terminals and tighten or clean them as needed.
- Adjust the voltage regulation settings on the inverter to stabilize the output voltage and minimize fluctuations.
- Fault Codes or Error Messages:
- Refer to the inverter’s user manual or documentation to interpret any fault codes or error messages displayed on the inverter.
- Follow the troubleshooting steps recommended by the manufacturer to address the specific issue indicated by the fault code.
- Reset the inverter or perform a factory reset if necessary to clear any temporary errors or malfunctions.
- Interference or Noise:
- Identify potential sources of interference or noise in the vicinity of the inverter system, such as nearby appliances, electronics, or power lines.
- Minimize electromagnetic interference by relocating sensitive equipment or shielding the inverter with grounded metal enclosures.
- Use high-quality shielded cables and wiring to reduce the transmission of electromagnetic interference and noise.
- Component Failures:
- Inspect all components of the inverter system, including wiring, connectors, circuit boards, and internal components, for signs of damage or wear.
- Replace any faulty or damaged components identified during the inspection, following manufacturer specifications and guidelines.
- Perform diagnostic tests or measurements to isolate the source of the failure and troubleshoot accordingly.
- Consult Manufacturer Support:
- If you are unable to resolve the issue on your own, contact the manufacturer’s technical support or customer service for assistance.
- Provide detailed information about the symptoms, troubleshooting steps taken, and any error codes or messages displayed by the inverter.
By following these troubleshooting steps and guidelines, you can effectively diagnose and resolve common issues with your inverter system, ensuring reliable operation and uninterrupted power supply for your home or facility. If you are unsure about any aspect of troubleshooting or need further assistance, consider consulting with a qualified electrician or professional technician for expert advice and support.
Maintenance Tips
Maintaining your inverter system regularly is essential to ensure its longevity, reliability, and optimal performance. Here are some maintenance tips to help you keep your inverter system in good condition:
- Regular Inspection:
- Conduct visual inspections of the inverter and associated components regularly to check for signs of damage, wear, or corrosion.
- Inspect wiring connections, terminals, and junction boxes for tightness, cleanliness, and proper insulation.
- Look for any loose or damaged components, such as cooling fans, vents, or circuit boards, and address them promptly.
- Cleaning:
- Keep the inverter and surrounding area clean and free from dust, dirt, and debris that can accumulate over time and affect ventilation and cooling.
- Use a soft brush or cloth to remove dust and debris from the inverter’s exterior, cooling fans, and ventilation slots.
- Avoid using harsh chemicals or abrasive cleaners that may damage the inverter’s housing or components.
- Battery Maintenance:
- If your inverter system includes batteries, perform regular maintenance tasks such as checking electrolyte levels, cleaning terminals, and equalizing charges.
- Monitor battery voltage, state of charge, and temperature regularly to ensure proper operation and prevent overcharging or discharging.
- Follow the manufacturer’s recommendations for battery maintenance and care, including periodic inspections and maintenance procedures.
- Temperature Control:
- Ensure proper ventilation and airflow around the inverter to prevent overheating and maximize cooling efficiency.
- Keep the inverter away from heat sources, direct sunlight, or other sources of excessive heat that can affect its performance and lifespan.
- Install additional cooling fans or ventilation if necessary to improve airflow and dissipate heat more effectively.
- Firmware Updates:
- Check for firmware updates or software upgrades provided by the manufacturer periodically to ensure your inverter system is running the latest version.
- Follow the manufacturer’s instructions for downloading and installing firmware updates to improve performance, add new features, or address known issues.
- Load Management:
- Monitor and manage the load on your inverter system to prevent overloading and ensure optimal performance.
- Distribute loads evenly across multiple circuits or phases to balance the electrical load and prevent voltage fluctuations.
- Avoid connecting incompatible or high-power appliances that can overload the inverter and cause damage.
- Environmental Protection:
- Protect the inverter system from environmental factors such as moisture, humidity, dust, and extreme temperatures that can affect its operation and lifespan.
- Install the inverter in a weatherproof enclosure or shelter if it will be exposed to outdoor conditions or harsh environments.
- Use protective covers or enclosures to shield the inverter from direct sunlight, rain, snow, and other weather elements.
- Professional Maintenance:
- Schedule regular maintenance checks and servicing by a qualified technician or service provider to inspect, test, and tune your inverter system.
- Follow the manufacturer’s recommended maintenance schedule and procedures to ensure compliance with warranty requirements and optimal system performance.
By following these maintenance tips and incorporating them into your routine, you can prolong the life of your inverter system, minimize downtime, and ensure reliable power supply for your home or facility. If you are unsure about any aspect of maintenance or need assistance, consult with a qualified electrician or professional technician for expert advice and support.
FAQs
- Do I need a professional electrician to install an inverter at home?
- While it is possible to install an inverter yourself if you have electrical knowledge and experience, it is recommended to hire a professional electrician for safety and compliance reasons, especially if you are not familiar with electrical wiring and regulations.
- Where should I install the inverter at home?
- The inverter should be installed in a dry, well-ventilated area that is easily accessible for maintenance and inspection. Avoid installing it in locations exposed to direct sunlight, moisture, extreme temperatures, or physical damage.
- Can I install the inverter outdoors?
- Some inverters are designed for outdoor installation and are weatherproof, but it’s essential to check the manufacturer’s specifications and recommendations before installing an inverter outdoors. If installing outdoors, ensure proper protection from the elements and compliance with local electrical codes.
- Do I need to install additional batteries with the inverter?
- Whether you need additional batteries depends on your specific requirements and usage. If you want backup power during outages, you’ll need batteries to store energy. However, if you’re only using the inverter for grid-tied solar power, batteries may not be necessary.
- How do I connect the inverter to my home’s electrical system?
- The inverter should be connected to your home’s electrical panel using appropriate wiring and breakers. It’s crucial to follow electrical codes and regulations and ensure that the connection is made safely and correctly to prevent electrical hazards.
- Do I need to ground the inverter system?
- Yes, grounding the inverter system is essential for electrical safety and compliance with regulations. The inverter should be properly grounded according to local electrical codes, and the grounding connection should be made securely to a suitable grounding point.
- Can I install the inverter myself if I have no electrical experience?
- It is not recommended to install an inverter yourself if you have no electrical experience. Working with electricity can be dangerous, and improper installation can lead to electrical hazards, damage to the inverter, or voiding of warranties. It’s best to hire a qualified electrician for installation.
- How much does it cost to install an inverter at home?
- The cost of installing an inverter at home varies depending on factors such as the type and size of the inverter, additional components needed (such as batteries), installation labor costs, and any necessary permits or inspections. It’s best to obtain quotes from reputable installers for an accurate cost estimate.
- Do I need permits or approvals to install an inverter at home?
- The requirements for permits or approvals vary depending on local regulations and the type of installation. In some areas, you may need permits for electrical work or approval from the utility company for grid-tied systems. It’s essential to check with your local authorities or utility provider for specific requirements.
- What maintenance is required after installing an inverter at home?
- Regular maintenance of the inverter system is essential to ensure its longevity and optimal performance. This may include cleaning, checking wiring connections, monitoring battery health (if applicable), and performing firmware updates as needed. It’s essential to follow the manufacturer’s recommendations for maintenance and consult with a professional if you encounter any issues.
Conclusion
Installing an inverter at home empowers you with a reliable backup power source and the ability to harness renewable energy. By carefully choosing the right inverter, selecting an optimal installation location, and following the step-by-step installation process outlined in this guide, you can enjoy uninterrupted power for your essential appliances.
Remember to prioritize safety during the installation, conduct thorough testing, and perform regular maintenance to keep your inverter system in top-notch condition. Whether you’re looking to be prepared for power outages or contribute to a sustainable energy future, a well-installed inverter is a valuable addition to your home.