The Best Spotify Equalizer Settings: Achieving Audio Excellence
Introduction
Spotify has become an integral part of our musical journey, providing a vast library of songs at our fingertips. To ensure you’re experiencing your favorite tracks at their best, Spotify offers an equalizer feature that allows you to customize the audio output to match your preferences and the capabilities of your headphones or speakers. In this article, we’ll delve into the art of optimizing your listening experience by exploring the best equalizer settings for Spotify.
Understanding the Equalizer
- What is an Equalizer?
- Definition and purpose: An equalizer (EQ) is a tool used to adjust the balance of audio frequencies in a music track or audio signal.
- Role in audio playback: It allows users to modify the intensity of specific frequency bands to enhance or attenuate certain aspects of the sound.
- Frequency Bands:
- Explanation of frequency bands: Audio frequencies are divided into bands, typically ranging from bass (low frequencies) to treble (high frequencies).
- Impact on sound: Each frequency band contributes to different aspects of the audio, such as bass depth, midrange clarity, and treble brightness.
- Adjustable Parameters:
- Center frequency: The specific frequency within a band that is targeted for adjustment.
- Gain: The level of boost or attenuation applied to the selected frequency band.
- Q factor (bandwidth): The width of the frequency band affected by the adjustment, controlling the range of frequencies affected by the EQ.
- Types of Equalizers:
- Graphic Equalizer: Offers a set of sliders or knobs representing different frequency bands, allowing users to adjust each band individually.
- Parametric Equalizer: Provides more control over frequency bands, allowing users to adjust parameters such as center frequency, gain, and bandwidth for precise adjustments.
- Shelving Equalizer: Adjusts all frequencies above or below a certain cutoff point, commonly used for boosting or attenuating bass or treble frequencies.
- Use Cases:
- Corrective EQ: Used to correct imbalances in audio playback, such as reducing excessive bass or boosting weak midrange frequencies.
- Creative EQ: Employed to enhance specific aspects of the audio for artistic purposes, such as emphasizing bass for a dance track or accentuating vocals in a mix.
- Application in Music Playback:
- Personalization: Allows users to tailor the sound to their preferences and compensate for deficiencies in playback systems.
- Optimization: Helps optimize audio playback for different listening environments, such as adjusting for room acoustics or compensating for the characteristics of headphones or speakers.
Understanding the equalizer provides users with the knowledge and tools needed to make informed adjustments to achieve the desired sound quality during music playback.
Accessing Spotify’s Equalizer:
- Open the Spotify app on your device.
- Go to “Settings.”
- Scroll down to find the “Playback” section.
- Tap on “Equalizer.”
Best Equalizer Settings for Spotify:
While the “best” equalizer settings can vary based on your personal preferences and the type of audio equipment you’re using, here are some general guidelines to enhance different aspects of your listening experience:
1. Bass Boost:
- Adjust the lower frequencies to give your audio more depth and impact.
- Raise the lower sliders (usually labeled as 60Hz and 120Hz) to create a warmer and fuller bass sound.
2. Vocal Clarity:
- Enhance the midrange frequencies to make vocals and instruments more pronounced.
- Slightly boost the middle sliders (often labeled as 400Hz and 800Hz) to improve the clarity of vocals and acoustic instruments.
3. Crisp Treble:
- Elevate the higher frequencies for sharper and more detailed treble.
- Increase the higher sliders (usually labeled as 2kHz and 4kHz) to add brightness to cymbals and higher-pitched instruments.
4. Flat Response:
- For a balanced sound without emphasizing specific frequencies, set all the sliders to the middle or “0” position.
- This setting can be ideal for experiencing music as it was recorded.
5. Customization for Genre:
- Customize your equalizer settings based on the genre of music you’re listening to.
- For example, for electronic or bass-heavy music, you might boost the bass frequencies. For classical or jazz, you might focus on enhancing vocal and instrumental clarity.
6. Headphone or Speaker Considerations:
- Tailor your equalizer settings to match the audio capabilities of your headphones or speakers.
- Different headphones and speakers have unique sound signatures, so adjust the settings to complement their strengths.
7. Experiment and Listen:
- The beauty of the Spotify equalizer is that it allows you to experiment.
- Play a song you’re familiar with, and make gradual adjustments to the sliders to find the sound that resonates best with you.
8. Save Custom Settings:
- Once you’ve found your ideal settings, tap on “Custom” and give your configuration a name.
- This way, you can switch between your customized settings and Spotify’s default options.
9. Avoid Overdoing It:
- While equalization can enhance your listening experience, avoid extreme adjustments that might lead to distortion or an unnatural sound.
- Subtle changes often yield the best results.
Preset Settings of Spotify Equalizer
Here are some of the preset equalizer settings available in Spotify:
1. Normal:
- This setting provides a flat response, maintaining a balanced sound without emphasizing any specific frequencies.
2. Bass Booster:
- This preset enhances the lower frequencies, adding more depth and impact to the bass.
3. Bass Reducer:
- If you find the bass overwhelming, this preset reduces the lower frequencies for a more balanced sound.
4. Classical:
- Optimized for classical music, this preset emphasizes the midrange frequencies, enhancing the clarity of instruments and vocals.
5. Dance:
- Tailored for dance and electronic music, this preset boosts the bass and treble frequencies to create an energetic and vibrant sound.
6. Electro:
- Similar to the Dance preset, Electro emphasizes the bass and treble, enhancing the experience of electronic tracks.
7. Hip-Hop:
- Ideal for hip-hop and rap, this preset boosts the bass frequencies to give your music a punchy and impactful feel.
8. Jazz:
- Designed for jazz enthusiasts, this preset accentuates the midrange frequencies, allowing the intricate details of instruments to shine.
9. Latin:
- Optimized for Latin music genres, this preset enhances both the bass and treble frequencies, creating a lively and rhythmic sound.
10. Lounge:
Lounge offers a balanced sound with a slight emphasis on the midrange frequencies, creating a relaxed and smooth listening experience.
11. Piano:
Tailored for piano music and instrumental tracks, this preset enhances the midrange frequencies for clarity and warmth.
12. Pop:
Suited for pop music, this preset provides a well-rounded sound with a slight boost in the treble frequencies for vocals and melodies.
13. R&B:
This preset enhances the bass and midrange frequencies, perfect for rhythm and blues tracks.
14. Rock:
Designed for rock music, this preset boosts both the bass and treble frequencies, adding energy and power to your tunes.
15. Small Speakers:
If you’re listening on smaller speakers, this preset optimizes the sound for such devices, ensuring clarity and balance.
Remember that these presets are just starting points, and you can further customize them based on your preferences. Feel free to adjust the sliders for each frequency to fine-tune the preset settings according to the specific characteristics of your headphones, speakers, and your ears. The goal is to find the perfect balance that enhances your listening experience and lets you enjoy your favorite music to the fullest.
Custom Settings of The Spotify Equalizer
Once you’re in the equalizer settings, you can adjust the sliders for different frequency bands to create your custom sound profile. Here’s how you can set up your custom equalizer settings:
1. Choose Your Base:
Start by selecting a base setting that aligns with your preferences or the type of music you often listen to. You can begin with the “Normal” preset for a balanced starting point.
2. Adjust the Sliders:
Customize the sound by adjusting the sliders for various frequency bands. Here’s how the sliders are typically labeled:
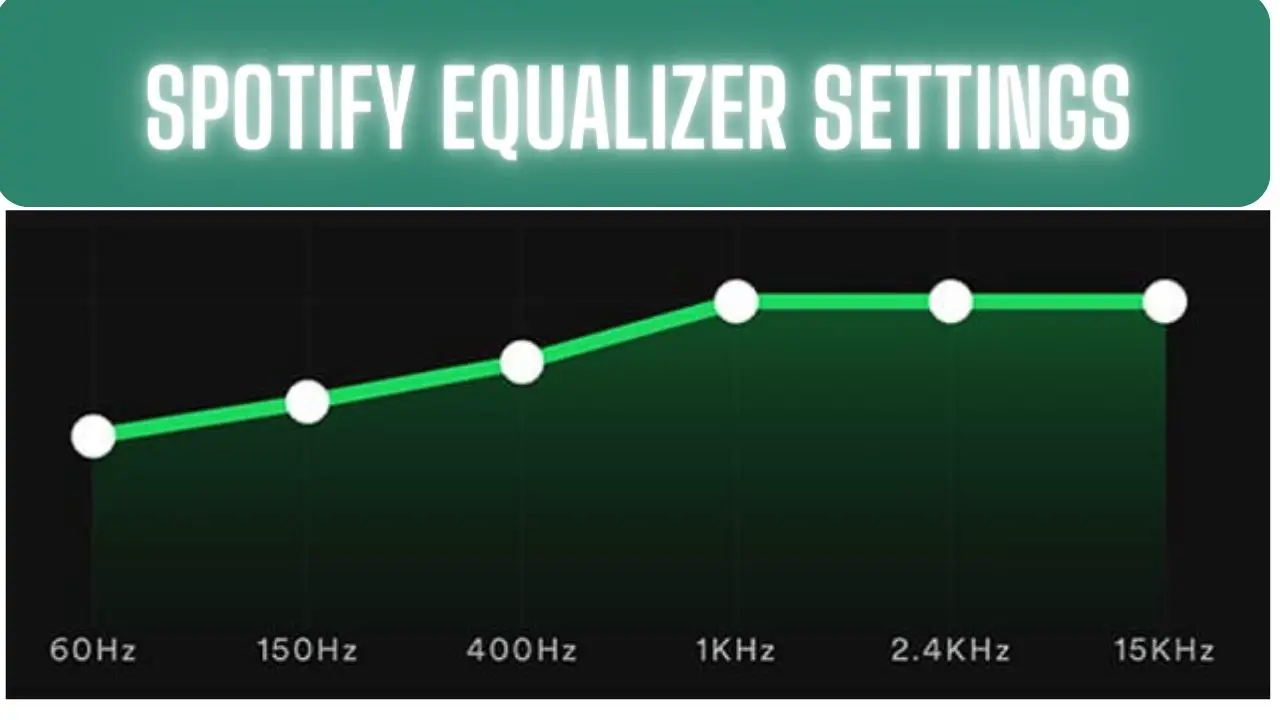
- 60Hz: Represents the low-end bass frequencies.
- 230Hz: Focuses on the lower midrange, impacting instruments like drums and bass guitars.
- 910Hz: Affects the midrange frequencies, including vocals and certain instruments.
- 3.6kHz: Influences the upper midrange frequencies, adding clarity to vocals and instruments.
- 14kHz: Represents the high frequencies, including cymbals and other high-pitched sounds.
3. Experiment Gradually:
Make small adjustments to each slider and listen to how the changes impact the sound. Move each slider up and down to hear how it affects the audio. You can start by boosting or reducing a particular frequency to see how it aligns with your preferences.
4. Find Your Sweet Spot:
Continue making subtle adjustments until you find the combination that enhances your listening experience. Focus on the aspects of the music that matter most to you, whether it’s deep bass, clear vocals, or crisp treble.
5. Save Your Custom Settings:
Once you’ve fine-tuned your custom equalizer settings, tap on the “Custom” option. Give your configuration a name that reflects your adjustments. This way, you can easily switch between your custom settings and the default or preset options.
6. Consider Your Gear:
Keep in mind that the effectiveness of your custom settings can vary based on the quality and type of headphones or speakers you’re using. Different audio devices have unique sound signatures, so your custom settings might work better with some devices than others.
7. Adapt to Different Genres:
Feel free to create multiple custom settings to match different genres of music. For example, you might have one setting optimized for bass-heavy tracks and another for acoustic music.
8. Revisit and Refine:
As you listen to various songs and genres, revisit your custom settings to ensure they continue to enhance your listening experience. Fine-tuning might be necessary to find the perfect balance for different types of music.
Customizing the Spotify equalizer settings is an excellent way to make your listening experience more enjoyable and personalized. It allows you to highlight the aspects of the music that resonate with you, ensuring that you’re getting the most out of your favorite tracks.
Tips for Fine-Tuning
- Start with Flat Settings:
- Begin by resetting your equalizer to flat or neutral settings. This provides a baseline for making adjustments and ensures that you’re starting from a balanced audio profile.
- Listen to Reference Tracks:
- Use well-mastered reference tracks that you’re familiar with across different genres. This allows you to hear how changes in the equalizer settings affect various aspects of the sound.
- Make Incremental Changes:
- Make small adjustments to individual frequency bands rather than large, drastic changes. Incremental adjustments allow you to fine-tune the sound without overcompensating or introducing distortion.
- Focus on Problem Areas:
- Identify specific frequency bands that may need adjustment based on the characteristics of the audio playback system or your listening environment. For example, if the bass sounds muddy, focus on attenuating lower frequencies.
- Use Your Ears:
- Trust your ears as the ultimate judge of sound quality. Pay attention to how changes in the equalizer settings affect the overall sound, and make adjustments based on what sounds best to you.
- Test Across Different Devices:
- Listen to your music on different playback devices, such as headphones, speakers, or earbuds, to ensure that your equalizer settings translate well across different systems.
- Consider Room Acoustics:
- Take into account the acoustics of your listening environment when fine-tuning your equalizer settings. Room reflections and resonance can affect how sound is perceived, so adjust accordingly.
- Save Custom Presets:
- Once you’ve found optimal equalizer settings for specific genres or listening scenarios, consider saving them as custom presets. This allows you to quickly recall and apply your preferred settings when needed.
- Experiment and Learn:
- Don’t be afraid to experiment with different equalizer settings to discover what works best for you. Fine-tuning your equalizer settings is a process of trial and error, so take the time to explore and learn from the experience.
- Listen for Balance:
- Aim for a balanced sound with no frequency bands overpowering others. Strive for clarity, definition, and naturalness in the audio playback, ensuring that all elements of the music are represented accurately.
By following these tips for fine-tuning your equalizer settings, you can optimize the sound quality of your music playback to suit your preferences and enhance your listening experience.
Troubleshooting Common Issues
- Inconsistent Sound Across Tracks:
- Issue: Some tracks may sound significantly different from others, even with the same equalizer settings.
- Solution: Use reference tracks with consistent mastering quality to gauge the effectiveness of your equalizer settings. Adjust settings as needed for individual tracks to achieve a more consistent sound.
- Unintended Distortion or Clipping:
- Issue: Overly aggressive equalizer adjustments can lead to distortion or clipping, especially in the bass frequencies.
- Solution: Reduce the gain on affected frequency bands, particularly in the bass range, to prevent distortion. Make gradual adjustments and avoid boosting frequencies beyond the capabilities of your audio system.
- Thin or Harsh Sound:
- Issue: Excessive attenuation of midrange frequencies or aggressive high-frequency boosts can result in a thin or harsh sound.
- Solution: Dial back extreme adjustments in the midrange and high-frequency bands to restore balance and warmth to the sound. Experiment with subtle adjustments until you find a more pleasing tonal balance.
- Muddy or Boomy Bass:
- Issue: Overemphasis of low-frequency bands can lead to a muddy or boomy bass response, obscuring clarity in the midrange and high frequencies.
- Solution: Reduce the gain on lower frequency bands or adjust the Q factor (bandwidth) to narrow the affected frequency range. Focus on achieving a tight, well-defined bass response without overpowering other elements of the music.
- Uneven Frequency Response:
- Issue: Certain frequency bands may sound overly pronounced or recessed compared to others, resulting in an uneven frequency response.
- Solution: Use frequency sweep tests or pink noise to identify areas of imbalance in the frequency spectrum. Make targeted adjustments to individual bands to achieve a more uniform frequency response.
- Lack of Impact or Presence:
- Issue: The music may lack impact or presence, with certain frequency ranges sounding dull or subdued.
- Solution: Experiment with subtle boosts in key frequency bands, such as the upper midrange or presence region, to enhance clarity and definition. Be cautious not to overdo adjustments, as this can lead to unnatural or fatiguing sound.
- Compatibility Issues Across Devices:
- Issue: Equalizer settings may not translate well across different playback devices, resulting in inconsistent sound quality.
- Solution: Test equalizer settings on various devices to ensure compatibility and adjust settings as needed for optimal performance. Save custom presets for different devices or listening scenarios to streamline the process.
- Resetting Equalizer Settings:
- Issue: Accidentally resetting or losing custom equalizer settings.
- Solution: Take note of your preferred equalizer settings and save custom presets if your device allows it. Regularly backup or document your settings to easily restore them in case of accidental resets.
By addressing these common equalizer issues and implementing the suggested solutions, you can troubleshoot and optimize your equalizer settings for a more satisfying listening experience.
Best Spotify Equalizer Settings FAQS
What is an equalizer in Spotify?
An equalizer in Spotify is a tool that allows you to adjust the balance of different frequencies in audio. It lets you enhance or reduce specific parts of the sound spectrum to customize the audio output according to your preferences.
How do I access the equalizer settings in Spotify?
To access the equalizer settings in Spotify, follow these steps:
- Open the Spotify app.
- Go to “Settings.”
- Scroll down to “Playback.”
- Tap on “Equalizer.”
Are there preset equalizer settings in Spotify?
Yes, Spotify offers a range of preset equalizer settings that are optimized for various music genres and preferences. These presets provide a quick way to enhance your listening experience without manually adjusting the sliders.
What are the frequency bands in the Spotify equalizer?
The Spotify equalizer typically consists of frequency bands labeled as 60Hz, 230Hz, 910Hz, 3.6kHz, and 14kHz. Each frequency band corresponds to different aspects of the sound, from bass to treble.
How do I create custom equalizer settings in Spotify?
To create custom equalizer settings in Spotify:
- Access the equalizer settings.
- Adjust the sliders for each frequency band (60Hz, 230Hz, 910Hz, 3.6kHz, 14kHz) to create your desired sound profile.
- Tap on “Custom” and give your configuration a name.
- Save your custom settings for future use.
What are the best equalizer settings for Spotify?
The best equalizer settings vary based on personal preferences and the type of music you’re listening to. However, here are some general guidelines:
- Boosting the bass frequencies (60Hz, 230Hz) for a richer low end.
- Enhancing the midrange frequencies (910Hz, 3.6kHz) for vocal clarity and instrument detail.
- Elevating the treble frequencies (14kHz) for crispness and brightness.
Can I use the equalizer settings to fix audio quality issues?
While the equalizer can help adjust the audio output, it might not completely fix issues caused by low-quality recordings or poor headphones/speakers. It’s best used to enhance the characteristics of well-recorded tracks.
Should I adjust the equalizer settings for different genres of music?
Yes, adjusting the equalizer settings based on the genre of music can enhance your listening experience. For example, you might boost the bass for electronic music or emphasize vocal clarity for classical tracks.
How do I reset the equalizer settings to default?
In the Spotify equalizer settings, there is usually an option to reset to the default settings or presets. This will revert any manual adjustments you’ve made back to the original settings.
Can I use the equalizer settings to compensate for headphone limitations?
Yes, you can use the equalizer to compensate for the sound signature of your headphones or speakers. Adjusting the settings can help bring out the best in your audio equipment.
Should I use the “Normal” preset if I’m unsure about equalizer settings?
Yes, the “Normal” preset provides a balanced sound and can be a good starting point if you’re unsure about manual adjustments. From there, you can experiment and make subtle changes based on your preferences.
Conclusion: Elevate Your Listening Experience
Spotify’s equalizer is a powerful tool that empowers you to shape your audio experience according to your taste. Whether you’re a bass enthusiast, a lover of crystal-clear vocals, or someone who values a balanced sound, the equalizer settings can help you unlock the full potential of your favorite tracks. Take the time to explore and experiment, and you’ll discover the sweet spot that resonates perfectly with your ears and audio setup.