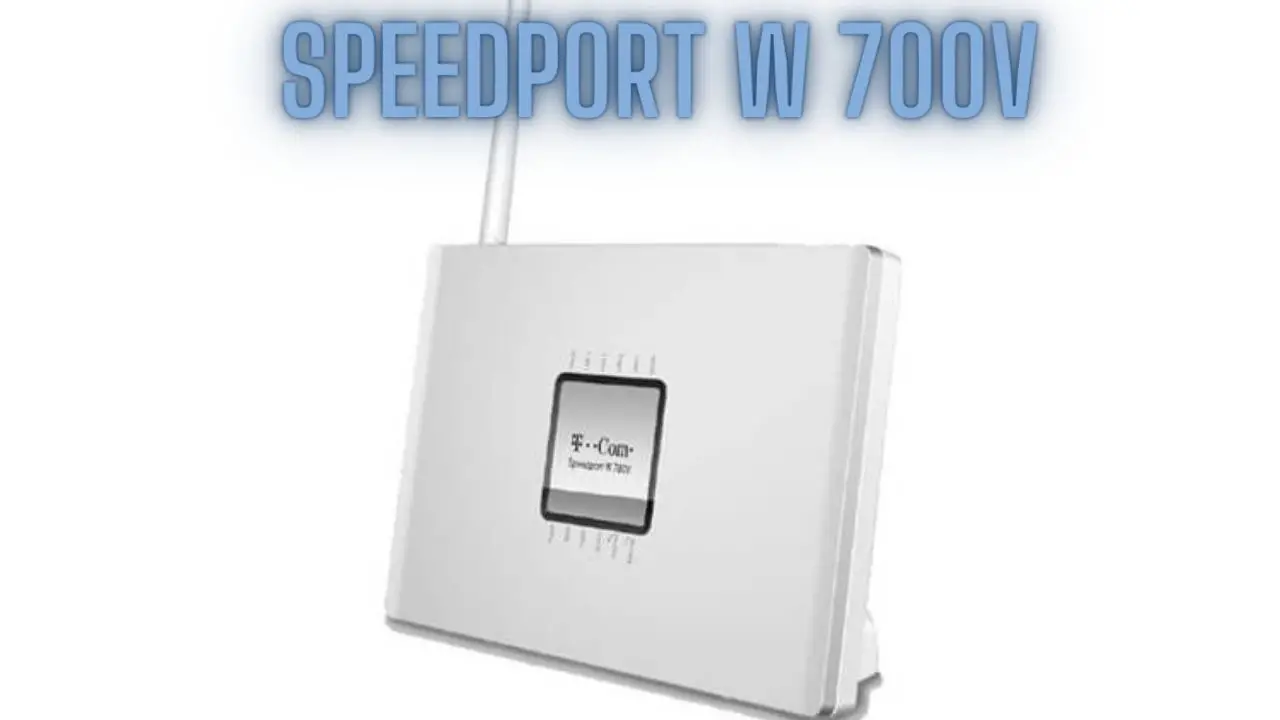
Speedport W 700V Setup and Configuration Guide
Introduction
The Speedport W 700V is a versatile router designed to provide reliable internet connectivity and advanced networking features for home and small office environments. This setup and configuration guide will walk you through the process of setting up and configuring your Speedport W 700V router, ensuring that you can maximize its performance and security while enjoying seamless internet access.
Whether you’re setting up your router for the first time or looking to customize its settings to better suit your needs, this guide will provide you with step-by-step instructions and tips to help you get the most out of your Speedport W 700V router. From basic setup and network configuration to advanced security settings and troubleshooting, we’ve got you covered. Let’s get started!
Unboxing and Initial Setup
When unboxing your Speedport W 700V router, you’ll typically find the following items included in the package:
- Speedport W 700V router
- Power adapter
- Ethernet cable
- DSL cable (for connecting to your DSL modem)
- Quick start guide and user manual
Once you have all the necessary components, follow these steps to set up your Speedport W 700V router:
- Choose a Central Location: Select a central location for your router where it can provide optimal Wi-Fi coverage throughout your home or office.
- Connect Power: Plug the power adapter into the router’s power port and connect it to a power outlet. Ensure that the power adapter is securely connected and that the router’s power LED indicator lights up.
- Connect to DSL Modem: If you’re using a DSL internet connection, connect one end of the DSL cable to the DSL port on the router and the other end to your DSL modem. Make sure the connection is secure.
- Connect to Computer: Use the provided Ethernet cable to connect your computer to one of the LAN ports on the router. This will allow you to access the router’s web interface for configuration.
- Power On: Turn on your computer and the DSL modem (if applicable). Wait for them to boot up completely before proceeding.
- Access Router Interface: Open a web browser on your computer and enter the default IP address for the router in the address bar. The default IP address for the Speedport W 700V router is typically “192.168.2.1”. Press Enter to access the router’s web interface.
- Log In: You will be prompted to log in to the router’s web interface. Use the default username and password provided in the router’s documentation or user manual. The default credentials are often “admin” for both the username and password.
- Follow Setup Wizard: Once logged in, you may be guided through a setup wizard that will help you configure basic settings such as internet connection type, wireless network name (SSID), and password.
- Save Settings: After completing the setup wizard or manually configuring the necessary settings, save your changes and wait for the router to apply the settings.
- Test Connection: Test your internet connection by opening a web browser and navigating to a website. If you can successfully access the internet, your router setup is complete.
Congratulations! You have successfully unboxed and set up your Speedport W 700V router. You can now proceed to further customize its settings to meet your specific networking needs.
Connecting to Power and Internet
To ensure your Speedport W 700V router functions properly, follow these steps to connect it to power and your internet source:
- Power Connection:
- Locate the power adapter included in the router’s package.
- Insert one end of the power adapter into the power port on the router.
- Plug the other end of the power adapter into a nearby power outlet.
- Ensure the power adapter is securely connected, and the router’s power LED lights up.
- Internet Connection:
- If you have a DSL internet connection:
- Use the DSL cable provided with the router.
- Connect one end of the DSL cable to the DSL port on the router.
- Connect the other end of the DSL cable to the DSL modem provided by your internet service provider (ISP).
- Ensure the DSL connection is securely plugged in at both ends.
- If you have a cable internet connection:
- Use an Ethernet cable to connect your cable modem to the WAN port on the router.
- Ensure the Ethernet cable is securely connected to both the modem and the router.
- If you have a DSL internet connection:
- Power On:
- Once the router is connected to power and the internet source, turn on the router by pressing the power button if available, or simply plugging in the power adapter.
- Wait for the router to boot up. This may take a few moments.
- Check Connection Status:
- Check the status LED indicators on the router to ensure that the power LED is lit up, indicating that the router has power, and the internet LED (DSL or WAN) is lit up or blinking, indicating that the router has successfully established an internet connection.
- Wait for Initialization:
- Allow the router a few minutes to initialize and establish a stable internet connection.
- During this time, the LED indicators may blink or change colors as the router completes its startup process.
- Test Connectivity:
- Once the initialization process is complete, test the internet connectivity by connecting a device (such as a computer or smartphone) to the router’s Wi-Fi network or using an Ethernet cable connected directly to one of the router’s LAN ports.
- Open a web browser on the connected device and navigate to a website to confirm that you can access the internet.
By following these steps, you can successfully connect your Speedport W 700V router to power and establish an internet connection, ensuring that your network is ready for use. If you encounter any issues during the setup process, refer to the router’s user manual or contact customer support for assistance.
Accessing the Router Interface
To access the router’s web interface for configuration and management, follow these steps:
- Connect to the Router:
- Ensure that your computer is connected to the router either via Ethernet cable or Wi-Fi.
- Open a Web Browser:
- Launch a web browser on your computer. You can use popular browsers such as Google Chrome, Mozilla Firefox, or Microsoft Edge.
- Enter the Router’s IP Address:
- In the address bar of the web browser, type the default IP address of the Speedport W 700V router. The default IP address is typically “192.168.2.1”.
- Press Enter to navigate to the router’s login page.
- Log In to the Router:
- You will be prompted to enter the router’s username and password. Use the default credentials provided in the router’s documentation or user manual. The default username and password are often “admin” for both.
- If you have changed the default credentials in the past and cannot remember them, you may need to perform a factory reset on the router to restore the default settings.
- Access the Dashboard:
- After successfully logging in, you will be directed to the router’s web-based management interface, also known as the dashboard or control panel.
- From the dashboard, you can access various settings and configurations to customize your router’s functionality according to your preferences.
- Explore Configuration Options:
- Navigate through the different sections and menus of the router’s interface to access configuration options such as wireless settings, network settings, security settings, and more.
- Familiarize yourself with the available options and make any necessary changes or adjustments based on your network requirements.
- Save Changes:
- After making any modifications to the router’s settings, remember to save your changes by clicking on the “Save” or “Apply” button within the interface.
- Some changes may require the router to reboot for the settings to take effect. If prompted, confirm the reboot action.
- Logout:
- Once you have finished configuring the router, it is recommended to log out of the web interface to prevent unauthorized access to your router’s settings.
- Look for the “Logout” or “Sign Out” option within the interface and click on it to log out.
By following these steps, you can easily access the web-based management interface of your Speedport W 700V router and customize its settings to suit your specific networking needs. If you encounter any issues or need further assistance, refer to the router’s user manual or contact customer support for help.
Basic Configuration Settings
Basic configuration settings for your Speedport W 700V router typically include:
- Wireless Network Setup:
- SSID (Service Set Identifier): Choose a unique name for your Wi-Fi network.
- Security Mode: Select the appropriate security mode (e.g., WPA2-PSK) to secure your Wi-Fi network.
- Wi-Fi Password: Set a strong password to prevent unauthorized access to your Wi-Fi network.
- LAN Settings:
- IP Address Range: Configure the IP address range for devices connected to the router’s LAN ports.
- DHCP Server: Enable or disable the router’s DHCP server to automatically assign IP addresses to connected devices.
- WAN Settings:
- Internet Connection Type: Select the appropriate connection type based on your internet service (e.g., PPPoE, DHCP).
- PPPoE Username and Password: If using PPPoE, enter the username and password provided by your ISP.
- Security Settings:
- Firewall: Enable or configure firewall settings to protect your network from unauthorized access and potential threats.
- Port Forwarding: Set up port forwarding rules to allow specific external traffic to reach devices on your network.
- Guest Network Setup (Optional):
- Enable a separate guest network with limited access to your main network for guests and visitors.
- Configure SSID, security settings, and password for the guest network.
- Parental Control Settings (Optional):
- Set up parental controls to restrict access to certain websites or internet services based on time schedules or content categories.
- Quality of Service (QoS):
- Prioritize certain types of internet traffic (e.g., streaming, gaming) over others to ensure a smooth and uninterrupted online experience.
- Firmware Updates:
- Check for firmware updates regularly and install them to ensure your router has the latest security patches and features.
These are some of the basic configuration settings that you may need to set up on your Speedport W 700V router. Access the router’s web interface as described earlier and navigate to the appropriate sections to configure these settings according to your preferences and requirements. Refer to the router’s user manual or online documentation for detailed instructions on configuring specific settings.
Security Settings
Security settings are crucial to safeguard your network from unauthorized access and potential threats. Here are some essential security settings you can configure on your Speedport W 700V router:
- Change Default Login Credentials:
- Change the default username and password used to access the router’s web interface. Choose strong, unique credentials to prevent unauthorized access.
- Wi-Fi Security:
- Enable WPA2-PSK (Wi-Fi Protected Access 2 – Pre-Shared Key) or WPA3 encryption to secure your Wi-Fi network.
- Set a strong Wi-Fi password (Pre-Shared Key) to prevent unauthorized users from accessing your network.
- Consider disabling WPS (Wi-Fi Protected Setup) to prevent brute-force attacks on your Wi-Fi network.
- Firewall Settings:
- Enable the router’s built-in firewall to monitor and control incoming and outgoing traffic.
- Configure firewall rules to block suspicious or unauthorized traffic and protect your network from external threats.
- Port Forwarding and Port Triggering:
- Only enable port forwarding or port triggering for specific applications or services that require inbound traffic from the internet.
- Avoid exposing unnecessary ports to reduce the risk of unauthorized access.
- DMZ (Demilitarized Zone):
- Consider setting up a DMZ to isolate certain devices or services from the rest of your network, providing an additional layer of security.
- MAC Address Filtering:
- Enable MAC address filtering to restrict access to your network based on the MAC addresses of connected devices.
- Only allow devices with registered MAC addresses to connect to your network.
- Guest Network Isolation:
- If your router supports guest networks, enable guest network isolation to prevent guest devices from accessing devices on your main network.
- Configure separate SSIDs and passwords for the guest network to keep it separate from your primary network.
- VPN (Virtual Private Network):
- Consider setting up a VPN server on your router to encrypt and secure your internet connection, especially when accessing the internet from public or unsecured networks.
- Remote Management:
- Disable remote management features unless absolutely necessary. Remote management can pose security risks if not properly secured.
- Firmware Updates:
- Regularly check for firmware updates provided by the router manufacturer and install them to ensure your router has the latest security patches and bug fixes.
By configuring these security settings on your Speedport W 700V router, you can enhance the security of your network and minimize the risk of unauthorized access and cyber threats. Always prioritize security measures to protect your sensitive information and maintain the integrity of your network.
Guest Network Setup
Setting up a guest network on your Speedport W 700V router allows you to provide internet access to visitors while keeping your main network secure. Here’s how you can set up a guest network:
- Access Router Interface:
- Open a web browser on a device connected to your router’s network.
- Enter the router’s IP address in the address bar and press Enter. The default IP address is typically “192.168.2.1”.
- Log in to the router’s web interface using your username and password.
- Navigate to Wireless Settings:
- Once logged in, navigate to the wireless settings section of the router’s interface. This may be located under the “Wireless” or “Wi-Fi” settings tab.
- Enable Guest Network:
- Look for an option to enable the guest network feature. This may be labeled as “Guest Network” or “Guest Wi-Fi”.
- Toggle the option to enable the guest network functionality.
- Configure Guest Network Settings:
- Once the guest network feature is enabled, you can customize the settings for the guest network.
- Set a unique SSID (Wi-Fi network name) for the guest network to distinguish it from your main network.
- Choose a security mode and password for the guest network. It’s recommended to use WPA2-PSK encryption with a strong password.
- Optional Settings:
- Some routers offer additional options for guest network configuration, such as bandwidth limitations, guest network isolation, and time limits.
- Configure these settings according to your preferences and requirements.
- Save Changes:
- After configuring the guest network settings, save your changes by clicking on the “Save” or “Apply” button within the router’s interface.
- Test Guest Network:
- Test the guest network by connecting a device to the guest Wi-Fi network using the SSID and password you configured.
- Verify that the device can successfully connect to the internet and access web pages.
- Provide Guest Network Details:
- Share the SSID and password of the guest network with your visitors so they can connect to the internet during their visit.
By following these steps, you can set up a guest network on your Speedport W 700V router, providing internet access to guests while maintaining the security of your main network. Ensure that you periodically review and update the guest network settings to ensure optimal security and functionality.
Parental Control Settings
Parental control settings on the Speedport W 700V router allow you to manage and restrict internet access for specific devices or users in your network. Here’s how you can set up parental controls:
- Access Router Interface:
- Open a web browser on a device connected to your router’s network.
- Enter the router’s IP address in the address bar and press Enter. The default IP address is typically “192.168.2.1”.
- Log in to the router’s web interface using your username and password.
- Navigate to Parental Control Settings:
- Once logged in, navigate to the parental control settings section of the router’s interface. This may be located under the “Security” or “Access Control” settings tab.
- Enable Parental Controls:
- Look for an option to enable parental controls or access control features.
- Toggle the option to enable parental control functionality.
- Add Devices or Users:
- Next, you’ll need to add the devices or users that you want to apply parental controls to.
- Some routers allow you to add devices based on their MAC addresses, while others may allow you to add users by specifying their usernames or IP addresses.
- Set Time Limits:
- Specify the time limits for when the devices or users are allowed to access the internet. You can set different time limits for weekdays and weekends.
- Some routers may also allow you to create custom schedules for internet access.
- Block Specific Websites or Content:
- If desired, you can block access to specific websites or types of content by adding them to a blacklist.
- Alternatively, you can create a whitelist of allowed websites and block access to all other sites.
- Save Changes:
- After configuring the parental control settings, save your changes by clicking on the “Save” or “Apply” button within the router’s interface.
- Test Parental Controls:
- Test the parental control settings by accessing the internet from the devices or users that you’ve applied the controls to.
- Verify that the controls are working as intended by ensuring that access to restricted websites or content is blocked during the specified periods.
- Adjust Settings as Needed:
- Periodically review and adjust the parental control settings as needed to accommodate changes in usage patterns or to add/remove devices or users from the controls.
By following these steps, you can set up parental controls on your Speedport W 700V router to manage and restrict internet access for specific devices or users in your network. These controls can help you enforce usage policies, protect children from inappropriate content, and manage screen time effectively.
Firmware Updates
Firmware updates for your Speedport W 700V router are essential for ensuring the device’s optimal performance, security, and compatibility with the latest technologies. Here’s how you can check for and install firmware updates:
- Access Router Interface:
- Open a web browser on a device connected to your router’s network.
- Enter the router’s IP address in the address bar and press Enter. The default IP address is typically “192.168.2.1”.
- Log in to the router’s web interface using your username and password.
- Navigate to Firmware Update Section:
- Once logged in, navigate to the firmware update section of the router’s interface. This may be located under the “Maintenance,” “Advanced,” or “System” settings tab.
- Check for Updates:
- Look for an option to check for firmware updates. This option may be labeled as “Firmware Update,” “Check for Updates,” or similar.
- Click on the option to initiate a check for available firmware updates.
- Download and Install Updates:
- If a firmware update is available, follow the on-screen instructions to download and install the update.
- During the update process, do not turn off the router or interrupt the firmware update, as this can potentially damage the device.
- Wait for Installation to Complete:
- Allow the router sufficient time to install the firmware update. The process may take several minutes, depending on the size of the update and the router’s processing speed.
- Reboot Router (If Necessary):
- After the firmware update is installed, the router may automatically reboot to apply the changes.
- If the router does not reboot automatically, you may need to manually restart it by unplugging the power adapter, waiting a few seconds, and then plugging it back in.
- Verify Firmware Version:
- Once the router has rebooted, log back into the router’s web interface and navigate to the firmware update section to verify that the update was successfully installed.
- Check the firmware version to ensure that it matches the latest version available from the manufacturer.
- Regularly Check for Updates:
- It’s a good practice to regularly check for firmware updates for your router, as manufacturers release updates to address security vulnerabilities, improve performance, and add new features.
- Set a reminder to check for updates periodically or enable automatic firmware update notifications if available.
By following these steps, you can check for and install firmware updates for your Speedport W 700V router, ensuring that your device remains up-to-date and secure. Regularly updating the firmware helps protect your network from potential security threats and ensures that your router operates smoothly.
Troubleshooting Common Issues
Here are some common issues that users may encounter with the Speedport W 700V router, along with troubleshooting steps to resolve them:
- Internet Connection Issues:
- Check the DSL or cable connection to ensure it is properly connected to the router.
- Restart the router and modem by unplugging them from power, waiting for a few minutes, and then plugging them back in.
- Check for any service outages or maintenance from your internet service provider (ISP).
- Ensure that the router’s WAN settings are configured correctly for your internet connection type.
- Slow Wi-Fi Speeds:
- Move closer to the router to improve signal strength if you are experiencing weak Wi-Fi signals.
- Reduce interference by placing the router away from electronic devices, microwaves, and cordless phones.
- Change the Wi-Fi channel on the router to avoid congestion from neighboring networks.
- Update the router’s firmware to the latest version to fix any performance-related issues.
- Wi-Fi Connection Drops:
- Restart the router and connected devices to refresh the network connection.
- Adjust the router’s wireless settings, such as the channel and frequency band, to improve stability.
- Update the Wi-Fi adapter drivers on your devices to the latest version.
- Reset the router to its factory default settings and reconfigure it from scratch if the issue persists.
- Inability to Access Router Interface:
- Ensure that you are using the correct IP address to access the router’s web interface.
- Check that the device you are using to access the interface is connected to the router’s network.
- Try accessing the interface from a different web browser or device to rule out browser-related issues.
- Reset the router to its factory default settings if you have forgotten the login credentials or if the interface is unresponsive.
- Firmware Update Failures:
- Ensure that the firmware file you are trying to install is compatible with your router model.
- Check the router’s internet connection and stability before attempting to update the firmware.
- Try downloading the firmware file from the manufacturer’s official website and manually installing it if automatic updates fail.
- Contact customer support for assistance if you continue to experience issues with firmware updates.
- Wireless Security Concerns:
- Change the default login credentials for accessing the router’s web interface to prevent unauthorized access.
- Enable WPA2-PSK encryption and use a strong Wi-Fi password to secure your wireless network.
- Disable Wi-Fi Protected Setup (WPS) to prevent potential security vulnerabilities.
- Regularly monitor connected devices and review access logs to detect any suspicious activity on your network.
If you encounter any other issues not listed here or if the troubleshooting steps provided do not resolve the problem, consider contacting customer support for further assistance. They can provide specialized guidance tailored to your specific situation and help you resolve the issue effectively.
Contacting Customer Support
If your issue is not resolved or if you have any further questions or concerns, don’t hesitate to follow up with customer support for additional assistance.
By contacting customer support, you can get expert assistance and guidance to resolve any issues you may encounter with your Speedport W 700V router. Customer support representatives are trained to provide technical support and troubleshooting assistance to help you get your router back up and running smoothly.
FAQS
What is the Speedport W 700V router?
The Speedport W 700V is a router provided by Deutsche Telekom, a German telecommunications company. It is designed to provide high-speed internet access and enable networking for home or small office environments.
How do I access the Speedport W 700V’s web interface?
To access the router’s web interface, connect a computer or device to the router either via Ethernet cable or Wi-Fi. Open a web browser and enter the router’s default IP address in the address bar. The default IP address for Speedport routers is often “192.168.2.1.” You’ll be prompted to log in with a username and password.
I forgot my Speedport W 700V login credentials. What should I do?
If you forget your login credentials, check the label on the router for the default username and password. Commonly, the default values are “admin” for both the username and password. If you’ve changed the credentials and can’t recall them, you may need to perform a factory reset on the router to restore the defaults.
How can I change the Wi-Fi network name (SSID) and password on my Speedport W 700V?
You can typically change the SSID and Wi-Fi password in the router’s settings. Log in to the router’s web interface, go to the “Wireless” or “Wi-Fi” section, and look for options to change the SSID and password. It’s essential to choose a strong password for security.
Can I set up a guest network on the Speedport W 700V?
Yes, the Speedport W 700V supports the creation of a guest network. You can usually find this option in the router’s settings under the Wi-Fi or Wireless section. Enabling a guest network allows visitors to access the internet without giving them access to your main network.
How can I update the firmware on my Speedport W 700V?
To update the router’s firmware, visit the Deutsche Telekom website or the router’s official support page. Download the latest firmware update for your specific router model. Then, log in to the router’s web interface, navigate to the firmware update section, and follow the instructions to install the update.
What should I do if I’m experiencing slow internet speeds or connectivity issues with my Speedport W 700V?
If you’re encountering network issues, try the following:
- Check your internet service provider’s status for any outages or issues.
- Restart the router and your modem.
- Update the router’s firmware.
- Ensure that you haven’t exceeded your data limit if you have a data-capped plan.
- Check for interference from other electronic devices.
- Contact your ISP or Speedport customer support for further assistance if the problem persists.
Can I use the Speedport W 700V with different internet service providers, or is it locked to Deutsche Telekom?
The Speedport W 700V is typically provided by Deutsche Telekom for their customers. It may come pre-configured for their services, but it can often be reconfigured for use with other internet service providers by adjusting the internet connection settings in the router’s web interface. However, it’s essential to check compatibility with your specific ISP and follow their configuration guidelines.
How can I reset the Speedport W 700V to its factory defaults?
To perform a factory reset on the Speedport W 700V, locate the reset button on the router (usually a small hole). Use a paperclip or a similar tool to press and hold the button for approximately 10 seconds. This will reset the router to its default settings.
What should I do if I encounter technical issues with my Speedport W 700V that I can’t resolve on my own?
If you encounter technical issues that you can’t resolve through troubleshooting, it’s advisable to contact Deutsche Telekom’s customer support or seek assistance from a professional technician familiar with the Speedport W 700V router and Deutsche Telekom’s services. They can provide specialized support and guidance for your specific situation.
Conclusion
Setting up and configuring your Speedport W 700V router may seem daunting initially, but by following these steps, you can ensure that your router is properly configured for a stable and secure network connection. Keep your router’s firmware updated and periodically review and adjust your settings to meet your network’s changing needs. If you encounter any issues during the setup process, consult the router’s manual or contact your internet service provider for assistance.