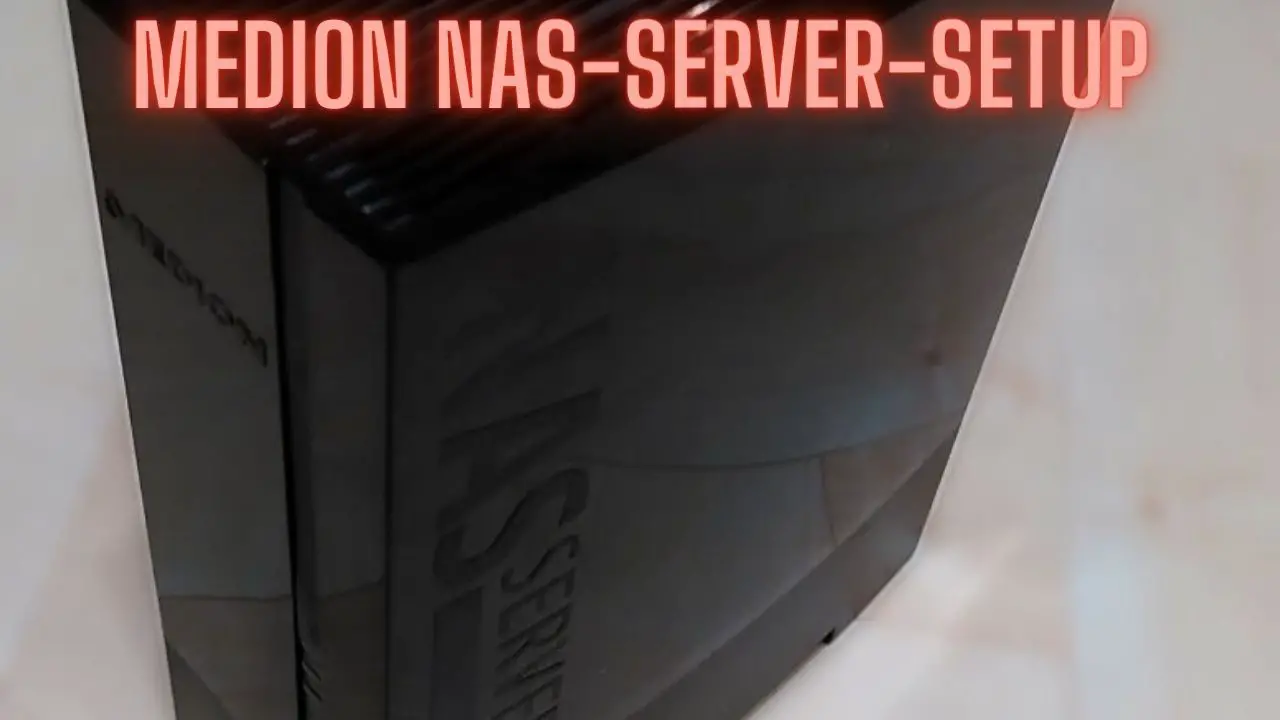
Setting Up a Medion NAS Server for Your Home Network
Introduction
In today’s digital age, managing and storing data has become increasingly important for individuals and families alike. Whether it’s family photos, important documents, or media collections, having a centralized and reliable storage solution can streamline access and ensure data safety.
A Network Attached Storage (NAS) server offers an ideal solution for home networks, providing a dedicated storage system accessible by multiple devices within your network. Among the many options available, Medion NAS servers stand out for their user-friendly interfaces, robust features, and affordable prices.
This guide is designed to help you set up and maximize the potential of your Medion NAS server within your home network. From initial setup to advanced configurations, we’ll walk you through each step to ensure you get the most out of your investment.
Whether you’re a novice looking to dip your toes into home network storage or a seasoned user seeking optimization tips, this guide has something for everyone. So let’s dive in and unlock the full potential of your Medion NAS server.
Understanding the Benefits of a NAS Server
A Network Attached Storage (NAS) server offers a range of benefits for individuals and families looking to manage their digital data effectively. Here are some key advantages:
- Centralized Storage: A NAS server provides a centralized repository for all your digital files, including documents, photos, videos, and music. This centralized storage simplifies file management by eliminating the need to store files across multiple devices.
- Easy File Access: With a NAS server, you can access your files from any device connected to your home network, including computers, smartphones, tablets, and smart TVs. This accessibility ensures that your files are always within reach, whether you’re at home or on the go.
- Data Backup and Redundancy: NAS servers typically offer RAID (Redundant Array of Independent Disks) configurations, allowing you to create redundant copies of your data for added security. In the event of a hard drive failure, your data remains intact, minimizing the risk of data loss.
- Media Streaming: Many NAS servers come with built-in media server software, enabling you to stream movies, music, and photos to compatible devices such as smart TVs, gaming consoles, and media players. This feature is ideal for creating a centralized entertainment hub for your home.
- File Sharing and Collaboration: NAS servers allow multiple users to access and share files simultaneously, making them ideal for households with multiple family members or small businesses. You can also set up user permissions to control access to sensitive files and folders.
- Remote Access: With the right configuration, you can access your NAS server remotely over the internet, allowing you to retrieve files or manage your storage even when you’re away from home. This feature is convenient for travelers or individuals who work remotely.
- Expandable Storage: NAS servers are typically designed to accommodate multiple hard drives, allowing you to expand your storage capacity as your needs grow. You can easily add additional drives or upgrade existing ones to accommodate larger file collections.
Overall, a NAS server offers a versatile and scalable solution for managing your digital data, providing convenience, security, and peace of mind. Whether you’re a casual user looking to store family photos or a power user with extensive media collections, a NAS server can cater to your needs effectively.
Choosing the Right Medion NAS Model for Your Needs
When selecting a Medion NAS (Network Attached Storage) model for your home network, it’s essential to consider several factors to ensure that it meets your requirements. Here are some key aspects to consider:
- Storage Capacity: Determine the amount of storage space you need based on your current and anticipated future needs. Medion offers NAS models with varying storage capacities, ranging from single-drive systems to multi-bay units that can accommodate several hard drives.
- Number of Drive Bays: Consider how many hard drives you intend to use in your NAS setup. Single-bay NAS models are suitable for basic storage needs and are typically more budget-friendly, while multi-bay models offer increased storage capacity and support for RAID configurations for data redundancy and performance.
- Performance Requirements: Assess your performance requirements based on the types of tasks you’ll be using the NAS for. If you’ll primarily be storing and accessing documents and photos, a basic model with moderate processing power may suffice. However, if you plan to stream high-definition media or run resource-intensive applications, you may need a model with more processing power and RAM.
- Connectivity Options: Consider the connectivity options offered by the NAS model, including Ethernet ports for network connectivity, USB ports for connecting external storage devices or printers, and HDMI ports for direct connection to displays or TVs. Choose a model that offers the right combination of connectivity options for your needs.
- Software Features: Evaluate the software features and capabilities of the NAS model, including the operating system, file management tools, backup solutions, media server functionality, and remote access options. Ensure that the NAS software meets your requirements and is user-friendly for easy setup and management.
- Budget: Determine your budget for purchasing a Medion NAS server and choose a model that offers the best combination of features and affordability within your budget constraints. Consider the long-term value and scalability of the NAS model to ensure that it remains suitable for your needs as they evolve.
By carefully considering these factors, you can select the right Medion NAS model that meets your storage requirements, performance needs, and budget constraints, providing a reliable and efficient storage solution for your home network.
Unboxing and Initial Setup
Setting up your Medion NAS server for the first time is a straightforward process. Follow these steps to unbox and perform the initial setup:
1. Unboxing:
- Carefully unpack the Medion NAS server and its accessories.
- Ensure that all included components, such as the power adapter, Ethernet cable, and documentation, are present.
2. Hardware Setup:
- Place the NAS server in a well-ventilated area with sufficient space around it.
- Connect the NAS server to your router or switch using the provided Ethernet cable. Ensure that the cable is securely plugged into the LAN port on the NAS and an available LAN port on your router or switch.
- Connect the power adapter to the NAS server and plug it into a power outlet. Turn on the NAS server by pressing the power button, if available.
3. Initial Configuration:
- Once the NAS server is powered on, wait for it to boot up. This process may take a few minutes.
- Open a web browser on a computer connected to the same network as the NAS server.
- Enter the default IP address or hostname of the NAS server in the address bar of the web browser. Refer to the user manual or documentation for the specific IP address or hostname.
- Press Enter to access the web-based management interface of the NAS server.
4. Login and Setup Wizard:
- Log in to the NAS server using the default username and password, if prompted. Refer to the user manual or documentation for the default login credentials.
- Follow the on-screen instructions to complete the initial setup wizard. This may include configuring basic network settings, setting up user accounts, and selecting storage options.
5. Firmware Update:
- Check for any available firmware updates for your Medion NAS server. This ensures that you have the latest features, bug fixes, and security patches.
- Follow the instructions provided by the NAS server’s management interface to download and install any available firmware updates.
6. Data Storage Setup:
- Configure storage options according to your preferences and requirements. This may include creating storage volumes, setting up RAID configurations for data redundancy, and configuring shared folders.
7. Network Access and Permissions:
- Set up network access permissions to control which devices and users can access the NAS server and its shared folders. Configure user accounts and assign appropriate permissions as needed.
8. Additional Configuration:
- Explore additional features and settings offered by the NAS server, such as media server functionality, backup solutions, remote access, and more.
- Customize settings according to your preferences and requirements.
9. Documentation and Support:
- Refer to the user manual and documentation provided with your Medion NAS server for detailed instructions and troubleshooting tips.
- Explore online resources, forums, and support channels for additional assistance if needed.
By following these steps, you can successfully unbox and perform the initial setup of your Medion NAS server, providing a reliable storage solution for your home network.
Connecting the NAS to Your Home Network
Connecting your Medion NAS server to your home network is essential for accessing and managing your files across various devices. Here’s a step-by-step guide to help you with the process:
1. Choose a Location:
- Select a suitable location for your Medion NAS server. Ensure that it’s placed in a well-ventilated area with adequate airflow to prevent overheating.
2. Gather Required Components:
- Make sure you have the following components ready:
- Medion NAS server
- Ethernet cable (usually provided with the NAS)
- Router or switch
- Power adapter for the NAS
3. Locate Ethernet Port on NAS:
- Identify the Ethernet port on the back of your Medion NAS server. It’s typically labeled as “LAN” or “Ethernet.”
4. Connect NAS to Router or Switch:
- Use the provided Ethernet cable to connect one end to the LAN port on your Medion NAS server.
- Connect the other end of the Ethernet cable to an available LAN port on your router or switch. Ensure a secure connection.
5. Power On NAS:
- Plug the power adapter into the power port on your Medion NAS server.
- Connect the power adapter to a power outlet.
- Turn on the NAS server by pressing the power button, if available. Allow the NAS to boot up fully.
6. Check Network Connection:
- Once the NAS is powered on, check the network connection status.
- Most NAS devices have indicator lights to show network connectivity. Look for a solid or blinking light near the Ethernet port to confirm the connection.
7. Obtain IP Address:
- To access the NAS server’s web-based management interface, you’ll need its IP address.
- You can typically find the IP address assigned to the NAS server in your router’s administration interface. Look for connected devices or DHCP lease information.
8. Access NAS Interface:
- Open a web browser on a computer connected to the same home network.
- Enter the IP address of the Medion NAS server in the address bar of the web browser.
- Press Enter to access the NAS’s web interface.
9. Login and Configure:
- Log in to the NAS’s web interface using the default username and password (found in the user manual or provided documentation).
- Follow the setup wizard or navigate through the settings to configure network settings, user accounts, shared folders, and any other desired configurations.
10. Test Access:
- After configuring the NAS, test access from other devices on your home network.
- Access shared folders, transfer files, or stream media to ensure everything is working correctly.
11. Secure Network Access (Optional):
- Consider configuring security features such as user authentication, encryption, and firewall settings to protect your NAS and data from unauthorized access.
By following these steps, you can easily connect your Medion NAS server to your home network, enabling seamless access and management of your files from various devices within your network.
Accessing the NAS Web Interface
Accessing the web interface of your Medion NAS server allows you to configure settings, manage files, and perform various administrative tasks. Here’s how you can access the NAS web interface:
1. Obtain the NAS IP Address:
- Before accessing the web interface, you need to know the IP address assigned to your Medion NAS server.
- You can typically find this information in your router’s administration interface under connected devices or DHCP lease information.
2. Open a Web Browser:
- On a computer or device connected to the same network as your Medion NAS server, open a web browser such as Google Chrome, Mozilla Firefox, Safari, or Microsoft Edge.
3. Enter the NAS IP Address:
- In the address bar of the web browser, type the IP address of your Medion NAS server.
- The format should be something like http://[NAS_IP_Address] or https://[NAS_IP_Address]. Replace [NAS_IP_Address] with the actual IP address of your NAS.
4. Press Enter:
- After entering the IP address, press Enter on your keyboard or click on the browser’s “Go” button to navigate to the NAS web interface.
5. Login to the Web Interface:
- You will be prompted to log in to the NAS web interface.
- Enter the username and password associated with your NAS server. These credentials are typically provided in the NAS documentation or during the initial setup process.
6. Access the Interface:
- Once logged in, you should be directed to the main dashboard or control panel of the NAS web interface.
- From here, you can navigate through the various settings, configurations, and options available to manage your NAS server.
7. Explore Features and Settings:
- Take some time to explore the different features and settings offered by the NAS web interface.
- Depending on your Medion NAS model and firmware version, you may have access to options such as storage management, user accounts, network settings, backup configurations, media server settings, and more.
8. Configure as Needed:
- Depending on your requirements, you can configure various aspects of your Medion NAS server through the web interface.
- This may include setting up shared folders, creating user accounts, configuring RAID levels, enabling remote access, and more.
9. Save Settings and Logout:
- After making any changes or configurations, remember to save your settings if applicable.
- Once you’re done, it’s a good practice to log out of the NAS web interface to prevent unauthorized access.
By following these steps, you can easily access the web interface of your Medion NAS server and start managing it to suit your specific needs and preferences.
Configuring Users and Permissions
Configuring users and permissions on your Medion NAS server is crucial for controlling access to files and ensuring data security within your home network. Here’s a step-by-step guide to help you set up users and permissions:
1. Access the NAS Web Interface:
- Open a web browser on a device connected to the same network as your Medion NAS server.
- Enter the IP address of your NAS in the address bar and press Enter to access the web interface.
- Log in with your administrator credentials.
2. Navigate to User Management:
- Once logged in, navigate to the user management section of the NAS interface. This may be located under “Settings,” “Access Control,” or a similar menu option depending on your NAS model and firmware.
3. Add New Users:
- Look for an option to add new users and click on it.
- Enter the necessary details for the new user, including username, password, and any additional information required.
4. Assign User Permissions:
- After adding a new user, you’ll need to assign permissions to determine what actions they can perform and which files they can access.
- Typically, you can specify read, write, or delete permissions for each shared folder on the NAS.
- You may also have the option to set permissions at the file or folder level for more granular control.
5. Create User Groups (Optional):
- If you have multiple users with similar permissions requirements, consider creating user groups to simplify permission management.
- Assign permissions to user groups rather than individual users, making it easier to manage access control.
6. Set User Quotas (Optional):
- Some NAS models allow you to set quotas for individual users or user groups, limiting the amount of storage space they can consume.
- This can help prevent one user from monopolizing available storage resources.
7. Configure Remote Access Permissions (Optional):
- If you plan to access your NAS remotely over the internet, ensure that you configure remote access permissions for each user.
- Specify which users are allowed remote access and define any restrictions or limitations as needed.
8. Save Settings and Apply Changes:
- Once you’ve configured user accounts and permissions, be sure to save your settings.
- Apply any changes to activate the new user accounts and permissions configurations.
9. Test User Access:
- After configuring user accounts and permissions, it’s essential to test user access to ensure that everything is working correctly.
- Log in to the NAS with the credentials of each user account and verify that they can access their designated folders and perform the necessary actions.
10. Regularly Review and Update Permissions:
- Periodically review and update user permissions as needed, especially as your data storage and user base evolve.
- Remove or modify permissions for users who no longer require access to specific folders or files.
By following these steps, you can effectively configure users and permissions on your Medion NAS server, ensuring that your data remains secure and accessible within your home network.
Setting Up Shared Folders
Setting up shared folders on your Medion NAS server allows you to organize and manage your files efficiently, enabling easy access and collaboration within your home network. Here’s a step-by-step guide to help you set up shared folders:
1. Access the NAS Web Interface:
- Open a web browser on a device connected to the same network as your Medion NAS server.
- Enter the IP address of your NAS in the address bar and press Enter to access the web interface.
- Log in with your administrator credentials.
2. Navigate to Shared Folders Settings:
- Once logged in, navigate to the shared folders settings section of the NAS interface. This may be located under “Storage,” “File Sharing,” or a similar menu option depending on your NAS model and firmware.
3. Create a New Shared Folder:
- Look for an option to create a new shared folder and click on it.
- Enter a name for the shared folder, and optionally, provide a description to help identify its purpose.
4. Set Permissions for the Shared Folder:
- Specify the permissions for the shared folder to control who can access it and what actions they can perform.
- You can typically set permissions for individual users or user groups, specifying read-only, read-write, or no access permissions.
5. Configure Advanced Settings (Optional):
- Depending on your NAS model and firmware, you may have the option to configure advanced settings for the shared folder.
- This may include setting up access restrictions based on time or IP address, enabling encryption, enabling file compression, and more.
6. Assign Quotas (Optional):
- If desired, you can assign storage quotas to limit the amount of disk space that users can consume within the shared folder.
- Specify the maximum quota size for each user or user group to prevent storage resource misuse.
7. Enable Services and Protocols (Optional):
- Determine which services and protocols you want to enable for the shared folder. This may include SMB/CIFS for Windows file sharing, NFS for Unix/Linux file sharing, AFP for Mac file sharing, FTP, or others.
- Enable the appropriate services and configure settings such as authentication methods and security options.
8. Save Settings and Apply Changes:
- Once you’ve configured the shared folder settings, be sure to save your changes.
- Apply any changes to activate the new shared folder and permissions configurations.
9. Test Access to the Shared Folder:
- After setting up the shared folder, it’s essential to test access to ensure that it’s working correctly.
- Log in to the NAS with the credentials of a user account that has access to the shared folder and verify that you can access it and perform the necessary actions (e.g., upload, download, delete files).
10. Repeat for Additional Shared Folders (if needed):
- If you have multiple shared folders to set up, repeat the above steps for each additional folder.
By following these steps, you can effectively set up shared folders on your Medion NAS server, enabling seamless file sharing and collaboration within your home network.
Configuring RAID for Data Redundancy (if applicable)
Configuring RAID (Redundant Array of Independent Disks) on your Medion NAS server is a crucial step to ensure data redundancy and protection against disk failure. Here’s how you can set up RAID, if applicable to your NAS model:
1. Access the NAS Web Interface:
- Open a web browser and enter the IP address of your Medion NAS server to access the web interface.
- Log in with your administrator credentials.
2. Navigate to Storage Management:
- Look for the storage management or RAID configuration section within the NAS interface. This may be located under “Storage,” “Disk Management,” or a similar menu option.
3. Check Supported RAID Levels:
- Determine which RAID levels are supported by your Medion NAS server. Common RAID levels include RAID 0, RAID 1, RAID 5, RAID 6, and RAID 10.
- Each RAID level offers a different balance of performance, capacity, and redundancy. Choose the RAID level that best fits your needs.
4. Create a RAID Volume:
- Select the option to create a new RAID volume.
- Choose the RAID level you want to use for your storage configuration. Follow any on-screen prompts to configure additional settings such as disk allocation, stripe size, and file system format.
5. Select Disks for RAID Array:
- If your NAS has multiple drive bays, select the disks you want to include in the RAID array.
- Depending on the RAID level chosen, you may need a minimum number of disks to create the array.
6. Initialize and Build the RAID Array:
- Once you’ve selected the disks and configured RAID settings, initialize the RAID array.
- This process may involve formatting the disks and configuring data redundancy or striping, depending on the RAID level chosen.
- Allow the NAS server some time to build the RAID array, as this process may take several hours depending on the size of the disks and RAID configuration.
7. Verify RAID Status:
- After the RAID array is built, verify its status to ensure that it’s functioning correctly.
- Check the RAID management section of the NAS interface for information on the RAID volume, including disk health, capacity, and redundancy status.
8. Configure Hot Spare (Optional):
- Consider configuring a hot spare disk if your NAS supports it. A hot spare is a standby disk that automatically replaces a failed disk in the RAID array, reducing downtime and improving data protection.
9. Monitor RAID Health:
- Regularly monitor the health and status of your RAID array using the NAS interface.
- Keep an eye out for any alerts or notifications indicating disk failures, degraded RAID arrays, or other issues that require attention.
10. Backup Data Regularly:
- While RAID provides redundancy against disk failures, it’s not a substitute for regular backups. Make sure to implement a backup strategy to protect your data against other types of loss, such as accidental deletion, file corruption, or catastrophic hardware failure.
By following these steps, you can effectively configure RAID for data redundancy on your Medion NAS server, ensuring that your data remains protected and accessible in the event of disk failure.
Installing and Configuring Backup Solutions
Installing and configuring backup solutions for your Medion NAS server is essential to safeguard your data against loss or corruption. Here’s how you can set up backup solutions:
1. Assess Backup Requirements:
- Determine the types of data you need to back up, including documents, photos, videos, and other important files.
- Consider factors such as data volume, frequency of backups, and retention policies when planning your backup strategy.
2. Choose Backup Software:
- Research and select backup software that is compatible with your Medion NAS server and meets your requirements.
- Many NAS models come with built-in backup applications, but you may also explore third-party options for additional features and flexibility.
3. Install Backup Software:
- If using third-party backup software, follow the manufacturer’s instructions to download and install the software on your computer or NAS server.
- For built-in backup applications, access the NAS web interface and navigate to the backup or app installation section to install the required software.
4. Configure Backup Jobs:
- Launch the backup software and configure backup jobs to define what data will be backed up, where it will be stored, and how often backups will occur.
- Specify the source files or folders on your NAS server that you want to back up, as well as the destination where backups will be stored (e.g., another NAS, external hard drive, cloud storage).
5. Schedule Regular Backups:
- Set up a backup schedule to ensure that backups occur regularly and automatically according to your desired frequency (e.g., daily, weekly).
- Consider scheduling backups during off-peak hours to minimize the impact on network performance.
6. Enable Versioning and Retention Policies:
- Configure versioning and retention policies to retain multiple versions of backed-up files and define how long backups will be retained.
- This allows you to recover previous versions of files in case of accidental deletion or data corruption.
7. Test Backup and Restore Processes:
- After configuring backup jobs, perform test backups to ensure that data is being backed up properly.
- Test the restore process to verify that you can successfully recover files from backups when needed.
8. Monitor Backup Status:
- Regularly monitor the status of backup jobs to ensure that backups are running as scheduled and that no errors or issues occur.
- Set up alerts or notifications to notify you of backup failures or other critical events.
9. Implement Off-Site Backup (Optional):
- Consider implementing off-site backup to protect your data against localized disasters such as fires, floods, or theft.
- This may involve replicating backups to a remote NAS, using cloud storage services, or physically storing backups in a secure off-site location.
10. Review and Update Backup Strategy:
- Periodically review and update your backup strategy to accommodate changes in data volume, storage requirements, and technology advancements.
- Ensure that your backup solution remains robust and capable of meeting your evolving needs.
By following these steps, you can effectively install and configure backup solutions for your Medion NAS server, ensuring that your data remains protected and accessible in the event of data loss or corruption.
Remote Access and Cloud Integration
Setting up remote access and cloud integration for your Medion NAS server allows you to access your files and manage your storage from anywhere with an internet connection. Here’s how you can set it up:
1. Enable Remote Access:
- Access the web interface of your Medion NAS server.
- Navigate to the remote access or cloud integration settings. This may be located under “Settings,” “Network,” or a similar menu option.
- Enable remote access features such as FTP, WebDAV, or VPN, depending on your NAS model and preferences.
2. Configure Dynamic DNS (DDNS):
- If your NAS server’s public IP address is dynamic (changes periodically), consider setting up Dynamic DNS (DDNS) to assign a domain name to your NAS server’s IP address.
- Many NAS models support DDNS services such as DynDNS, No-IP, or DuckDNS. Follow the instructions provided by your NAS manufacturer or DDNS service provider to configure DDNS on your NAS.
3. Set Up Port Forwarding (If Necessary):
- If your NAS is behind a router or firewall, you may need to set up port forwarding to allow external access to your NAS server.
- Log in to your router’s administration interface and configure port forwarding rules to forward specific ports (e.g., FTP, HTTP, HTTPS) to your NAS server’s internal IP address.
4. Configure Remote Access Applications:
- Install and configure remote access applications on your devices, such as FileZilla for FTP access or WebDAV clients for WebDAV access.
- Use the DDNS hostname or your NAS server’s public IP address along with the appropriate port number to connect to your NAS remotely.
5. Secure Remote Access:
- Implement security measures to protect remote access to your NAS server, such as using strong, unique passwords for user accounts and enabling encryption protocols (e.g., SSL/TLS) for secure communication.
- Consider setting up two-factor authentication (2FA) to add an extra layer of security to your remote access setup.
6. Set Up Cloud Integration:
- Many NAS models offer built-in cloud integration features that allow you to sync your files with popular cloud storage services such as Dropbox, Google Drive, or OneDrive.
- Navigate to the cloud integration settings in your NAS web interface and follow the prompts to connect your NAS to your preferred cloud storage service.
7. Configure Sync Settings:
- Once connected, configure sync settings to specify which files or folders you want to sync between your NAS server and the cloud storage service.
- You can typically choose to sync files bidirectionally (both ways) or unidirectionally (one-way) depending on your needs.
8. Monitor Remote Access and Cloud Sync:
- Regularly monitor remote access and cloud sync activities to ensure that they are functioning as expected.
- Check for any errors or issues that may arise and troubleshoot them promptly to maintain seamless remote access and data synchronization.
9. Review Security and Privacy Settings:
- Periodically review and update security and privacy settings for remote access and cloud integration to ensure that your data remains secure and protected.
By following these steps, you can effectively set up remote access and cloud integration for your Medion NAS server, enabling you to access and manage your files from anywhere while keeping your data secure and synchronized.
Media Server Setup for Streaming Content
Setting up a media server on your Medion NAS server allows you to stream multimedia content such as movies, music, and photos to various devices within your home network. Here’s how you can set it up:
1. Check Media Server Compatibility:
- Ensure that your Medion NAS server supports media server functionality. Most NAS models offer built-in media server applications or support third-party media server software.
2. Access the NAS Web Interface:
- Open a web browser and enter the IP address of your Medion NAS server to access the web interface.
- Log in with your administrator credentials.
3. Install Media Server Software (if necessary):
- If your NAS does not have a built-in media server application, you may need to install third-party media server software.
- Look for media server applications such as Plex, Emby, or Twonky in the NAS’s app store or package manager. Follow the instructions to install the desired media server software.
4. Configure Media Server Settings:
- Once installed, access the media server settings within the NAS web interface.
- Configure settings such as media library locations, supported file formats, transcoding options (if applicable), and access permissions.
5. Add Media Files to Library:
- Specify the folders on your NAS where your media files are stored (e.g., movies, music, photos).
- Add these folders to the media server’s library to allow the server to index and organize your media content.
6. Enable Media Server:
- Enable the media server application or service within the NAS interface.
- This typically involves toggling a switch or selecting an option to start the media server.
7. Access Media Server from Client Devices:
- On your client devices (e.g., smart TVs, streaming media players, gaming consoles, computers), look for the media server in the list of available network devices or media sources.
- Open the media server app or navigate to the media server’s network location to access your media library.
8. Stream and Enjoy Content:
- Browse through your media library on the client device and select the content you want to stream.
- Depending on the media server software and client device capabilities, you may be able to stream content in various formats and resolutions.
9. Customize Settings (Optional):
- Explore additional settings and customization options offered by the media server software.
- This may include configuring transcoding settings, setting up user accounts and permissions, enabling remote access, and more.
10. Monitor Performance and Troubleshoot:
- Regularly monitor the performance of your media server to ensure smooth streaming experiences.
- If you encounter any issues or playback errors, troubleshoot them promptly by checking network connections, server settings, and client device compatibility.
By following these steps, you can effectively set up a media server on your Medion NAS server, allowing you to stream multimedia content to various devices within your home network for an enjoyable entertainment experience.
Securing Your Medion NAS Server
Securing your Medion NAS server is essential to protect your data and prevent unauthorized access. Here are some key steps to enhance the security of your NAS server:
1. Change Default Passwords:
- Change the default administrator password for accessing the NAS web interface. Use a strong, unique password that includes a combination of letters, numbers, and special characters.
2. Update Firmware and Software:
- Regularly check for firmware updates for your Medion NAS server and install them promptly. Updates often include security patches and bug fixes that help protect against vulnerabilities.
3. Enable Firewall:
- Enable the built-in firewall feature on your NAS server to block unauthorized access attempts and protect against network threats.
4. Use Encryption:
- Enable encryption for sensitive data stored on your NAS server. Many NAS models support encryption for shared folders or entire volumes, providing an extra layer of security against unauthorized access.
5. Implement User Authentication:
- Configure user authentication mechanisms such as username/password authentication or two-factor authentication (2FA) to control access to the NAS server and its resources.
6. Set Up Access Controls:
- Configure access controls and permissions to restrict access to sensitive files and folders. Assign permissions to user accounts or groups based on the principle of least privilege to limit exposure to potential security risks.
7. Monitor Network Activity:
- Regularly monitor network activity on your NAS server to detect any unusual or suspicious behavior. Use built-in logging and monitoring features or third-party security tools to track access attempts and identify potential security threats.
8. Enable Network Segmentation:
- Implement network segmentation to isolate your NAS server from other devices and segments of your home network. This helps contain security breaches and prevent unauthorized access to sensitive data.
9. Backup Regularly:
- Implement a robust backup strategy to regularly back up your data stored on the NAS server. This ensures that you have a copy of your data in case of accidental deletion, data corruption, or a security breach.
10. Physical Security:
- Ensure that physical access to your NAS server is restricted to authorized individuals. Place the NAS server in a secure location and consider using physical locks or security cables to prevent theft or tampering.
11. Stay Informed:
- Stay informed about emerging security threats and best practices for securing network-attached storage devices. Regularly review security advisories, forums, and community resources for the latest information and updates.
By following these steps, you can strengthen the security of your Medion NAS server and protect your data from potential threats and vulnerabilities.
Troubleshooting Common Issues
Troubleshooting common issues with your Medion NAS server can help you quickly resolve problems and ensure smooth operation. Here are some common issues and troubleshooting steps:
1. Unable to Access NAS Web Interface:
- Check the network connection between your computer and the NAS server. Ensure that both devices are connected to the same network and that there are no network connectivity issues.
- Verify that you are entering the correct IP address or hostname of the NAS server in the web browser’s address bar.
- Check firewall settings on your computer or router to ensure that they are not blocking access to the NAS web interface.
- Restart the NAS server and try accessing the web interface again.
2. Slow Performance or Connectivity Issues:
- Check the network bandwidth and latency between your computer and the NAS server. Use network diagnostic tools or utilities to identify any network congestion or performance issues.
- Ensure that the NAS server’s firmware and software are up to date. Install any available updates or patches that may address performance issues.
- Check for background processes or tasks running on the NAS server that may be consuming resources and affecting performance. Consider scheduling resource-intensive tasks during off-peak hours.
- Review and optimize network settings on both the NAS server and client devices to improve performance. This may include adjusting network adapter settings, enabling jumbo frames, or configuring Quality of Service (QoS) settings on your router.
3. Data Access or File Sharing Problems:
- Verify that shared folders and network shares are properly configured on the NAS server. Check permissions and access controls to ensure that users have the necessary permissions to access shared files and folders.
- Check for disk errors or storage issues on the NAS server. Use built-in diagnostic tools or utilities to scan for disk errors and repair any issues found.
- Ensure that the NAS server’s file system is compatible with the operating system and file sharing protocols used by client devices. Consider formatting the storage drives with a compatible file system if necessary.
- Test file sharing and data access using different client devices and protocols (e.g., SMB/CIFS, NFS, FTP) to isolate the issue and determine if it is specific to certain devices or protocols.
4. Backup or Sync Failures:
- Review backup or sync settings on the NAS server and client devices to ensure that they are configured correctly. Check for any errors or warnings in backup logs or sync reports that may indicate the cause of the failure.
- Verify that there is sufficient storage space available on both the NAS server and destination storage devices for backups or sync operations.
- Check network connectivity and bandwidth between the NAS server and destination storage devices. Slow or unreliable network connections may cause backup or sync failures.
- Ensure that backup or sync software is up to date and compatible with the NAS server and client devices. Install any available updates or patches that may address compatibility issues or bugs affecting backup or sync operations.
5. Hardware or Disk Failures:
- Monitor the health and status of storage drives installed in the NAS server. Use built-in diagnostic tools or SMART (Self-Monitoring, Analysis, and Reporting Technology) utilities to check for disk errors or failures.
- Replace any failed or failing storage drives as soon as possible to prevent data loss or corruption. Follow manufacturer guidelines and best practices for replacing storage drives in the NAS server.
- Consider configuring RAID for data redundancy to protect against disk failures. RAID configurations such as RAID 1, RAID 5, or RAID 6 provide varying levels of redundancy and fault tolerance.
6. Security or Access Control Issues:
- Review security settings and access controls on the NAS server to ensure that they are configured correctly. Check user accounts, permissions, and authentication settings to identify any issues affecting security or access control.
- Monitor access logs or audit trails on the NAS server to track user activity and identify any unauthorized access attempts or security breaches.
- Update firmware and software on the NAS server to the latest versions that include security patches and fixes for known vulnerabilities.
- Consider implementing additional security measures such as enabling encryption for sensitive data, configuring firewall rules to block unauthorized access, and enabling two-factor authentication (2FA) for user accounts.
7. Remote Access or Cloud Integration Problems:
- Check network connectivity and port forwarding settings on your router to ensure that remote access ports (e.g., HTTP, HTTPS, FTP) are properly configured and not blocked by firewall rules.
- Verify that dynamic DNS (DDNS) settings are configured correctly if you are using a dynamic IP address for remote access. Update DDNS settings if your public IP address has changed.
- Review remote access settings on the NAS server to ensure that they are enabled and configured correctly. Check for any errors or warnings in remote access logs that may indicate the cause of the problem.
- Test remote access from different networks or devices to isolate the issue and determine if it is specific to certain configurations or environments.
- Contact your NAS manufacturer’s support or consult online forums and community resources for assistance if you are unable to resolve remote access or cloud integration problems on your own.
By following these troubleshooting steps, you can effectively diagnose and resolve common issues with your Medion NAS server, ensuring reliable performance and data accessibility within your home network.
Tips for Maintenance and Optimization
Maintaining and optimizing your Medion NAS server ensures its smooth operation, reliability, and longevity. Here are some tips to help you keep your NAS server in top condition:
Regular Data Backup:
- Regularly back up your data stored on the NAS server to prevent loss in case of hardware failure, accidental deletion, or data corruption. Set up automated backup schedules to ensure consistent backups.
Firmware Updates:
- Stay up-to-date with firmware updates released by Medion for your NAS server. These updates often include bug fixes, security patches, and performance enhancements. Check for updates regularly and install them promptly.
Disk Health Monitoring:
- Monitor the health of your hard drives regularly using the NAS server’s built-in diagnostic tools or third-party disk health monitoring software. Keep an eye on factors such as temperature, SMART attributes, and disk error rates to detect potential issues early.
RAID Array Health Checks:
- If your NAS server uses RAID for data redundancy, regularly monitor the health and status of the RAID array. Check for disk failures, rebuild status, and RAID synchronization to ensure optimal data protection.
Storage Optimization:
- Regularly review your storage usage and optimize storage configurations as needed. Remove unnecessary files and folders, consolidate data, and defragment disk volumes to improve performance and maximize available storage space.
Network Performance Tuning:
- Optimize network settings and configurations to improve data transfer speeds and network performance. This may include adjusting network interface settings, enabling jumbo frames, or optimizing network switch configurations.
Security Audits:
- Conduct periodic security audits of your NAS server to identify potential vulnerabilities and security weaknesses. Review user accounts, permissions, access controls, and firewall settings to ensure robust security measures are in place.
Temperature and Ventilation:
- Ensure proper airflow and ventilation around your NAS server to prevent overheating. Keep the NAS server in a well-ventilated area with adequate clearance around it. Monitor temperature levels regularly and take corrective action if necessary.
Regular Maintenance Tasks:
- Perform routine maintenance tasks such as cleaning dust and debris from the NAS server, checking cable connections, and inspecting hardware components for signs of wear or damage. Replace faulty components as needed to maintain optimal performance.
Backup Battery Maintenance (if applicable):
- If your NAS server has a built-in backup battery for RAID controller cache, monitor its health and replace it according to manufacturer recommendations. A failing backup battery can lead to data loss or corruption in case of power failure.
Documentation and Record-Keeping:
- Keep detailed documentation of your NAS server’s configuration, settings, maintenance activities, and any troubleshooting performed. This documentation can be valuable for future reference and troubleshooting efforts.
By following these maintenance and optimization tips, you can ensure that your Medion NAS server operates smoothly, reliably, and efficiently, providing secure storage and access to your data for years to come.
Medion NAS Server FAQS
What is a Medion NAS Server, and what does it do?
A Medion NAS (Network-Attached Storage) Server is a dedicated device designed to store and manage digital files and data on a network. It provides centralized storage accessible to multiple users and devices, making it easier to store, share, and manage files, perform backups, and stream media content.
What are the advantages of using a Medion NAS Server?
The advantages of using a Medion NAS Server include:
- Centralized storage for easy file organization.
- Data redundancy and protection through RAID configurations.
- User-friendly interfaces for setup and management.
- Remote access for accessing files from anywhere.
- Media server capabilities for streaming content.
- Backup solutions to safeguard important data.
What storage capacities are available for Medion NAS Servers?
Medion offers a range of NAS server models with varying storage capacities. These can range from single-drive units to multi-bay systems capable of accommodating multiple hard drives. The specific capacities depend on the model you choose.
How do I access and manage my Medion NAS Server?
You can access and manage your Medion NAS Server through a web-based interface. Simply open a web browser on a device connected to the same network and enter the NAS server’s IP address. From there, you can configure settings, create user accounts, set permissions, and manage your files.
Can I access my Medion NAS Server remotely?
Yes, many Medion NAS Servers support remote access features. This allows you to securely access your files and data from anywhere with an internet connection. You can use remote access to retrieve files or perform administrative tasks while away from home or the office.
What is RAID, and why is it important for a Medion NAS Server?
RAID (Redundant Array of Independent Disks) is a storage technology that provides data redundancy and fault tolerance. It’s important for a Medion NAS Server because it helps protect your data in case of a hard drive failure. RAID configurations are available on many NAS server models and can be configured to suit your needs.
Can I use my Medion NAS Server as a media server?
Yes, many Medion NAS Servers come with built-in media server functionality. This feature allows you to stream music, videos, and photos to compatible devices like smart TVs, gaming consoles, and media players, creating a convenient home media hub.
What backup options are available with a Medion NAS Server?
Medion NAS Servers typically support various backup options, including local backups to external drives or devices and cloud backups to online storage services. You can schedule automatic backups to ensure your data is protected against hardware failure or accidental deletion.
Can I use my Medion NAS Server for remote work?
Yes, you can use your Medion NAS Server for remote work by accessing your work files and documents securely from home or any remote location with an internet connection. Remote access features make it possible to work with your data remotely.
Are there different models of Medion NAS Servers, and how do I choose the right one for my needs?
Yes, there are different models of Medion NAS Servers with varying features and storage capacities. To choose the right one, consider your specific storage requirements, such as the amount of data you need to store, the number of users, and the desired features like RAID support and media streaming capabilities. Review the product specifications and choose a model that aligns with your needs.
Conclusion
Setting up a Medion NAS server is a straightforward process that provides centralized storage and convenient file management for your home network. Whether you use it for data backup, media streaming, or as a shared repository for your family’s files, a Medion NAS server can significantly improve your digital lifestyle while keeping your data safe and accessible.