How to Install a 30 Amp Breaker: A Step-by-Step Guide
Introduction
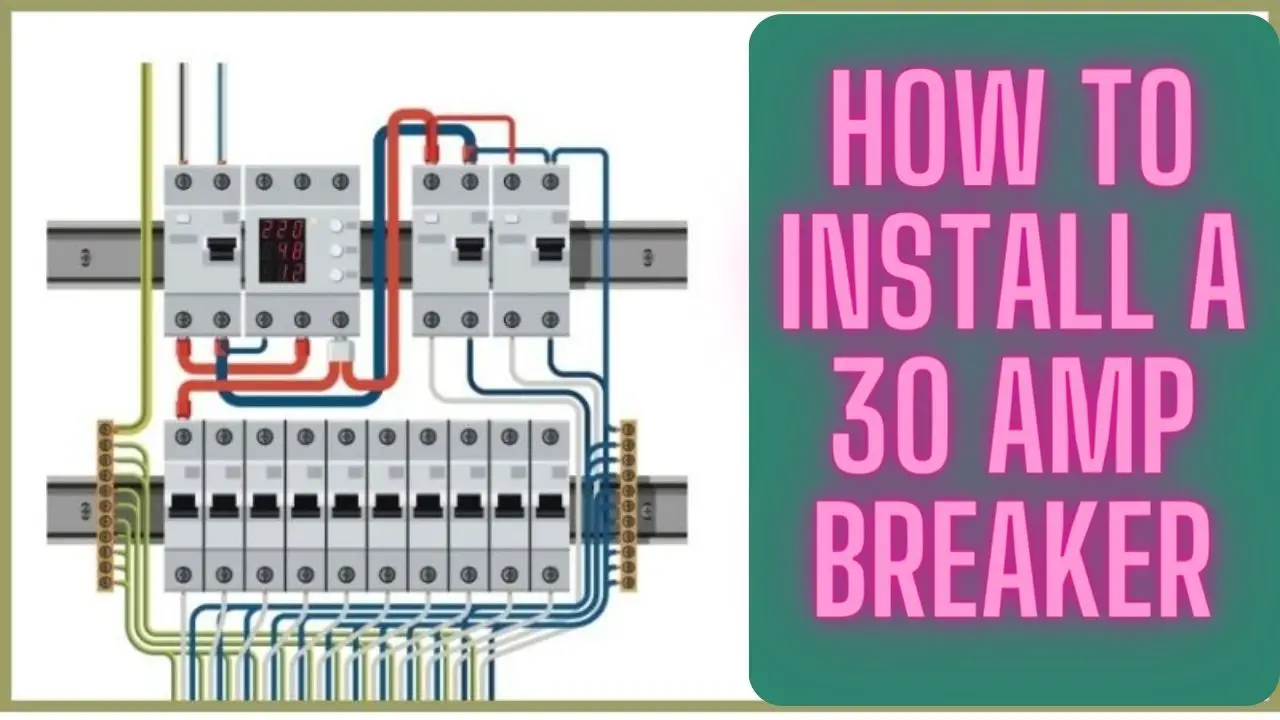
Installing a 30 Amp breaker is a fundamental aspect of electrical work, whether you’re setting up a new circuit or upgrading an existing one. Breakers serve as critical components in electrical systems, protecting circuits from overloads and potential fire hazards. Whether you’re a seasoned electrician or a DIY enthusiast, understanding how to safely and correctly install a 30 Amp breaker is essential.
In this guide, we’ll walk you through the step-by-step process of installing a 30 Amp breaker, ensuring that you have the knowledge and confidence to complete the task successfully. Before diving into the installation process, it’s crucial to emphasize the importance of safety. Working with electricity can be hazardous, so always prioritize safety precautions and consult local building codes and regulations.
By following the instructions outlined in this guide and adhering to safety guidelines, you’ll be equipped to install a 30 Amp breaker effectively and with confidence. Let’s get started.
Safety Precautions
Before beginning the installation of a 30 Amp breaker, it’s essential to prioritize safety. Working with electricity can be dangerous, so taking appropriate precautions is paramount. Here are some safety measures to observe:
- Turn Off Power: Before starting any electrical work, shut off the power supply to the circuit you’ll be working on. Locate the main circuit breaker panel and switch off the corresponding breaker. Use a voltage tester to confirm that the power is indeed off before proceeding.
- Wear Protective Gear: Always wear appropriate personal protective equipment (PPE), including safety glasses, insulated gloves, and non-conductive footwear. These items help protect against electrical shocks and potential injuries.
- Work in a Dry Environment: Ensure that the area where you’ll be working is dry. Moisture can increase the risk of electrical shock, so avoid working in damp conditions.
- Use Insulated Tools: When handling electrical components, use tools with insulated handles to reduce the risk of shock. Inspect your tools for any signs of damage before use.
- Follow Code Requirements: Familiarize yourself with local building codes and regulations governing electrical installations. Adhering to these standards ensures the safety and compliance of your installation.
- Avoid Overloading Circuits: Make sure the circuit you’re working on can handle the load of the new breaker. Overloading a circuit can lead to overheating and fire hazards.
- Keep Work Area Clear: Keep your work area clear of clutter and debris to minimize tripping hazards. This also helps prevent accidental damage to electrical components.
- Seek Professional Help if Unsure: If you’re unsure about any aspect of the installation process or encounter unexpected issues, don’t hesitate to seek assistance from a qualified electrician. It’s better to be safe than sorry when working with electricity.
By adhering to these safety precautions, you can minimize the risk of accidents and injuries during the installation of a 30 Amp breaker. Always prioritize safety above all else.
Tools and Materials Needed
Before you begin installing a 30 Amp breaker, gather the following tools and materials:
Tools:
- Screwdriver (flathead and Phillips)
- Needle-nose pliers
- Wire stripper/cutter
- Voltage tester
- Circuit breaker panel key or screwdriver (depending on panel type)
- Insulated gloves
- Flashlight
- Level (for ensuring the breaker is installed correctly)
- Electrical tape
Materials:
- 30 Amp circuit breaker (compatible with your panel)
- Electrical wires (appropriate gauge and type for the circuit)
- Wire nuts
- Cable clamps
- Marker or labeling tape (for labeling wires)
- Junction box (if required by local code)
- Mounting screws (if not included with the breaker)
- Protective cover for the circuit breaker panel (if missing or damaged)
Ensure that all tools and materials are in good condition and appropriate for the task at hand. Using the right tools and materials will help you complete the installation safely and effectively. Additionally, always refer to local building codes and regulations to ensure compliance with any specific requirements in your area.
By having all the necessary tools and materials prepared beforehand, you’ll streamline the installation process and minimize the risk of delays or complications.
Shut Off Power
Before you begin installing the 30 Amp breaker, it’s critical to turn off the power supply to the circuit where the breaker will be installed. Follow these steps to safely shut off the power:
- Locate the Main Circuit Breaker Panel: The main circuit breaker panel is usually located in a utility room, basement, or garage. It may also be located outside your home in a weatherproof enclosure.
- Identify the Correct Breaker: Determine which breaker controls the circuit where you’ll be installing the 30 Amp breaker. Refer to your electrical panel’s circuit directory if available. Otherwise, you may need to test each breaker individually to identify the correct one.
- Switch Off the Breaker: Once you’ve identified the correct breaker, switch it to the “Off” position by toggling the switch or flipping the corresponding lever.
- Verify Power is Off: Use a voltage tester to confirm that the power to the circuit has been successfully turned off. Insert the tester into a nearby outlet or touch the tester’s probes to the wires of the circuit you’ll be working on. If the tester indicates no voltage, it’s safe to proceed with the installation. If voltage is still present, recheck the circuit breaker and ensure it’s properly switched off.
- Double-Check for Safety: Before proceeding with the installation, double-check that the power remains off by testing again with the voltage tester. Additionally, inform others in the household that electrical work is being conducted and advise them to avoid the area for their safety.
By following these steps to shut off the power supply, you’ll create a safe working environment for installing the 30 Amp breaker. Always exercise caution when working with electricity and never proceed unless you’re certain that the power is turned off.
Determine Circuit Requirements
Before proceeding with the installation of the 30 Amp breaker, it’s essential to assess the specific requirements of the circuit where the breaker will be installed. Follow these steps to determine the circuit requirements:
- Identify the Circuit Load: Determine the intended purpose of the circuit and the electrical load it will support. Consider the appliances, equipment, or lighting fixtures connected to the circuit and their corresponding power requirements. The total load should not exceed the capacity of the breaker you intend to install.
- Check Electrical Panel Compatibility: Verify that your electrical panel is compatible with the installation of a 30 Amp breaker. Consult the panel’s specifications and documentation to ensure it can accommodate breakers of this size. Some older panels may have limitations on the types of breakers they can accept.
- Evaluate Wiring Capacity: Assess the capacity of the existing wiring connected to the circuit. Ensure that the wire gauge is appropriate for a 30 Amp circuit. Using inadequate wiring can lead to overheating and safety hazards. Refer to electrical code standards or consult a qualified electrician if you’re uncertain about the wiring capacity.
- Consider Future Expansion: Anticipate any future changes or additions to the circuit’s load. Installing a 30 Amp breaker provides a certain capacity for current usage, but it’s important to consider potential future needs. If there’s a possibility of increased demand on the circuit, you may need to upgrade the wiring or install additional circuits.
- Review Local Electrical Codes: Familiarize yourself with local electrical codes and regulations governing circuit installations. Ensure that your planned installation complies with these standards to ensure safety and code compliance.
By carefully assessing the circuit requirements, you’ll ensure that the installation of the 30 Amp breaker is suitable for the intended purpose and meets all necessary safety and regulatory requirements. If you have any doubts or concerns about the circuit’s requirements, consult a qualified electrician for assistance.
Choose the Correct Breaker
Selecting the right 30 Amp breaker is crucial for a safe and effective installation. Follow these steps to choose the correct breaker:
- Check Electrical Panel Compatibility: Ensure that the 30 Amp breaker you choose is compatible with your electrical panel. Different panels have specific requirements regarding the type and size of breakers they can accommodate. Refer to the panel’s documentation or consult with a qualified electrician to determine compatibility.
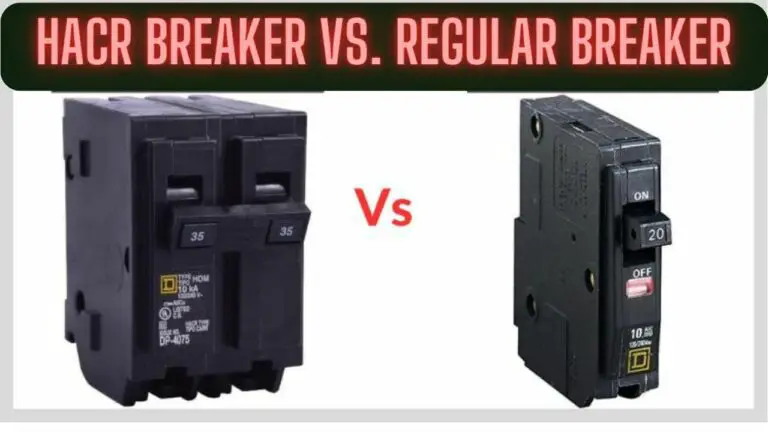
- Identify Breaker Type: Determine the type of breaker required for your installation. Common types include standard single-pole breakers, double-pole breakers, and combination arc-fault circuit interrupters (AFCIs) or ground-fault circuit interrupters (GFCIs) if required by code.
- Consider Brand and Model: Choose a reputable brand and model of breaker known for its reliability and quality. Quality breakers are essential for ensuring the safety and longevity of your electrical system.
- Verify Amperage Rating: Confirm that the breaker has a rating of 30 Amps, matching the requirements of your circuit. Using a breaker with the wrong amperage rating can lead to overheating and electrical hazards.
- Optional: Consider Additional Features: Depending on your needs and local code requirements, you may opt for breakers with additional features such as AFCI or GFCI protection. These features provide enhanced safety by detecting and mitigating arc faults or ground faults.
- Purchase the Breaker: Once you’ve identified the correct breaker for your installation, purchase it from a reputable supplier or retailer. Ensure that the breaker is new and in good condition, with no signs of damage or wear.
- Keep Documentation: Retain the documentation and packaging for the breaker for future reference. This information may be useful for warranty purposes or future maintenance.
By carefully selecting the correct breaker for your installation, you’ll ensure compatibility, safety, and compliance with electrical codes and regulations. If you’re unsure about which breaker to choose or have any questions, don’t hesitate to seek guidance from a qualified electrician.
Install the Breaker
Now that you’ve prepared the necessary tools and materials and ensured the power is safely turned off, you’re ready to install the 30 Amp breaker. Follow these steps carefully:
- Access the Electrical Panel: Remove the cover of the electrical panel by unscrewing the fasteners or releasing any latches. Set the cover aside in a safe place.
- Identify the Installation Location: Locate an available slot or space in the electrical panel where the 30 Amp breaker will be installed. Ensure that the slot is compatible with the type of breaker you’re installing (e.g., single-pole or double-pole).
- Position the Breaker: Hold the 30 Amp breaker firmly with one hand and align it with the chosen slot in the electrical panel. The breaker’s connection prongs should line up with the corresponding bus bars inside the panel.
- Insert the Breaker: Carefully insert the breaker into the slot, applying gentle pressure to ensure it is fully seated. You may need to wiggle the breaker slightly to engage it with the bus bars.
- Secure the Breaker: Once the breaker is properly seated in the slot, press down firmly on the breaker’s front edge to secure it in place. You should feel or hear a distinct click as the breaker snaps into position.
- Check Alignment: Verify that the breaker is aligned correctly and sits flush with the surrounding breakers in the panel. Misaligned breakers can indicate improper installation and should be adjusted as needed.
- Replace the Panel Cover: With the breaker installed securely, reattach the cover of the electrical panel by aligning it with the panel’s frame and fastening the screws or latches. Ensure that the cover is closed securely to protect against electrical hazards.
- Label the Breaker: Use a marker or labeling tape to clearly identify the newly installed 30 Amp breaker. This labeling will help you and others identify the circuit in the future.
Congratulations! You’ve successfully installed the 30 Amp breaker into the electrical panel. Before proceeding, take a moment to inspect your work and ensure everything is securely in place. If you encounter any issues or have concerns about the installation, don’t hesitate to seek assistance from a qualified electrician.
Connect Wires to Breaker
Now that the 30 Amp breaker is securely installed in the electrical panel, it’s time to connect the electrical wires to the breaker. Follow these steps carefully:
- Prepare the Wires: Strip approximately 3/4 inch (19 mm) of insulation from the ends of the electrical wires using a wire stripper. Be careful not to nick or damage the underlying wire strands.
- Identify the Circuit Wires: Identify the electrical wires that will be connected to the 30 Amp breaker. These wires may originate from a circuit you’re extending or modifying, or they may be new wires that you’re installing as part of a new circuit.
- Connect the Neutral (White) Wire: If the circuit includes a neutral wire (typically white), locate the neutral bus bar in the electrical panel. Loosen the screw or terminal on the neutral bus bar and insert the stripped end of the neutral wire into the terminal. Tighten the screw securely to make a solid connection.
- Connect the Hot (Black) Wire: Locate the terminal or lug on the 30 Amp breaker where the hot (black) wire will be connected. Loosen the screw on the terminal and insert the stripped end of the hot wire into the terminal. Ensure that the wire is inserted securely and then tighten the screw to clamp the wire in place.
- Secure the Ground Wire (if applicable): If the circuit includes a ground wire (typically green or bare copper), locate the ground bus bar in the electrical panel. Loosen the screw or terminal on the ground bus bar and connect the stripped end of the ground wire. Tighten the screw securely to make a solid connection.
- Double-Check Connections: After connecting the wires to the breaker, double-check all connections to ensure they are secure and tight. Loose connections can lead to overheating and electrical hazards.
- Neaten Wiring: Arrange the wires neatly within the electrical panel, ensuring they are not pinched or strained. Use cable ties or wire clips to secure the wires and prevent them from contacting other components or obstructing access to breakers.
- Replace Panel Cover: Once all connections are secure and the wiring is neatly arranged, replace the cover of the electrical panel and secure it with the appropriate fasteners.
Congratulations! You’ve successfully connected the electrical wires to the 30 Amp breaker. Before restoring power to the circuit, double-check all connections and ensure everything is properly secured. If you encounter any issues or have concerns about the wiring, consult a qualified electrician for assistance.
Test the Circuit
After completing the installation of the 30 Amp breaker and connecting the wires, it’s essential to test the circuit to verify its functionality and safety. Follow these steps to test the circuit:
- Double-Check Connections: Before proceeding with testing, double-check all connections to ensure they are secure and properly tightened. Loose connections can lead to electrical hazards and should be addressed immediately.
- Restore Power: Turn the main circuit breaker back on to restore power to the electrical panel. If you’re working with a dedicated circuit, switch on the corresponding breaker for the newly installed 30 Amp breaker.
- Test Breaker Operation: With power restored to the circuit, manually trip the 30 Amp breaker by toggling the switch to the “Off” position. This simulates a fault condition and ensures that the breaker functions correctly by cutting off power to the circuit.
- Verify Power Loss: Use a voltage tester to confirm that power has been successfully cut off to the circuit when the breaker is tripped. Place the tester probes on the terminals or wires connected to the circuit to check for the absence of voltage.
- Reset Breaker: After testing the tripping function, reset the 30 Amp breaker by toggling the switch to the “On” position. The breaker should latch into place, restoring power to the circuit.
- Test Circuit Functionality: Turn on the devices or equipment connected to the circuit to verify that they receive power and operate as expected. Check for any signs of abnormal behavior or malfunctions.
- Inspect for Issues: While the circuit is powered on, visually inspect the electrical panel, breaker, and wiring for any signs of overheating, sparking, or unusual odors. These can indicate potential problems that require further investigation.
- Final Voltage Test: Perform a final voltage test using the voltage tester to ensure that power is present at the outlets or devices connected to the circuit. This confirms that the circuit is functioning correctly and safely.
- Label Circuit: Once you’ve confirmed that the circuit is operational, label the breaker and any outlets or devices connected to it to indicate its purpose. This labeling helps identify the circuit for future reference and maintenance.
By thoroughly testing the circuit, you can ensure that the installation of the 30 Amp breaker is successful and that the circuit operates safely and reliably. If you encounter any issues during testing or have concerns about the circuit’s performance, consult a qualified electrician for assistance.
Final Checks and Cleanup
Before concluding the installation of the 30 Amp breaker, it’s essential to perform final checks to ensure everything is in order and complete the cleanup process. Follow these steps:
- Inspect Connections: Once again, inspect all connections, including those at the breaker terminals and within the electrical panel, to ensure they are secure and properly tightened. Verify that there are no loose wires or visible signs of damage.
- Check Panel Cover: Ensure that the cover of the electrical panel is securely fastened in place. All screws or latches should be tightened to prevent unauthorized access and protect against electrical hazards.
- Clean Up Work Area: Remove any debris, packaging materials, or tools from the work area. Dispose of waste materials responsibly and return tools to their designated storage locations.
- Test Surrounding Outlets: Test nearby outlets or devices to confirm that they are still functioning properly after the installation. This ensures that the installation of the 30 Amp breaker has not affected other circuits in the vicinity.
- Document Installation: Take note of the installation details, including the date of installation, breaker specifications, and any relevant observations or notes. This documentation can serve as a reference for future maintenance or troubleshooting.
- Review Safety Procedures: Reflect on the safety procedures followed during the installation process and identify any areas for improvement. Reinforce the importance of safety precautions when working with electricity.
- Final Power-Up Test: Turn on the power to the circuit by switching on the main circuit breaker or the breaker corresponding to the installed 30 Amp breaker. Verify that power is restored to the circuit and that connected devices or equipment operate as expected.
- Label Breaker: If not already done, label the 30 Amp breaker to clearly indicate the circuit it controls. This labeling helps identify the breaker for future reference and maintenance.
- Secure Documentation: Keep any documentation related to the installation, including manuals, warranty information, and permits, in a safe and accessible location for future reference.
Congratulations! You’ve completed the installation of the 30 Amp breaker and conducted final checks and cleanup to ensure everything is in order. By following these steps, you’ve ensured a safe and successful installation process. If you have any further questions or need assistance, don’t hesitate to consult a qualified electrician.
FAQS
What is a 30 amp breaker used for?
A 30 amp breaker is typically used to protect circuits that power moderate-load appliances and devices, such as window air conditioners, space heaters, power tools, and certain kitchen appliances. It’s important to ensure that the devices on the circuit do not collectively draw more than 30 amps to prevent tripping the breaker.
What wire size is appropriate for a 30 amp breaker?
For a 30 amp breaker, you should use a wire size that is rated to handle at least 30 amps of current. This is usually a 10-gauge copper wire. Using the appropriate wire size is crucial to prevent overheating and ensure the safety of your electrical system.
Can I use a larger wire size than recommended for a 30 amp breaker?
It’s generally not recommended to use a larger wire size than what’s appropriate for a 30 amp breaker. The wire size is selected based on the breaker’s capacity to safely handle the current load. Using a larger wire might not provide the necessary protection and could lead to safety issues.
Can I use a smaller wire size than recommended for a 30 amp breaker?
Using a smaller wire size than recommended for a 30 amp breaker is not safe. The wire might not be able to handle the current load, leading to overheating and potentially causing a fire hazard. Always adhere to the appropriate wire size guidelines for your breaker.
How do I install a 30 amp breaker?
Electrical work should be done by a qualified electrician. If you’re not experienced with electrical installations, it’s best to hire a professional. The general process involves turning off the main power, installing the breaker into the panel, connecting the wires to the breaker, and then turning the power back on and testing the circuit.
Can I plug a 30 amp device into a standard outlet?
No, you should not plug a device that requires a 30 amp circuit into a standard household outlet, which is typically designed for 15 or 20 amp circuits. Attempting to do so could overload the circuit, cause the breaker to trip, or even damage the device.
Can I upgrade my circuit to use a 30 amp breaker?
If you’re considering upgrading a circuit to use a 30 amp breaker, it’s essential to assess the entire electrical system’s capacity and consult a qualified electrician. Upgrading a circuit involves ensuring that the wiring, outlets, and devices can safely handle the increased current load.
What precautions should I take when working with a 30 amp breaker?
Working with electrical components can be dangerous. Always turn off the main power before making any changes, and if you’re uncertain about any aspect of the work, consult a professional electrician. Safety should be your top priority.
Conclusion
Congratulations on successfully installing a 30 Amp breaker! By following the step-by-step instructions outlined in this guide, you’ve ensured the safety and functionality of your electrical circuit. Before wrapping up, let’s review some key points:
- Safety First: Always prioritize safety when working with electricity. Remember to shut off power to the circuit before beginning any electrical work, and wear appropriate personal protective equipment.
- Choose the Right Breaker: Ensure compatibility with your electrical panel and select a breaker with the appropriate amperage rating for your circuit’s requirements.
- Proper Installation: Take care to install the breaker securely in the electrical panel and connect the wires correctly. Double-check all connections and wiring before restoring power.
- Thorough Testing: Test the circuit to verify its functionality and safety. Check that the breaker trips properly and that power is restored to the circuit without any issues.
- Labeling and Documentation: Label the breaker and any connected devices to identify the circuit for future reference. Keep documentation and records of the installation for maintenance and troubleshooting purposes.
- Seek Professional Help if Needed: If you encounter any difficulties during the installation process or have concerns about the circuit’s performance, don’t hesitate to seek assistance from a qualified electrician. Electrical work can be complex, and it’s better to seek professional help if you’re unsure.
By following these guidelines and exercising caution, you’ve successfully completed the installation of a 30 Amp breaker. Regular maintenance and periodic inspections of your electrical system are essential for ensuring continued safety and reliability. Thank you for taking the time to learn and perform this important task. If you have any further questions or need additional assistance, don’t hesitate to reach out for help. Stay safe, and happy wiring!

