How to Connect a Security Camera to Your TV: A Step-by-Step Guide
Introduction
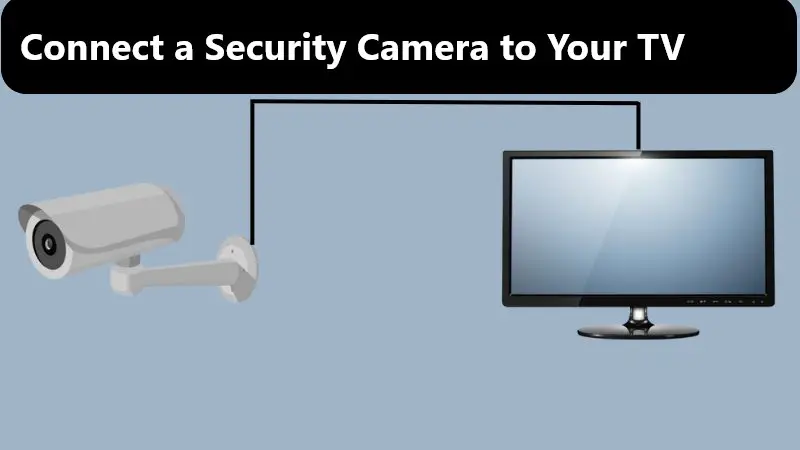
Security cameras are essential for monitoring your home or business, but viewing the footage on a small monitor or smartphone screen may not always be convenient. Luckily, you can connect your security camera to your TV to get a larger, more accessible display. In this guide, we’ll walk you through the steps to connect your security camera to your TV.
Types of Security Cameras
Security cameras come in various types, each designed to suit different surveillance needs and environments. Understanding the differences between these types can help you choose the right camera for your specific requirements. Here are some common types of security cameras:
- Bullet Cameras:
- Bullet cameras are cylindrical or rectangular in shape and are typically mounted on a wall or ceiling.
- They are highly visible and often used for deterrence purposes.
- Bullet cameras have a fixed lens and are suitable for monitoring specific areas such as entrances, driveways, or outdoor spaces.
- Dome Cameras:
- Dome cameras have a dome-shaped housing that makes them more discreet and less noticeable.
- They offer a wider viewing angle and are often used for indoor surveillance in retail stores, offices, and other commercial spaces.
- Dome cameras may have fixed or adjustable lenses and are available in vandal-resistant or weatherproof models for outdoor use.
- PTZ Cameras (Pan-Tilt-Zoom):
- PTZ cameras are equipped with motorized pan, tilt, and zoom functions, allowing operators to remotely control the camera’s movement and focus.
- They offer greater flexibility and coverage compared to fixed cameras and can be programmed to patrol predefined areas automatically.
- PTZ cameras are commonly used in large-scale surveillance systems such as stadiums, parking lots, and industrial facilities.
- Wireless Cameras:
- Wireless cameras transmit video signals wirelessly over Wi-Fi or other wireless protocols, eliminating the need for a physical connection to a recording device.
- They offer easy installation and flexibility in placement, making them ideal for temporary surveillance or areas where wiring is impractical.
- Wireless cameras may be battery-powered or require a power source, depending on the model.
- Outdoor Cameras:
- Outdoor cameras are specifically designed to withstand harsh weather conditions and provide reliable surveillance outdoors.
- They are built with weatherproof housings and may feature infrared (IR) LEDs for night vision capabilities.
- Outdoor cameras come in various types, including bullet, dome, and PTZ cameras, to suit different outdoor surveillance needs.
- Indoor Cameras:
- Indoor cameras are designed for indoor use and may be smaller and more discreet compared to outdoor cameras.
- They are commonly used for monitoring interior spaces such as homes, offices, and retail stores.
- Indoor cameras may offer features such as two-way audio, motion detection, and remote viewing via mobile apps.
- IP Cameras:
- IP cameras, or network cameras, connect to a network (e.g., Wi-Fi or Ethernet) to transmit video data over the internet.
- They offer high-definition video quality and advanced features such as remote access, motion detection, and cloud storage.
- IP cameras can be integrated into larger surveillance systems and accessed remotely from any internet-enabled device.
- Analog Cameras:
- Analog cameras transmit video signals in analog format over coaxial cables to a recording device such as a DVR (Digital Video Recorder).
- They are more affordable than IP cameras but offer lower resolution and fewer features.
- Analog cameras are suitable for basic surveillance applications and may be compatible with existing analog CCTV systems.
Choosing the right type of security camera depends on factors such as the intended location, desired features, budget, and specific surveillance needs. Consider these factors carefully to select the most suitable camera for your home or business security requirements.
Requirements:
Before you start, ensure you have the following:
- Security Camera: Your security camera should have video output ports, commonly BNC (Bayonet Neill-Concelman) or RCA (Radio Corporation of America) connectors.
- TV: Make sure your TV has available video input ports, such as HDMI, RCA, or VGA.
- Cables: You’ll need the appropriate cables to connect your camera to your TV. The type of cable depends on the camera’s output and the TV’s input. Common options include BNC cables, RCA cables, or HDMI cables.
- Power Supply: Ensure that your security camera and TV are powered on and functioning correctly.
Now, let’s proceed with the steps to connect your security camera to your TV:
Steps to Connect a Security Camera to TV
Step 1: Choose the Right Cable:
Identify the output port on your security camera and the corresponding input port on your TV. Here are some common options:
- BNC to RCA: If your camera has BNC connectors and your TV has RCA inputs, you’ll need a BNC to RCA adapter or cable.
- HDMI: If both your camera and TV have HDMI ports, use an HDMI cable for the best quality and convenience.
- VGA: Some security cameras and older TVs use VGA connections. If this is the case, you’ll need a VGA cable.
Step 2: Power Off the Camera and TV:
Before making any connections, turn off both your security camera and your TV.
Step 3: Connect the Cable:
- If you’re using BNC or RCA connectors, insert one end into the camera’s output port and the other end into the TV’s input port, matching colors if applicable (yellow for video, red and white for audio).
- If you’re using an HDMI cable, simply plug one end into the camera’s HDMI output and the other end into an available HDMI input on your TV.
- For VGA connections, use a VGA cable and tighten the screws on the connectors to secure the connection.
Step 4: Power On the Camera and TV:
Turn on your security camera and TV. Make sure your TV is set to the correct input source for the camera (e.g., HDMI1, VGA, or AV).
Step 5: Adjust Camera Settings (If Needed):
Depending on your camera model, you may need to adjust settings to enable video output. Refer to your camera’s manual for guidance on this step.
Step 6: View Camera Feed:
Once everything is connected and powered on, you should see the camera’s live feed on your TV screen. You can now monitor the camera’s video feed on your TV, making it more convenient to keep an eye on your property.
Step 7: Switch Back to Regular TV:
To return to regular TV programming, simply change the TV input source to the one you typically use for television. You can do this using your TV remote control.
That’s it! You’ve successfully connected your security camera to your TV, allowing you to view the camera feed on a larger screen whenever you want. Keep in mind that the exact steps may vary slightly depending on your camera and TV models, so always refer to the user manuals for specific instructions.
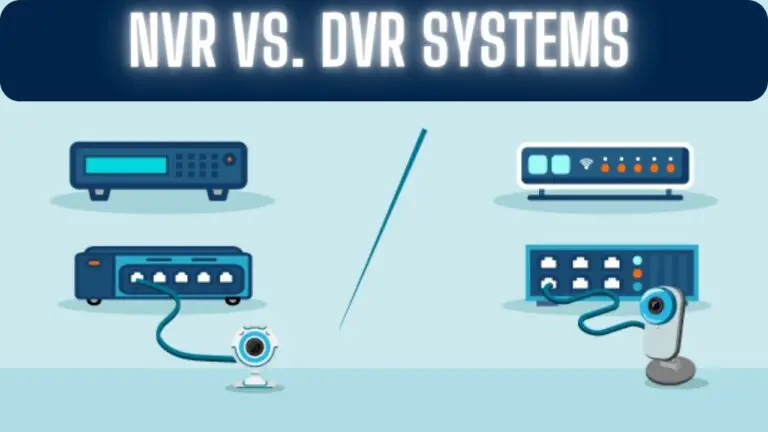
Connection Of The Security Camera To The Television using NVR
Connecting a security camera to your television using a Network Video Recorder (NVR) can be a convenient way to monitor your surveillance footage on a larger screen. Here’s a step-by-step guide on how to do it:
Requirements:
- Security Camera System: You’ll need a security camera system that includes cameras, an NVR (Network Video Recorder), and a television.
- HDMI Cable: Ensure you have an HDMI cable to connect the NVR to your TV.
- Power Supply: Make sure your cameras, NVR, and TV are powered on and functioning correctly.
Step 1: Position Your NVR:
Place your NVR near your television and within reach of a power outlet. Ensure it’s connected to your local network and powered on.
Step 2: Connect the NVR to the TV:
- Use an HDMI cable to connect the HDMI output port on your NVR to an available HDMI input on your TV.
Step 3: Power On the TV and NVR:
Turn on your television and your NVR. Use your TV remote control to select the HDMI input you connected the NVR to (e.g., HDMI1, HDMI2, etc.).
Step 4: Access the NVR Interface:
You should now see the NVR’s interface on your TV screen. This interface displays the live camera feeds and recorded footage from your security cameras.
Step 5: Navigate and Monitor:
Using the NVR’s remote control or interface, you can navigate the camera feeds, playback recorded footage, and access various settings. Each NVR system may have a different user interface, so refer to the manufacturer’s manual for specific instructions.
Step 6: Switch Back to Regular TV:
To return to watching regular television programming, simply change the TV input source to the one you typically use for TV. You can do this using your TV remote control.
Additional Tips:
- Many modern NVRs come with mobile apps that allow you to access camera feeds and recordings from your smartphone or tablet. Consider installing the app for remote monitoring.
- Ensure that your security camera system and NVR are properly configured for remote access and have the necessary security measures in place to protect your surveillance footage.
- Refer to your NVR’s user manual for specific details on accessing and navigating the NVR interface and adjusting camera settings.
By connecting your security camera system to your television via an NVR, you can enjoy the convenience of monitoring your cameras on a larger screen, making it easier to keep an eye on your property and maintain security.
Benefits of Using NVR To Connect Security Cameras To TV
Using a Network Video Recorder (NVR) to connect security cameras to your TV offers several benefits, making it a popular choice for surveillance system setups. Here are the key advantages:
- High-Quality Video: NVRs are designed to handle high-definition (HD) and even 4K video streams from modern security cameras. This ensures that the video feed displayed on your TV is of superior quality, allowing you to see details clearly.
- Convenience: NVRs offer a central hub for managing multiple security cameras. With a connected TV, you can conveniently monitor all camera feeds in one place, providing a comprehensive view of your property.
- Large Screen Viewing: One of the most significant advantages of connecting to your TV is the larger screen size. This makes it easier to see details and spot any potential security issues, especially if you have multiple cameras.
- Real-Time Monitoring: You can view the live camera feed on your TV in real-time. This feature is valuable for keeping an eye on your property at any moment, whether it’s daytime or nighttime.
- Playback and Recording: NVRs typically record footage from your security cameras. You can easily access and playback recorded video on your TV, which is helpful for reviewing past events or incidents.
- Remote Viewing: Many NVR systems offer remote access through mobile apps or web interfaces. This means you can also view your security camera feeds on your smartphone or tablet when you’re away from home.
- Customization: NVR systems often provide various settings and configurations, allowing you to customize how you view and manage your cameras. You can set up alerts, motion detection, and more.
- User-Friendly Interface: NVRs typically have user-friendly interfaces that make it easy to navigate camera feeds and settings. This ensures that you can use your TV to monitor your security system without a steep learning curve.
- Multi-Channel Support: NVRs can accommodate multiple security cameras, making them suitable for both residential and commercial applications. You can add additional cameras as needed to enhance your surveillance coverage.
- Security and Storage: NVRs usually come with built-in storage options or support external storage devices like hard drives. This ensures that your video footage is stored securely and can be accessed when needed for evidence or review.
- Integration: Many NVR systems can be integrated with other smart home devices and security systems, allowing for enhanced automation and control.
- Peace of Mind: The ability to view your security camera feeds on your TV provides peace of mind, knowing that you have easy access to monitor and protect your property and loved ones.
FAQS
How can I connect my security camera to my TV?
To connect your security camera to your TV, you typically need an appropriate cable (e.g., HDMI, RCA) that matches the camera’s output and the TV’s input. Connect the cable from the camera to the TV and select the correct input source on your TV.
What type of cable do I need to connect my camera to the TV?
The type of cable you need depends on the camera’s output and the TV’s input. Common options include HDMI cables, RCA cables, BNC cables, or VGA cables. Ensure you have the right cable for your specific setup.
Can I connect multiple security cameras to my TV?
Yes, you can connect multiple security cameras to your TV if your TV has multiple input ports (e.g., HDMI1, HDMI2). Each camera will require a separate cable and input source on your TV.
Do I need a specific TV for connecting security cameras?
Most modern TVs have various input ports like HDMI, RCA, or VGA, making it possible to connect security cameras. Ensure your TV has the appropriate input options for your camera’s output.
Can I view my security camera feed on a smart TV?
Yes, many smart TVs have built-in apps or features that allow you to view your security camera feeds directly if the cameras are compatible with the TV’s software.
Do I need a separate NVR (Network Video Recorder) to connect my cameras to the TV?
It depends on your camera setup. If your cameras are connected to an NVR, you can often connect the NVR to your TV via HDMI for easy access to all camera feeds and recordings. If your cameras have direct video outputs, you may not need an NVR for basic viewing on your TV.
What do I do if I can’t see my camera feed on the TV after connecting it?
If you can’t see your camera feed on the TV, ensure that both the camera and TV are powered on, and the cable connections are secure. Use your TV remote to select the correct input source (e.g., HDMI1, RCA) corresponding to the camera connection.
Can I view my security cameras remotely on my TV?
Some security camera systems offer remote viewing through smart TV apps or screen mirroring from a compatible device. Check if your security camera system supports this feature and follow the setup instructions.
Is it possible to record camera footage directly to the TV?
Typically, TVs do not have built-in storage for recording camera footage. Recording is usually done on an NVR or a dedicated digital video recorder (DVR) that connects to the cameras.
What are the advantages of viewing security camera feeds on a TV?
Viewing security camera feeds on a TV provides a larger, more accessible display for monitoring your property, making it easier to spot potential security issues and review recorded footage.
Conclusion
In conclusion, selecting and connecting the right security camera to your TV involves understanding your surveillance needs, the available camera options, and the appropriate connection methods. By considering factors such as camera type, location, features, and budget, you can choose a camera that meets your specific requirements for home or business security.
Once you’ve chosen the camera, connecting it to your TV requires careful preparation, selecting the correct cables or wireless connection method, and adjusting TV settings for optimal viewing. Whether you opt for a wired or wireless setup, ensuring a stable connection and proper configuration is essential for reliable surveillance.
By following the steps outlined in this guide, you can successfully connect your security camera to your TV and enjoy the benefits of direct monitoring and surveillance. Additionally, regularly maintaining and monitoring your camera setup, along with implementing additional security measures as needed, will help enhance the effectiveness of your security system.
Remember to periodically check for updates, troubleshoot any issues promptly, and seek professional assistance if necessary to ensure the continued safety and security of your home or business premises.
With the right security camera setup in place and proper integration with your TV, you can have peace of mind knowing that your property is protected and under surveillance, deterring potential threats and providing valuable insights into any security incidents that may occur.