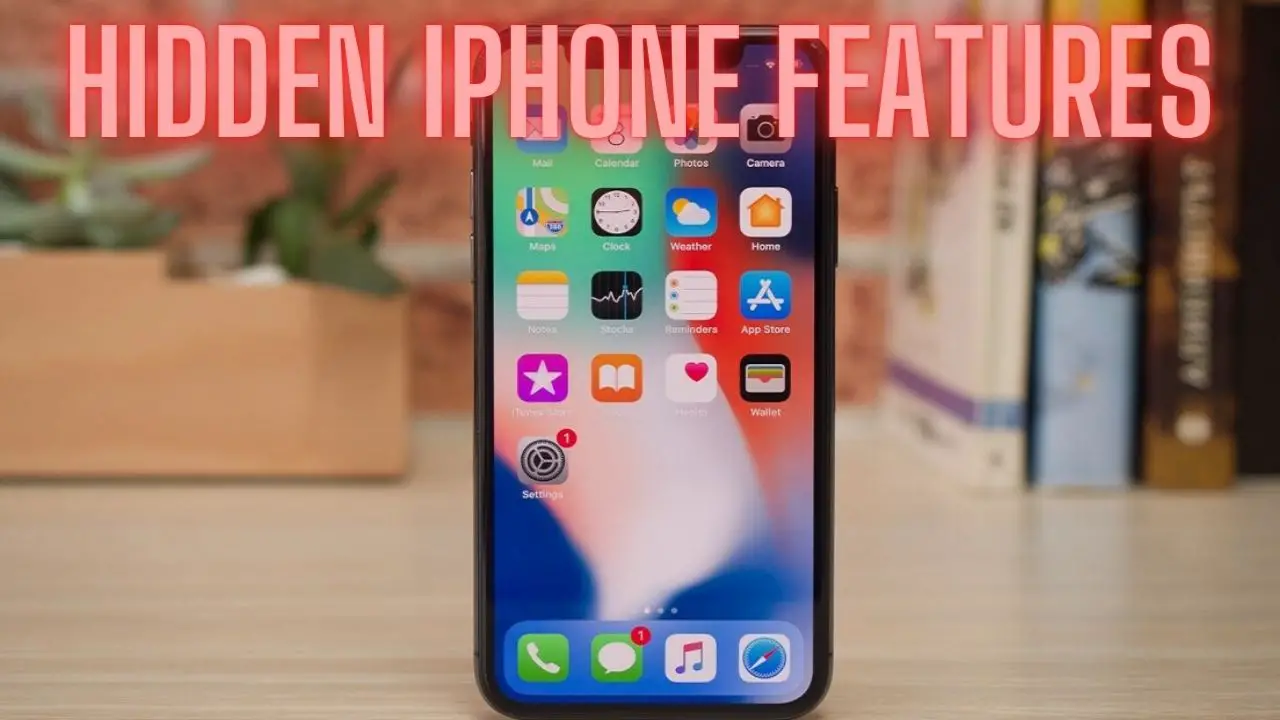
Unlocking the Mysteries: Surprising Hidden iPhone Features
Introduction
The iPhone is packed with a plethora of features beyond its well-known capabilities. While many users are familiar with basic functions like making calls, sending texts, and taking photos, numerous hidden features can enhance productivity, accessibility, and convenience. In this guide, we’ll explore some surprising hidden iPhone features that you may not be aware of. From built-in tools like the magnifier and level to accessibility features like back tap and guided access, these hidden gems can make your iPhone experience even more enjoyable and efficient. Whether you’re a seasoned iPhone user or a newcomer, you’re bound to discover something new and exciting within your device. So, let’s dive in and uncover these hidden treasures waiting to be explored on your iPhone.
Magnifier Tool
The Magnifier tool on your iPhone essentially turns your device into a magnifying glass, allowing you to zoom in on small text, objects, or details with ease. Here’s how to access and use the Magnifier:
- Accessing the Magnifier:
- Open the “Settings” app on your iPhone.
- Tap on “Accessibility.”
- Scroll down and select “Magnifier.”
- Toggle the switch to turn on the Magnifier.
- Using the Magnifier:
- Triple-press the side button (on iPhone models with Face ID) or the Home button (on iPhone models with Touch ID) to quickly open the Magnifier.
- Alternatively, you can access the Magnifier from the Control Center. Swipe down from the top-right corner of the screen (or swipe up from the bottom on older iPhone models) to open the Control Center. Tap on the Magnifier icon to launch it.
- Adjusting Magnification:
- Once the Magnifier is open, use the slider at the bottom to adjust the magnification level. Slide it left to decrease magnification and right to increase magnification.
- Using Additional Features:
- Tap the “Flash” icon to turn on the flashlight if you need additional light.
- Tap the “Filters” icon to choose from various color filters to enhance visibility for specific tasks.
- Freezing the Image:
- Tap the “Freeze” button (the camera icon) to freeze the image. This allows you to examine the magnified image without needing to hold your iPhone steady.
- Capturing Images:
- Tap the shutter button (the white circle) to capture a photo of the magnified image. The captured image will be saved to your Photos app for later reference.
The Magnifier tool is particularly handy for reading small text, examining fine details, or even for tasks like removing splinters or reading restaurant menus in dim lighting. It’s a versatile feature that can be incredibly useful in various situations.
Hidden Level Tool
Your iPhone comes equipped with a built-in level tool that can help you measure angles and ensure that surfaces are perfectly level. Here’s how to access and use the hidden level tool:
- Accessing the Level Tool:
- Open the “Measure” app on your iPhone. If you can’t find it, you can swipe down on your home screen and use the search bar to locate it.
- Alternatively, if you have an older iPhone model that doesn’t have the Measure app, you can access the level tool through the Compass app.
- Using the Level Tool:
- Once you’re in the Measure app, swipe to the right to access the “Level” tool.
- Hold your iPhone flat against the surface you want to measure or level.
- You’ll see a horizontal white line with a degree indicator. Adjust the position of your iPhone until the white line is centered between the two vertical lines, indicating that the surface is level.
- If the surface is perfectly level, the degree indicator will show “0°.” If it’s not level, the degree indicator will show the angle of deviation from level.
- Using the Compass App (for Older iPhone Models):
- If you have an older iPhone model without the Measure app, you can still access the level tool through the Compass app.
- Open the “Compass” app on your iPhone.
- Swipe left to access the level tool. It’s represented by a bubble level icon.
- Hold your iPhone flat against the surface you want to measure or level, and adjust the position until the white bubble is centered between the two lines.
- Calibrating the Level Tool:
- If you notice any inaccuracies with the level tool, you can calibrate it by tapping the “Calibrate” button. Follow the on-screen instructions to complete the calibration process.
The hidden level tool on your iPhone is a handy feature for various tasks, such as hanging picture frames, installing shelves, or ensuring that furniture is level. It’s a convenient tool that’s always available at your fingertips whenever you need it.
Back Tap Accessibility Feature
The Back Tap feature is a relatively new addition to iPhones, introduced with iOS 14, that allows you to trigger actions by tapping on the back of your device. It’s a convenient accessibility feature that can be customized to perform a variety of functions with a simple double or triple tap on the back of your iPhone. Here’s how to set up and use Back Tap:
- Accessing Back Tap Settings:
- Open the “Settings” app on your iPhone.
- Navigating to Accessibility:
- Scroll down and select “Accessibility.”
- Finding Back Tap:
- Scroll down again and tap on “Touch.”
- Setting Up Back Tap:
- Scroll to the bottom and select “Back Tap.”
- Choosing an Action:
- Under “Double Tap” and “Triple Tap,” choose the action you want your iPhone to perform when you double or triple tap on the back of the device.
- You can select from a list of system actions like taking a screenshot, accessing the Control Center, locking the screen, adjusting volume, and more.
- Alternatively, you can choose to launch a Shortcut that you’ve created using the Shortcuts app.
- Testing Back Tap:
- Once you’ve selected your desired actions, exit the Settings app and try double or triple tapping on the back of your iPhone to trigger the chosen action.
- Adjusting Sensitivity:
- If you find that Back Tap is triggering too easily or not consistently enough, you can adjust the sensitivity by going back to the Back Tap settings and tweaking the settings for “Touch Sensitivity.”
Back Tap is a versatile feature that can be customized to suit your preferences and workflow. It provides a convenient way to perform actions on your iPhone without having to navigate through menus or use physical buttons. Whether you’re a power user looking to streamline your workflow or someone who needs easier access to certain functions due to accessibility reasons, Back Tap can be a valuable addition to your iPhone’s repertoire.
Guided Access
Guided Access is an accessibility feature on your iPhone that allows you to restrict the device to a single app and control which features are available within that app. It’s particularly useful for parents, teachers, or caregivers who want to limit access to specific apps or features on their iPhone, iPad, or iPod touch. Here’s how to set up and use Guided Access:
- Accessing Guided Access Settings:
- Open the “Settings” app on your iPhone.
- Navigating to Accessibility:
- Scroll down and select “Accessibility.”
- Finding Guided Access:
- Scroll down again and tap on “Guided Access.”
- Turning on Guided Access:
- Toggle the switch to turn on Guided Access.
- Setting a Passcode:
- Tap on “Passcode Settings” to set a passcode for Guided Access. This passcode will be required to exit Guided Access mode.
- Starting Guided Access:
- Open the app you want to use in Guided Access mode.
- Activating Guided Access:
- Triple-click the side button (on iPhone models with Face ID) or the Home button (on iPhone models with Touch ID) to activate Guided Access.
- If you’ve assigned a shortcut for Guided Access, you can use that shortcut instead.
- Configuring Guided Access Options:
- Once Guided Access is activated, you’ll see options to customize the settings.
- You can disable certain parts of the screen by drawing around them, disable touch altogether, or even set a time limit for how long Guided Access will remain active.
- Exiting Guided Access:
- To exit Guided Access mode, triple-click the side button or the Home button again.
- You’ll be prompted to enter the passcode you set earlier.
Guided Access is a powerful tool for managing screen time, controlling access to specific apps, and ensuring focused use of your iPhone. Whether you’re using it to create a distraction-free environment for studying or to limit your child’s access to certain apps or features, Guided Access gives you greater control over how your device is used.
Text Replacement Shortcuts
Text Replacement is a feature on your iPhone that allows you to create custom shortcuts for longer phrases or sentences that you frequently type. By creating these shortcuts, you can save time and effort by typing a few characters instead of typing out the entire phrase. Here’s how to set up and use Text Replacement:
- Accessing Text Replacement Settings:
- Open the “Settings” app on your iPhone.
- Navigating to Keyboard Settings:
- Scroll down and select “General.”
- Finding Text Replacement:
- Tap on “Keyboard.”
- Accessing Text Replacement:
- Scroll down and select “Text Replacement.”
- Adding a New Shortcut:
- Tap on the “+” icon in the top right corner to add a new shortcut.
- Entering Phrase and Shortcut:
- In the “Phrase” field, type the longer phrase or sentence that you want to create a shortcut for.
- In the “Shortcut” field, type the shortcut that you want to use to trigger the phrase.
- Saving the Shortcut:
- Tap on “Save” in the top right corner to save the shortcut.
- Using Text Replacement:
- Now, whenever you type the shortcut you created, your iPhone will automatically replace it with the corresponding phrase or sentence.
- For example, if you set up a shortcut “omw” for “On my way!”, typing “omw” will automatically replace it with “On my way!” in your text message, email, or any other text input field.
Text Replacement shortcuts can be incredibly handy for typing out commonly used phrases, email addresses, or other repetitive text quickly and efficiently. It’s a great way to streamline your typing experience and save time on your iPhone. You can also use it for more complex replacements, such as correcting common misspellings or inserting special characters.
Shake to Undo
“Shake to Undo” is a handy feature on your iPhone that allows you to quickly undo typing, deleting, or other actions by shaking your device. It’s especially useful if you’ve made a mistake while typing or editing text and want to undo it without manually selecting and deleting the text. Here’s how to use Shake to Undo:
- Typing or Editing Text:
- While typing or editing text in any app, if you make a mistake or want to undo your last action, simply shake your iPhone gently.
- Shake Your iPhone:
- Hold your iPhone firmly and shake it back and forth, as if you were shaking a physical object.
- Triggering Undo Action:
- After shaking your iPhone, you’ll see an “Undo Typing” or “Undo Delete” pop-up message appear on the screen.
- Confirming Undo:
- Tap on the “Undo” option within the pop-up message to confirm and undo your last action.
- If you change your mind and don’t want to undo the action, you can tap anywhere outside of the pop-up message to dismiss it.
“Shake to Undo” is a convenient feature that can save you time and frustration when you make a mistake while typing or editing text on your iPhone. It’s a quick and intuitive way to undo actions without having to manually select and delete text or navigate through menus. Keep in mind that if you find the shaking gesture uncomfortable or if you accidentally trigger it frequently, you can disable the feature in the Settings app under Accessibility > Touch > Shake to Undo.
Custom Vibrations for Contacts
Did you know that you can set custom vibration patterns for specific contacts on your iPhone? This feature allows you to identify incoming calls or messages from important contacts without needing to look at your phone. Here’s how to set up custom vibrations for contacts:
- Accessing Contact Details:
- Open the “Contacts” app on your iPhone.
- Selecting a Contact:
- Find and select the contact for whom you want to set a custom vibration pattern.
- Editing Contact Information:
- Tap on the “Edit” button in the upper-right corner of the contact’s details.
- Setting Custom Ringtone or Text Tone:
- Scroll down and tap on “Vibration.”
- You’ll see a list of default vibration patterns. At the bottom of the list, select “Create New Vibration.”
- Creating Custom Vibration:
- Tap on the screen to create a custom vibration pattern. You can tap and hold to create longer vibrations or tap repeatedly to create shorter ones. Experiment with different patterns until you’re satisfied with the result.
- Tap “Stop” when you’re finished creating your custom vibration.
- Saving Custom Vibration:
- You’ll be prompted to name your custom vibration. Enter a name for the vibration pattern and tap “Save.”
- Assigning Custom Vibration:
- After saving your custom vibration, it will appear in the list of vibration patterns. Select your custom vibration to assign it to the contact.
- Saving Changes:
- Once you’ve assigned the custom vibration, tap “Done” to save your changes and exit the contact editing screen.
Now, whenever you receive a call or message from the contact for whom you’ve set a custom vibration, your iPhone will vibrate according to the pattern you’ve created. This allows you to identify important contacts without needing to check your phone, making it especially useful in situations where you need to keep your phone on silent or in your pocket. Custom vibrations add a personalized touch to your iPhone experience and can help you stay connected more efficiently.
QR Code Scanner in Camera App
Your iPhone’s Camera app includes a built-in QR code scanner, allowing you to scan QR codes without the need for a separate app. QR codes are commonly used for various purposes, including website links, app downloads, Wi-Fi network connections, and more. Here’s how to use the QR code scanner in the Camera app:
- Opening the Camera App:
- Locate the Camera app on your iPhone’s home screen and tap to open it.
- Positioning the QR Code:
- Hold your iPhone steady and point the camera towards the QR code you want to scan. Make sure the QR code is well-lit and clearly visible within the camera frame.
- Scanning the QR Code:
- Once the camera detects the QR code within its frame, it will automatically recognize it and display a notification banner at the top of the screen.
- You don’t need to press any buttons or take a photo; simply position the QR code within the camera frame, and the scanner will activate automatically.
- Interacting with the Scanned QR Code:
- After the QR code is successfully scanned, the notification banner at the top of the screen will display the content of the QR code, such as a website link or an app download.
- Tap on the notification banner to open the associated content in Safari, the App Store, or another relevant app.
- Additional Options:
- If the scanned QR code contains a URL, you may also see a preview of the website’s link and the option to open it directly in Safari by tapping on the preview.
- Accessibility Shortcut:
- You can also access the QR code scanner quickly from the Control Center by customizing your Control Center settings. This allows you to open the camera and access the QR code scanner with just a few taps.
The built-in QR code scanner in the Camera app provides a convenient and efficient way to interact with QR codes without the need for third-party apps. Whether you’re scanning QR codes for website links, Wi-Fi network connections, or other purposes, your iPhone’s Camera app has you covered.
Safari Reader Mode
Safari Reader Mode is a feature in the Safari web browser on your iPhone that provides a distraction-free reading experience by removing ads, navigation menus, and other clutter from web pages. It presents the main content of the web page in a clean, easy-to-read format, making it ideal for reading articles, blog posts, and other text-heavy content. Here’s how to use Safari Reader Mode:
- Opening Safari:
- Tap on the Safari icon on your iPhone’s home screen to open the Safari web browser.
- Navigating to a Web Page:
- Enter the URL of the web page you want to visit in the address bar and tap “Go” on the keyboard to load the page.
- Activating Reader Mode:
- When the web page finishes loading, look for the Reader Mode icon in the address bar. It appears as a set of lines stacked on top of each other.
- Tap on the Reader Mode icon to activate Reader Mode for the current web page.
- Viewing in Reader Mode:
- Once Reader Mode is activated, the web page will be reformatted to display only the main content in a clean, text-focused layout.
- You’ll see the text of the article or content front and center, without distractions from ads, navigation bars, or other elements.
- Adjusting Reader Settings:
- While in Reader Mode, you can adjust the text size and font by tapping on the “AA” icon in the address bar.
- You can also change the background color to improve readability in different lighting conditions.
- Exiting Reader Mode:
- To exit Reader Mode and return to the original web page layout, simply tap on the Reader Mode icon again in the address bar.
Safari Reader Mode is a great feature for enhancing your reading experience on the web, especially when browsing content-heavy websites. It allows you to focus on the main text without distractions, making it easier to read articles and other long-form content on your iPhone. Whether you’re catching up on news, reading blog posts, or exploring educational articles, Safari Reader Mode can help make your reading sessions more enjoyable and efficient.
Emergency SOS Feature
The Emergency SOS feature on your iPhone provides a quick and easy way to call for help and notify emergency contacts in urgent situations. It’s designed to help you quickly get assistance from emergency services or trusted contacts when you’re in distress or need immediate assistance. Here’s how to use the Emergency SOS feature:
- Activating Emergency SOS:
- Press and hold the side button (on iPhone models with Face ID) and one of the volume buttons simultaneously until the Emergency SOS slider appears on the screen.
- On iPhone models with Touch ID, rapidly press the side button five times to activate the Emergency SOS slider.
- Sliding to Call Emergency Services:
- Drag the Emergency SOS slider to the right to immediately call emergency services in your region, such as 911 in the United States.
- If you’re using an iPhone in a different country, the Emergency SOS feature will automatically dial the local emergency number.
- Optional: Auto Call Emergency Services:
- If you enable the “Auto Call” feature in the Emergency SOS settings, your iPhone will automatically call emergency services when you activate Emergency SOS.
- To enable Auto Call, go to Settings > Emergency SOS, and toggle the switch next to “Auto Call.”
- Notifying Emergency Contacts:
- After making the emergency call, your iPhone will also send a message with your current location to your designated emergency contacts, if you have them set up.
- To set up emergency contacts, go to the Health app, tap on your profile picture in the upper-right corner, select “Medical ID,” and then tap “Edit” to add emergency contacts.
- Accessing Emergency Medical ID:
- Emergency responders can also access important medical information and emergency contacts from your iPhone’s Medical ID without needing to unlock your device.
- To set up your Medical ID, open the Health app, tap on your profile picture, and select “Medical ID.” Fill in your medical information and emergency contacts.
The Emergency SOS feature on your iPhone provides peace of mind knowing that help is just a few taps away in case of emergencies. Whether you need medical assistance, facing a dangerous situation, or witnessing an accident, Emergency SOS can quickly connect you with emergency services and notify your trusted contacts of your situation. It’s a valuable feature that can potentially save lives and ensure timely assistance when every second counts.
Silence Unknown Callers
The “Silence Unknown Callers” feature on your iPhone helps reduce interruptions from spam and robocalls by automatically sending calls from unknown numbers to voicemail. This feature is particularly useful for avoiding nuisance calls and maintaining focus without being disturbed by unwanted calls from unfamiliar numbers. Here’s how to enable Silence Unknown Callers:
- Accessing Phone Settings:
- Open the “Settings” app on your iPhone.
- Navigating to Phone Settings:
- Scroll down and select “Phone” from the list of options.
- Enabling Silence Unknown Callers:
- Scroll down to find the “Silence Unknown Callers” option.
- Toggle the switch next to “Silence Unknown Callers” to enable the feature. When enabled, incoming calls from numbers not in your contacts, recent outgoing calls, or Siri Suggestions will be silenced and sent directly to voicemail.
- Reviewing Voicemail Messages:
- Any calls from unknown numbers that are silenced and sent to voicemail will still leave a message if the caller chooses to leave one.
- You can check your voicemail messages at any time by accessing the Phone app and navigating to the “Voicemail” tab.
By enabling the “Silence Unknown Callers” feature, you can significantly reduce the disruption caused by unwanted calls from unknown or unfamiliar numbers. This feature helps you maintain focus, avoid spam and robocalls, and prioritize important calls from contacts in your address book. Keep in mind that while Silence Unknown Callers can be effective at reducing unwanted calls, it may also potentially silence legitimate calls from unknown numbers, such as those from new contacts or businesses you haven’t saved in your contacts.
Voice Memos Trim Feature
The Voice Memos app on your iPhone includes a convenient trimming feature that allows you to edit and remove unwanted sections from your recorded audio clips. Whether you’re recording meetings, lectures, interviews, or personal notes, the trim feature enables you to refine your recordings by removing unnecessary parts or trimming the beginning or end of the audio. Here’s how to use the trim feature in the Voice Memos app:
- Open the Voice Memos App:
- Locate and open the Voice Memos app on your iPhone. It’s typically found in the Utilities folder or by searching your home screen.
- Select the Recording:
- Tap on the audio recording that you want to trim to open it.
- Accessing Editing Options:
- Once the recording is open, you’ll see the audio waveform along with playback controls at the bottom of the screen.
- Tap on the ellipsis (…) icon (three dots) in the lower-right corner of the screen to access additional options.
- Select “Edit Recording”:
- From the options menu, choose “Edit Recording.”
- Trimming the Recording:
- You’ll see the audio waveform displayed with handles at the beginning and end.
- To trim the recording, tap and hold on either handle (the yellow markers) and drag them inward to select the portion of the recording you want to keep.
- As you drag the handles, you’ll see a preview of the trimmed section in the waveform.
- Release the handle once you’ve selected the desired portion of the recording to be kept.
- Saving the Trimmed Recording:
- After trimming the recording, tap on “Trim” in the upper-right corner to apply the changes and save the trimmed version of the recording.
- You’ll be returned to the recording’s details screen, where you can listen to the trimmed version or make additional edits if needed.
- Save or Discard Changes:
- If you’re satisfied with the trimmed recording, tap “Save” to keep the changes.
- If you want to discard the changes and revert to the original recording, tap “Cancel.”
The trim feature in the Voice Memos app makes it easy to refine your audio recordings by removing unwanted sections or trimming the beginning and end of the recording. Whether you’re capturing important notes, interviews, or brainstorming sessions, the ability to edit your recordings directly on your iPhone ensures that your audio content is polished and ready for sharing or archiving.
Announce Messages with Siri
The “Announce Messages with Siri” feature on your iPhone enables Siri to read incoming messages aloud to you when you’re wearing compatible headphones or connected to your car’s audio system. This hands-free functionality allows you to stay connected and informed without having to glance at your iPhone’s screen while driving or engaged in other activities. Here’s how to enable and use Announce Messages with Siri:
- Accessing Siri Settings:
- Open the “Settings” app on your iPhone.
- Navigating to Siri Settings:
- Scroll down and select “Siri & Search” from the list of options.
- Enabling Announce Messages:
- Under the “Siri Responses” section, find and tap on “Announce Messages.”
- Toggle the switch next to “Announce Messages with Siri” to enable the feature.
- Choosing Announcement Options:
- Below the toggle switch, you’ll see options to choose when Siri should announce incoming messages.
- Select one of the options:
- “Headphones & Car”: Siri will announce messages when you’re wearing compatible headphones or connected to your car’s audio system.
- “Headphones Only”: Siri will announce messages only when you’re wearing compatible headphones.
- “Always”: Siri will always announce messages, regardless of your audio output device.
- Customizing Sender Options:
- Below the announcement options, you can choose which contacts Siri should announce messages from.
- Tap on “Favorites” to have Siri announce messages from your favorite contacts, or select “All Contacts” for Siri to announce messages from anyone.
- You can also tap on “Recent Messages” to have Siri announce messages from recent contacts you’ve communicated with.
- Using Announce Messages:
- Once enabled, Siri will automatically announce incoming messages from the selected contacts when you’re wearing compatible headphones or connected to your car’s audio system.
- Siri will say the sender’s name and read the message aloud, giving you the option to reply hands-free using Siri.
By enabling Announce Messages with Siri, you can stay connected and informed while keeping your hands on the wheel or focusing on other tasks. This feature enhances accessibility and convenience, allowing you to manage incoming messages without having to check your iPhone’s screen. It’s a valuable tool for maintaining productivity and safety, especially while driving or in situations where hands-free communication is essential.
Offload Unused Apps
The “Offload Unused Apps” feature on your iPhone is a convenient way to free up storage space by automatically removing apps that you rarely use, while keeping their data intact. When you enable this feature, your iPhone will analyze your installed apps and offload those that haven’t been used for a while, reclaiming storage space without permanently deleting the apps. Here’s how to enable and use Offload Unused Apps:
- Accessing iPhone Storage Settings:
- Open the “Settings” app on your iPhone.
- Navigating to iPhone Storage:
- Scroll down and select “General” from the list of options.
- Finding iPhone Storage:
- Tap on “iPhone Storage” to view the storage usage breakdown.
- Enabling Offload Unused Apps:
- Scroll down to find the “Offload Unused Apps” option.
- Tap on “Enable” or toggle the switch next to “Offload Unused Apps” to enable the feature.
- Reviewing Offloaded Apps:
- After enabling Offload Unused Apps, your iPhone will periodically analyze your app usage and offload apps that haven’t been used recently to reclaim storage space.
- You can review the list of offloaded apps by scrolling down to the “Offloaded Apps” section on the iPhone Storage screen.
- Reinstalling Offloaded Apps:
- If you want to use an offloaded app again, simply tap on its icon to reinstall it from the App Store.
- The app’s data and settings will be preserved, so you can continue where you left off.
By enabling Offload Unused Apps, you can optimize storage space on your iPhone by removing apps that you rarely use while retaining the ability to easily reinstall them when needed. This feature helps keep your device running smoothly and ensures that you have enough storage space for essential apps and data. It’s a convenient way to manage your app collection and keep your iPhone clutter-free.
Conclusion
In conclusion, the iPhone is packed with hidden gems that can enhance your daily use and even come to your rescue in unexpected situations. These features not only showcase Apple’s commitment to accessibility but also provide users with clever tools to simplify and enrich their digital lives. So, the next time you pick up your iPhone, take a moment to explore these hidden features and unlock a world of possibilities right at your fingertips.