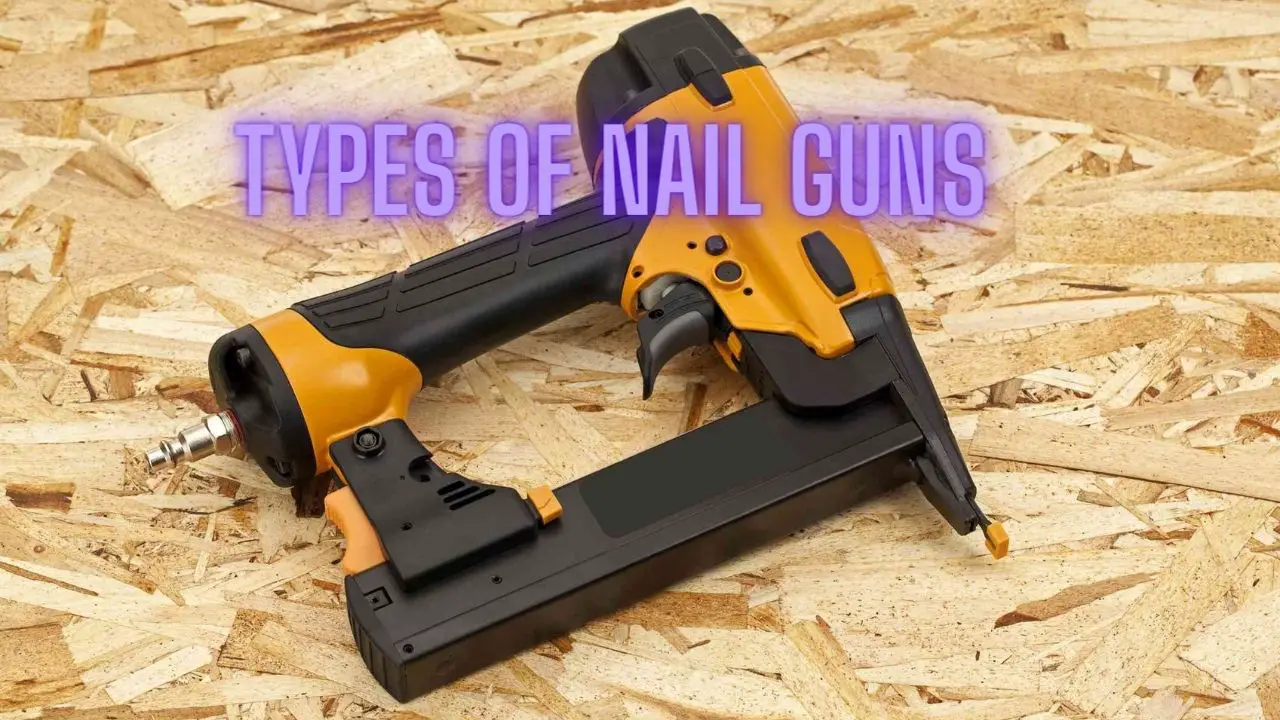
Different Types of Nail Guns: A Comprehensive Guide
Introduction
Nail guns, also known as nailers, are indispensable tools in construction, woodworking, and DIY projects, making fastening tasks quicker and more efficient. There are various types of nail guns designed for specific applications, each offering unique features and benefits. In this article, we’ll delve into the world of nail guns and explore the different types available.
Different Types of Nail Guns
1. Framing Nailers:
Framing nailers are powerful tools designed specifically for framing and construction applications. They are used to drive large, heavy-duty nails into wood, typically for tasks such as framing walls, building decks, installing subfloors, and constructing fences. Here are some key points to consider about framing nailers:
- Types of Framing Nailers:
- Pneumatic Framing Nailers: These nailers are powered by compressed air and require an air compressor to operate. They are known for their high power and durability, making them suitable for heavy-duty framing tasks.
- Cordless Framing Nailers: Cordless framing nailers are powered by rechargeable batteries, offering greater mobility and flexibility compared to pneumatic models. They are ideal for jobsites where access to power sources may be limited.
- Nail Size and Capacity: Framing nailers typically use larger nails, such as 2-inch to 3.5-inch nails, with varying diameters (commonly 0.113 inches to 0.131 inches). They often have a magazine capacity of 20 to 60 nails, allowing for efficient nailing without frequent reloading.
- Trigger Mechanism:
- Sequential Trigger: Many framing nailers feature a sequential trigger, which requires the user to depress the nose of the nailer against the workpiece before pulling the trigger. This helps prevent accidental firing and enhances safety.
- Contact or “Bump” Trigger: Some framing nailers offer a contact or “bump” trigger mode, where nails are fired rapidly as the user continuously depresses the trigger while moving the nailer along the workpiece. This mode can increase productivity but requires caution to prevent unintentional firing.
- Depth Adjustment:
- Most framing nailers allow for depth adjustment, allowing users to control how deeply the nails are driven into the workpiece. This feature is essential for achieving the desired level of nail penetration and preventing overdriving or underdriving nails.
- Dry-Fire Lockout: Many framing nailers are equipped with a dry-fire lockout mechanism that prevents the nailer from firing when the magazine is empty. This helps prevent damage to the tool and ensures that all nails are properly driven.
- Comfort and Ergonomics: Look for framing nailers with ergonomic designs and features such as padded grips, adjustable handles, and lightweight construction to reduce user fatigue during prolonged use.
- Safety Features: In addition to trigger mechanisms, framing nailers may include other safety features such as anti-jam mechanisms, tool-free jam clearing, and no-mar tips to protect the workpiece surface from damage.
- Brand Reputation and Warranty: Choose framing nailers from reputable brands known for quality construction and reliable performance. Check the warranty offered by the manufacturer to ensure you’re covered in case of defects or malfunctions.
When selecting a framing nailer, consider your specific framing needs, preferred power source, and desired features to choose a model that meets your requirements and provides efficient, reliable performance on the job site.
2. Finish Nailers:
Finish nailers are precision tools designed for more delicate woodworking and carpentry tasks, where aesthetics and minimal damage to the workpiece are crucial. Here are some key points to consider about finish nailers:
- Types of Finish Nailers:
- Pneumatic Finish Nailers: These nailers are powered by compressed air and require an air compressor to operate. They are commonly used for trim work, crown molding, baseboards, cabinetry, and other finish carpentry projects.
- Cordless Finish Nailers: Cordless finish nailers are powered by rechargeable batteries, offering mobility and convenience, especially in situations where access to power sources may be limited. They are ideal for finishing tasks in areas where cords may be cumbersome or impractical.
- Nail Size and Type:
- Finish nailers typically use smaller gauge nails compared to framing nailers, ranging from 15 to 16 gauge. These nails have a smaller diameter and leave behind smaller holes, resulting in a more aesthetically pleasing finish.
- Common nail lengths for finish nailers range from 1 inch to 2.5 inches, depending on the specific application and thickness of the material being fastened.
- Trigger Mechanism:
- Sequential Trigger: Similar to framing nailers, many finish nailers feature a sequential trigger mechanism, requiring the user to depress the nose of the nailer against the workpiece before pulling the trigger. This helps prevent accidental firing and ensures precise nail placement.
- Contact or “Bump” Trigger: Some finish nailers offer a contact or “bump” trigger mode for rapid nailing, where nails are fired as the user continuously depresses the trigger while moving the nailer along the workpiece. This mode can increase productivity but requires caution to prevent unintentional firing.
- Depth Adjustment:
- Finish nailers often feature depth adjustment settings to control how deeply the nails are driven into the workpiece. This allows users to achieve flush or countersunk nail heads without damaging the surface of the material.
- No-Mar Tips:
- Many finish nailers come equipped with no-mar tips or bumpers to prevent damage to the workpiece surface during nailing. These tips help ensure a clean, professional finish without leaving behind unsightly marks or scratches.
- Comfort and Ergonomics:
- Look for finish nailers with ergonomic designs and features such as padded grips, lightweight construction, and adjustable handles to reduce user fatigue during prolonged use.
- Safety Features:
- In addition to trigger mechanisms, finish nailers may include safety features such as anti-dry fire mechanisms, tool-free jam clearing, and reload indicators to enhance user safety and efficiency.
- Brand Reputation and Warranty:
- Choose finish nailers from reputable brands known for quality construction and reliable performance. Check the warranty offered by the manufacturer to ensure you’re covered in case of defects or malfunctions.
When selecting a finish nailer, consider your specific finishing needs, preferred power source, and desired features to choose a model that provides precise, consistent results and enhances the overall quality of your woodworking projects.
3. Brad Nailers:
Brad nailers are versatile tools used for precise and delicate woodworking tasks, such as trim work, furniture assembly, cabinetry, and other finish carpentry projects. Here are some key points to consider about brad nailers:
- Types of Brad Nailers:
- Pneumatic Brad Nailers: These nailers are powered by compressed air and require an air compressor to operate. They are lightweight and offer excellent maneuverability, making them ideal for intricate woodworking tasks.
- Cordless Brad Nailers: Cordless brad nailers are powered by rechargeable batteries, providing mobility and convenience, especially in situations where access to power sources may be limited. They offer the freedom to work without the hassle of air hoses and compressors.
- Nail Size and Type:
- Brad nailers use thin, small-gauge nails called brad nails, typically ranging from 18 to 23 gauge. These nails have a small diameter and leave behind minimal holes, making them ideal for finishing work where appearance is critical.
- Common nail lengths for brad nailers range from 5/8 inch to 2 inches, depending on the specific application and thickness of the material being fastened.
- Trigger Mechanism:
- Sequential Trigger: Like other nailers, many brad nailers feature a sequential trigger mechanism, requiring the user to depress the nose of the nailer against the workpiece before pulling the trigger. This helps prevent accidental firing and ensures precise nail placement.
- Contact or “Bump” Trigger: Some brad nailers offer a contact or “bump” trigger mode for rapid nailing, where nails are fired as the user continuously depresses the trigger while moving the nailer along the workpiece. This mode can increase productivity but requires caution to prevent unintentional firing.
- Depth Adjustment:
- Brad nailers often feature depth adjustment settings to control how deeply the nails are driven into the workpiece. This allows users to achieve flush or countersunk nail heads without damaging the surface of the material.
- No-Mar Tips:
- Many brad nailers come equipped with no-mar tips or bumpers to prevent damage to the workpiece surface during nailing. These tips help ensure a clean, professional finish without leaving behind unsightly marks or scratches.
- Comfort and Ergonomics:
- Look for brad nailers with ergonomic designs and features such as padded grips, lightweight construction, and adjustable handles to reduce user fatigue during prolonged use.
- Safety Features:
- In addition to trigger mechanisms, brad nailers may include safety features such as anti-dry fire mechanisms, tool-free jam clearing, and reload indicators to enhance user safety and efficiency.
- Brand Reputation and Warranty:
- Choose brad nailers from reputable brands known for quality construction and reliable performance. Check the warranty offered by the manufacturer to ensure you’re covered in case of defects or malfunctions.
When selecting a brad nailer, consider your specific woodworking needs, preferred power source, and desired features to choose a model that provides precise, consistent results and enhances the overall quality of your projects.
4. Pin Nailers:
Pin nailers, also known as pinners, are specialized tools used for delicate woodworking tasks where minimal visibility of nail holes is desired. Here are some key points to consider about pin nailers:
- Types of Pin Nailers:
- Pneumatic Pin Nailers: These nailers are powered by compressed air and require an air compressor to operate. They are commonly used in professional woodworking shops due to their power and precision.
- Cordless Pin Nailers: Cordless pin nailers are powered by rechargeable batteries, providing mobility and convenience, especially in situations where access to power sources may be limited. They offer flexibility and ease of use in various woodworking applications.
- Nail Size and Type:
- Pin nailers use extremely thin-gauge nails called pin nails, typically ranging from 23 to 18 gauge. These nails have a very small diameter and leave behind virtually invisible holes, making them ideal for delicate trim work, moldings, and decorative projects.
- Common nail lengths for pin nailers range from 3/8 inch to 2 inches, depending on the specific application and thickness of the material being fastened.
- Trigger Mechanism:
- Pin nailers typically feature a single-action trigger mechanism, allowing for rapid and continuous nailing with each pull of the trigger. Some models may offer a sequential firing mode for added safety and control.
- Depth Adjustment:
- Many pin nailers come equipped with depth adjustment settings to control how deeply the nails are driven into the workpiece. This feature ensures precise nail penetration without damaging the surface of the material.
- No-Mar Tips:
- Some pin nailers come equipped with no-mar tips or bumpers to prevent damage to the workpiece surface during nailing. These tips help ensure a clean, professional finish without leaving behind unsightly marks or scratches.
- Comfort and Ergonomics:
- Look for pin nailers with ergonomic designs and features such as padded grips, lightweight construction, and adjustable handles to reduce user fatigue during prolonged use, especially on intricate woodworking projects.
- Safety Features:
- Pin nailers may include safety features such as anti-dry fire mechanisms, tool-free jam clearing, and reload indicators to enhance user safety and efficiency.
- Brand Reputation and Warranty:
- Choose pin nailers from reputable brands known for quality construction and reliable performance. Check the warranty offered by the manufacturer to ensure you’re covered in case of defects or malfunctions.
When selecting a pin nailer, consider your specific woodworking needs, preferred power source, and desired features to choose a model that provides precise, consistent results and enhances the overall quality of your projects.
5. Roofing Nailers:
Roofing nailers are specialized tools designed specifically for installing roofing materials such as shingles, underlayment, and roofing felt. Here are some key points to consider about roofing nailers:
- Types of Roofing Nailers:
- Pneumatic Roofing Nailers: These nailers are powered by compressed air and require an air compressor to operate. They are commonly used for professional roofing projects due to their power and durability.
- Coil Roofing Nailers: Coil roofing nailers use a coil magazine to hold nails, allowing for higher nail capacity and reduced reloading frequency. They are preferred for large roofing projects where efficiency is essential.
- Stick Roofing Nailers: Stick roofing nailers use straight magazines to hold nails and are suitable for smaller roofing jobs or DIY projects.
- Nail Size and Type:
- Roofing nailers typically use large-headed nails specifically designed for roofing applications. These nails are usually between 3/4 inch to 1-3/4 inches in length and have a wide shank to provide secure attachment to roofing materials.
- Trigger Mechanism:
- Roofing nailers typically feature a single-action trigger mechanism, allowing for rapid and continuous nailing with each pull of the trigger. Some models may offer a sequential firing mode for added safety and control.
- Depth Adjustment:
- Many roofing nailers come equipped with depth adjustment settings to control how deeply the nails are driven into the roofing material. This feature ensures proper nail penetration without damaging the underlying structure.
- Magazine Type:
- Coil roofing nailers use a coil magazine that holds nails in a continuous coil, while stick roofing nailers use a straight magazine that holds nails in a linear arrangement. Choose the magazine type that best suits your preferences and project requirements.
- Comfort and Ergonomics:
- Look for roofing nailers with ergonomic designs and features such as padded grips, lightweight construction, and adjustable handles to reduce user fatigue during prolonged use, especially on large roofing projects.
- Safety Features:
- Roofing nailers may include safety features such as anti-dry fire mechanisms, tool-free jam clearing, and exhaust deflectors to redirect air away from the user’s face. These features enhance user safety and efficiency on the job site.
- Brand Reputation and Warranty:
- Choose roofing nailers from reputable brands known for quality construction and reliable performance, especially for professional roofing projects. Check the warranty offered by the manufacturer to ensure you’re covered in case of defects or malfunctions.
When selecting a roofing nailer, consider your specific roofing needs, preferred power source, and desired features to choose a model that provides efficient, reliable performance and helps you achieve professional-quality results on your roofing projects.
6. Flooring Nailers:
Flooring nailers are specialized tools designed for the installation of hardwood, engineered wood, and other types of flooring. Here are some key points to consider about flooring nailers:
- Types of Flooring Nailers:
- Manual Flooring Nailers: These nailers require manual force to drive nails into the flooring material. They are typically operated with a mallet or hammer and are suitable for smaller flooring projects or DIY installations.
- Pneumatic Flooring Nailers: Pneumatic flooring nailers are powered by compressed air and require an air compressor to operate. They offer increased efficiency and are ideal for professional flooring installers or larger flooring projects.
- Nail Type and Size:
- Flooring nailers use specially designed flooring nails or cleats to secure the flooring material to the subfloor. These nails are typically L-shaped or T-shaped and have serrated edges to provide better grip and stability.
- Common nail lengths for flooring nailers range from 1.5 inches to 2 inches, depending on the thickness of the flooring material and the subfloor.
- Nailer Angle:
- Flooring nailers are available in different angles, including 0-degree (straight), 45-degree, and 90-degree. The angle refers to the angle at which the nail is driven into the flooring material. Choose the nailer angle that best suits the layout and orientation of your flooring installation.
- Trigger Mechanism:
- Flooring nailers typically feature a single-action trigger mechanism, allowing for rapid and continuous nailing with each pull of the trigger. Some models may offer a sequential firing mode for added safety and control.
- Depth Adjustment:
- Many flooring nailers come equipped with depth adjustment settings to control how deeply the nails are driven into the flooring material. This feature ensures proper nail penetration without damaging the surface of the flooring.
- No-Mar Tips:
- Some flooring nailers come equipped with no-mar tips or bumpers to prevent damage to the surface of the flooring material during nailing. These tips help ensure a clean, professional finish without leaving behind unsightly marks or scratches.
- Comfort and Ergonomics:
- Look for flooring nailers with ergonomic designs and features such as padded grips, lightweight construction, and adjustable handles to reduce user fatigue during prolonged use, especially on larger flooring projects.
- Safety Features:
- Flooring nailers may include safety features such as anti-dry fire mechanisms, tool-free jam clearing, and reload indicators to enhance user safety and efficiency.
- Brand Reputation and Warranty:
- Choose flooring nailers from reputable brands known for quality construction and reliable performance. Check the warranty offered by the manufacturer to ensure you’re covered in case of defects or malfunctions.
When selecting a flooring nailer, consider your specific flooring installation needs, preferred power source, and desired features to choose a model that provides efficient, reliable performance and helps you achieve professional-quality results on your flooring projects.
7. Palm Nailers:
Palm nailers are compact and versatile tools designed for driving nails in tight spaces or hard-to-reach areas where conventional nail guns may not fit. Here are some key points to consider about palm nailers:
- Design and Size:
- Palm nailers are small, handheld tools that fit comfortably in the palm of your hand. They are lightweight and easy to maneuver, making them ideal for working in confined spaces or overhead.
- Some palm nailers feature a magnetic tip to securely hold the nail in place during operation, while others use a pneumatic or cordless design.
- Power Source:
- Pneumatic Palm Nailers: Pneumatic palm nailers are powered by compressed air and require an air compressor to operate. They offer high power and precision, making them suitable for a wide range of fastening tasks.
- Cordless Palm Nailers: Cordless palm nailers are powered by rechargeable batteries, providing mobility and convenience, especially in situations where access to power sources may be limited. They offer flexibility and ease of use in various fastening applications.
- Nail Size and Type:
- Palm nailers are compatible with a variety of nail sizes and types, including common nails, finish nails, and even small framing nails. They are suitable for a wide range of fastening tasks, including framing, trim work, and general carpentry.
- Trigger Mechanism:
- Palm nailers typically feature a single-action trigger mechanism, allowing for rapid and continuous nailing with each pull of the trigger. Some models may offer a sequential firing mode for added safety and control.
- Comfort and Ergonomics:
- Look for palm nailers with ergonomic designs and features such as padded grips, lightweight construction, and adjustable handles to reduce user fatigue during prolonged use, especially in tight or awkward positions.
- Applications:
- Palm nailers are versatile tools suitable for a wide range of fastening applications, including framing, decking, fencing, sheathing, and siding. They excel in tasks where precision and control are required, such as driving nails in corners or overhead.
- Safety Features:
- Palm nailers may include safety features such as anti-dry fire mechanisms, tool-free jam clearing, and exhaust deflectors to enhance user safety and efficiency.
- Brand Reputation and Warranty:
- Choose palm nailers from reputable brands known for quality construction and reliable performance. Check the warranty offered by the manufacturer to ensure you’re covered in case of defects or malfunctions.
When selecting a palm nailer, consider your specific fastening needs, preferred power source, and desired features to choose a model that provides efficient, reliable performance and helps you achieve professional-quality results in tight or hard-to-reach spaces.
8. Siding Nailers:
Siding nailers are specialized tools designed specifically for the installation of siding materials, such as vinyl, fiber cement, wood, and composite siding. Here are some key points to consider about siding nailers:
- Types of Siding Nailers:
- Pneumatic Siding Nailers: These nailers are powered by compressed air and require an air compressor to operate. They offer high power and precision, making them suitable for professional siding installation projects.
- Cordless Siding Nailers: Cordless siding nailers are powered by rechargeable batteries, providing mobility and convenience, especially in situations where access to power sources may be limited. They offer flexibility and ease of use in various siding applications.
- Nail Type and Size:
- Siding nailers use specially designed nails, typically known as siding nails or siding screws, to secure siding materials to the exterior of a building. These nails are often coated with a corrosion-resistant finish to withstand outdoor exposure.
- Common nail lengths for siding nailers range from 1-1/4 inches to 2-1/2 inches, depending on the thickness of the siding material and the underlying structure.
- Nailer Angle:
- Siding nailers are available in different angles, including 0-degree (straight), 15-degree, and 16-degree. The angle refers to the angle at which the nail is driven into the siding material. Choose the nailer angle that best suits the layout and orientation of your siding installation.
- Trigger Mechanism:
- Siding nailers typically feature a single-action trigger mechanism, allowing for rapid and continuous nailing with each pull of the trigger. Some models may offer a sequential firing mode for added safety and control.
- Depth Adjustment:
- Many siding nailers come equipped with depth adjustment settings to control how deeply the nails are driven into the siding material. This feature ensures proper nail penetration without damaging the surface of the siding.
- No-Mar Tips:
- Some siding nailers come equipped with no-mar tips or bumpers to prevent damage to the surface of the siding material during nailing. These tips help ensure a clean, professional finish without leaving behind unsightly marks or scratches.
- Comfort and Ergonomics:
- Look for siding nailers with ergonomic designs and features such as padded grips, lightweight construction, and adjustable handles to reduce user fatigue during prolonged use, especially on larger siding projects.
- Safety Features:
- Siding nailers may include safety features such as anti-dry fire mechanisms, tool-free jam clearing, and reload indicators to enhance user safety and efficiency.
- Brand Reputation and Warranty:
- Choose siding nailers from reputable brands known for quality construction and reliable performance, especially for professional siding installation projects. Check the warranty offered by the manufacturer to ensure you’re covered in case of defects or malfunctions.
When selecting a siding nailer, consider your specific siding installation needs, preferred power source, and desired features to choose a model that provides efficient, reliable performance and helps you achieve professional-quality results on your siding projects.
9. Staple Guns:
Staple guns, also known as staplers, are versatile tools used for fastening materials together using staples. Here are some key points to consider about staple guns:
- Types of Staple Guns:
- Manual Staple Guns: Manual staple guns are powered by hand pressure and require physical force to drive staples into materials. They are suitable for light-duty tasks and DIY projects.
- Pneumatic Staple Guns: Pneumatic staple guns are powered by compressed air and require an air compressor to operate. They offer higher power and efficiency, making them suitable for professional and heavy-duty applications.
- Electric Staple Guns: Electric staple guns are powered by electricity and do not require manual force to operate. They are convenient and easy to use, making them ideal for upholstery, carpentry, and other tasks where repetitive stapling is required.
- Staple Size and Type:
- Staple guns use staples of various sizes and types, including narrow crown staples, wide crown staples, and brad nails. The size and type of staple used depend on the specific application and material being fastened.
- Common staple lengths range from 1/4 inch to 1-1/2 inches, but longer staples are available for certain applications.
- Trigger Mechanism:
- Staple guns typically feature a trigger mechanism for firing staples. Some models offer a single-action trigger, while others may have a sequential or contact firing mode for rapid stapling.
- Depth Adjustment:
- Many staple guns come equipped with depth adjustment settings to control how deeply the staples are driven into the material. This feature ensures proper staple penetration without damaging the surface of the material.
- Safety Features:
- Staple guns may include safety features such as trigger locks, anti-jam mechanisms, and safety guards to prevent accidental firing and enhance user safety.
- Comfort and Ergonomics:
- Look for staple guns with ergonomic designs and features such as padded grips, lightweight construction, and adjustable handles to reduce user fatigue during prolonged use.
- Applications:
- Staple guns are versatile tools suitable for a wide range of applications, including upholstery, carpentry, woodworking, flooring, insulation, and general repairs. They are used to fasten materials such as fabric, paper, cardboard, insulation, and thin wood panels.
- Brand Reputation and Warranty:
- Choose staple guns from reputable brands known for quality construction and reliable performance. Check the warranty offered by the manufacturer to ensure you’re covered in case of defects or malfunctions.
When selecting a staple gun, consider your specific fastening needs, preferred power source, and desired features to choose a model that provides efficient, reliable performance and helps you achieve professional-quality results on your projects.
10. Combination Nailers:
Combination nailers, also known as 2-in-1 or 3-in-1 nailers, are versatile tools that combine the functionality of multiple nail guns into a single unit. Here are some key points to consider about combination nailers:
- Versatility:
- Combination nailers are capable of driving different types and sizes of nails, including brad nails, finish nails, and staple, depending on the model. This versatility allows users to tackle a wide range of fastening tasks with a single tool.
- Applications:
- Combination nailers are suitable for various applications, including trim work, crown molding, baseboards, cabinetry, furniture assembly, upholstery, flooring, and more. They are ideal for both DIY enthusiasts and professional contractors who require flexibility and efficiency in their projects.
- Power Source:
- Combination nailers may be powered by different sources, including pneumatic (air-powered), cordless (battery-powered), or electric (corded or cordless). Choose the power source that best suits your needs and preferences based on factors such as mobility, convenience, and available power sources.
- Trigger Mechanism:
- Like individual nail guns, combination nailers typically feature trigger mechanisms for firing nails or staples. Some models offer a single-action trigger, while others may have a sequential or contact firing mode for rapid fastening.
- Depth Adjustment:
- Many combination nailers come equipped with depth adjustment settings to control how deeply the fasteners are driven into the material. This feature ensures precise fastener penetration without damaging the surface of the material.
- Comfort and Ergonomics:
- Look for combination nailers with ergonomic designs and features such as padded grips, lightweight construction, and adjustable handles to reduce user fatigue during prolonged use. Comfortable and user-friendly designs enhance productivity and overall satisfaction with the tool.
- Safety Features:
- Combination nailers may include safety features such as trigger locks, anti-dry fire mechanisms, tool-free jam clearing, and safety guards to prevent accidental firing and enhance user safety.
- Brand Reputation and Warranty:
- Choose combination nailers from reputable brands known for quality construction and reliable performance. Check the warranty offered by the manufacturer to ensure you’re covered in case of defects or malfunctions.
When selecting a combination nailer, consider your specific fastening needs, preferred power source, and desired features to choose a model that provides efficient, reliable performance and helps you achieve professional-quality results on your projects.
Choosing the Right Nail Gun
Choosing the right nail gun involves considering several factors to ensure it fits your specific needs and preferences. Here are some key points to consider when selecting a nail gun:
- Project Type and Size: Determine the primary tasks you’ll be using the nail gun for. Different projects may require different types of nail guns. For example, framing nailers are suitable for heavy-duty tasks like framing and construction, while brad nailers are better suited for delicate trim work.
- Power Source: Nail guns come in pneumatic (air-powered), cordless (battery-powered), and electric (corded or cordless) models. Consider which power source aligns best with your workspace and mobility requirements. Pneumatic nail guns tend to be more powerful but require an air compressor. Cordless nail guns offer greater mobility but may have limited battery life.
- Nail Size and Type: Ensure the nail gun is compatible with the size and type of nails you’ll be using for your projects. Different nail guns accommodate different nail lengths and gauges. Make sure the nail gun you choose can handle the nails required for your specific tasks.
- Ergonomics and Weight: Comfort is essential, especially for extended use. Consider the weight, grip, and overall ergonomics of the nail gun. Choose a model that feels comfortable to hold and maneuver for long periods without causing fatigue or strain.
- Budget and Cost of Ownership: Set a budget for your nail gun purchase, considering not only the initial cost but also ongoing expenses such as maintenance, accessories, and consumables like nails and batteries. Compare prices and features to find the best value within your budget.
- Versatility: Some nail guns are designed for specific applications, while others offer versatility for a wide range of tasks. Determine whether you need a specialized nail gun for specific projects or prefer a more versatile model that can handle various tasks.
- Brand Reputation and Warranty: Research reputable brands are known for quality construction and reliable performance. Check customer reviews and ratings to gauge satisfaction with specific models. Additionally, consider the warranty offered by the manufacturer to ensure you’re covered in case of defects or malfunctions.
- Additional Features: Look for additional features that enhance convenience and efficiency, such as tool-free depth adjustment, jam-clearing mechanisms, swivel air connectors (for pneumatic models), LED lights (for working in dimly lit areas), and belt hooks (for easy portability).
By carefully considering these factors, you can choose the right nail gun that meets your specific requirements and ensures the successful completion of your projects.
Safety Precautions and Best Practices
Safety should always be a top priority when using nail guns. Here are some important safety precautions and best practices to follow:
- Read the Manual: Before using a nail gun, thoroughly read the manufacturer’s instruction manual and familiarize yourself with the tool’s operation, safety features, and maintenance requirements.
- Wear Personal Protective Equipment (PPE):
- Safety glasses or goggles to protect your eyes from flying debris.
- Hearing protection, especially when using pneumatic nail guns, to reduce noise exposure.
- Gloves to protect your hands from sharp edges and potential injuries.
- Steel-toed boots or sturdy footwear to protect your feet from falling objects.
- Inspect the Nail Gun: Before each use, inspect the nail gun for any visible damage, loose parts, or signs of wear. Ensure that all safety guards and mechanisms are in place and functioning properly.
- Use the Correct Nails: Only use nails recommended by the manufacturer for your specific nail gun model. Using incorrect or damaged nails can lead to malfunctions and accidents.
- Handle with Care: Always treat the nail gun with care and respect. Avoid dropping or mishandling the tool, as this can cause damage and increase the risk of accidents.
- Keep Hands Clear: Keep your hands and body parts away from the nail gun’s firing area at all times, especially when the trigger is activated. Accidental firing can occur if fingers are too close to the trigger.
- Avoid “Bump Firing”: Use the nail gun’s trigger in sequential firing mode rather than bump firing mode whenever possible. Bump firing increases the risk of unintentional firing and can lead to injuries.
- Secure Workpiece: Ensure the workpiece is properly secured and supported before nailing to prevent it from shifting or falling during operation.
- Maintain Proper Balance: Maintain a stable stance and proper balance while operating the nail gun. Avoid overreaching or working from unstable positions that could lead to loss of control.
- Disconnect Power Sources: If using a corded or pneumatic nail gun, disconnect the power source or release air pressure before performing maintenance, clearing jams, or making adjustments.
- Store Safely: When not in use, store the nail gun in a secure location away from children and unauthorized users. Keep it in a dry place to prevent corrosion and damage.
- Training and Supervision: Ensure that anyone using a nail gun receives proper training on its safe operation and follows all safety precautions. Supervise inexperienced users until they demonstrate competency.
By following these safety precautions and best practices, you can minimize the risk of accidents and injuries when using nail guns. Always prioritize safety and take appropriate measures to protect yourself and others in the work environment.
Nail Guns FAQS
What is a nail gun used for?
Nail guns are used to drive nails into various materials quickly and efficiently. They are commonly used in construction, woodworking, and DIY projects for tasks such as framing, finish work, attaching trim, roofing, and more.
Are nail guns safe to use?
Yes, nail guns are safe to use when operated correctly and with proper safety precautions. Follow manufacturer instructions, wear appropriate safety gear (eye protection, gloves), and keep your hands and body away from the nail’s path.
What types of nails do nail guns use?
Nail guns use different types of nails depending on the type of nailer. Common nail types include framing nails, finish nails, brads, pins, and staples. The nail size and type should match the nail gun’s specifications.
Are there different power sources for nail guns?
Yes, nail guns can have different power sources:
- Pneumatic: Powered by compressed air from an air compressor.
- Cordless: Powered by batteries or gas fuel cells, offering mobility without cords or hoses.
- Electric: Operate using electricity, either corded or cordless.
Can I use a nail gun for all types of materials?
Nail guns are designed for specific materials and applications. For example, framing nailers are used for heavy-duty framing tasks, while finish nailers are better for precision work. Always choose the appropriate nail gun for the material you’re working with.
How do I prevent nail jams?
Nail jams can be prevented by using the correct nail type and size specified by the manufacturer. Regularly clean and maintain your nail gun, lubricate it according to the guidelines, and avoid overloading the magazine.
How do I select the right nail gun for my project?
Consider the type of project, the materials you’ll be working with, and the specific tasks you’ll need the nail gun for. Choose a nail gun that matches the nail type, size, and power source required for your project.
Can nail guns replace traditional hammers?
Nail guns are efficient alternatives to traditional hammers for many tasks. They can save time and effort, especially for repetitive fastening. However, hammers may still be necessary for certain delicate tasks or when working with materials that require more controlled force.
Do I need any training to use a nail gun?
While nail guns are relatively user-friendly, it’s recommended to read the manufacturer’s instructions thoroughly before use. If you’re new to nail guns, practice on scrap materials to get a feel for the tool’s operation before starting your project.
Can I rent a nail gun?
Yes, many hardware stores and equipment rental shops offer nail guns for rent. Renting a nail gun can be a cost-effective option for occasional or one-time projects.
How do I maintain a nail gun?
Regular maintenance includes cleaning the gun, lubricating it as recommended by the manufacturer, and checking for any loose or worn parts. Follow the maintenance guidelines provided in the tool’s manual.
Conclusion
When choosing a nail gun, consider the type of projects you’ll be working on, the materials you’ll be fastening, and the level of precision required. Always prioritize safety and familiarize yourself with the tool’s operation and safety features. Proper maintenance and following manufacturer’s guidelines will ensure your nail gun serves you effectively for years to come.