How to Record From your TV to a USB Stick | Solutions and Guide?
Introduction
Purpose of the Guide:
In this guide, we aim to provide you with comprehensive solutions and guidance on how to record from your TV to a USB stick. With the increasing popularity of digital content and the convenience of USB storage, this guide will help you harness the capabilities of your TV and USB stick to record your favorite shows, movies, and events. Whether you want to capture live sports, save episodes of your favorite series, or simply create a digital archive of memorable broadcasts, this guide will walk you through the process step by step.
Benefits of Recording to a USB Stick:
Recording to a USB stick offers several advantages over traditional recording methods:
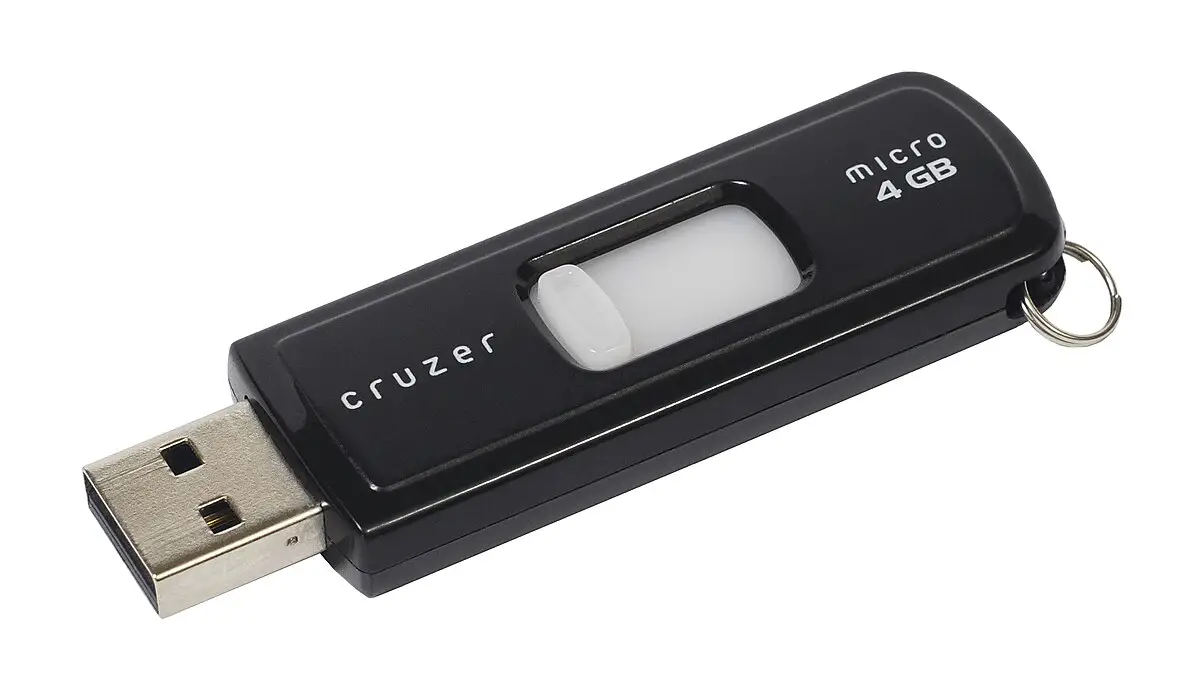
- Portability: USB sticks are small, lightweight, and easy to carry, allowing you to take your recorded content with you wherever you go.
- Cost-effectiveness: USB sticks are relatively inexpensive compared to other recording devices, making them a budget-friendly option for recording TV content.
- Convenience: With a USB stick, you can easily transfer recorded content to other devices such as computers, laptops, or tablets for playback or storage.
- Flexibility: USB sticks offer flexible storage options, allowing you to choose the capacity that best suits your recording needs.
- Compatibility: USB sticks are compatible with most modern TVs, making them a versatile solution for recording content from a variety of sources.
By recording to a USB stick, you can enjoy the flexibility and convenience of digital recording while preserving your favorite TV moments for future enjoyment. This guide will equip you with the knowledge and tools you need to make the most of your TV and USB stick recording capabilities.
Understanding TV Recording
Different Methods of TV Recording:
- Built-in DVR: Some modern TVs come with built-in digital video recorders (DVRs) that allow you to schedule and record programs directly onto the TV’s internal storage. These DVRs often offer features such as pause, rewind, and fast-forward during playback.
- External DVRs: External DVRs, also known as set-top boxes or digital video recorders, can be connected to your TV to provide recording capabilities. These devices usually offer additional features and storage options compared to built-in DVRs.
- Streaming Devices: Some streaming devices, such as Roku, Amazon Fire TV, and Apple TV, offer cloud-based DVR services that allow you to record live TV and stream recorded content over the internet.
- PC-Based Recording: You can also use a computer or laptop equipped with a TV tuner card or USB tuner to record TV programs. Software applications like Windows Media Center or third-party DVR software can facilitate this process.
Why Record to a USB Stick?
Recording to a USB stick offers several advantages over other methods:
- Convenience: Recording to a USB stick eliminates the need for additional equipment like external DVRs or set-top boxes, streamlining the recording process.
- Portability: USB sticks are compact and portable, allowing you to easily transfer recorded content to other devices for playback or storage.
- Cost-effectiveness: USB sticks are relatively inexpensive compared to dedicated DVR devices, making them a cost-effective option for recording TV content.
- Compatibility: USB sticks are compatible with most modern TVs and can be easily connected via USB ports, ensuring compatibility across a wide range of devices.
- Ease of Use: Recording to a USB stick is often straightforward and user-friendly, requiring minimal setup and configuration.
Compatibility Check
TV Compatibility:
Before attempting to record to a USB stick from your TV, it’s essential to ensure that your TV supports this feature. Here are some factors to consider regarding TV compatibility:
- USB Port: Check if your TV has a USB port. Most modern TVs come equipped with at least one USB port, which can be used for various purposes, including connecting external storage devices for recording.
- Supported Formats: Ensure that your TV supports the file format used for recording. Common formats for TV recording include MPEG-2, MPEG-4, and H.264. Consult your TV’s user manual or specifications to verify compatibility.
- Recording Functionality: Not all TVs support recording to USB sticks out of the box. Some may require firmware updates or additional software to enable this feature. Check your TV’s documentation or manufacturer’s website for information on recording capabilities.
USB Stick Compatibility:
In addition to TV compatibility, it’s essential to ensure that your USB stick is compatible with your TV and suitable for recording purposes. Consider the following factors when assessing USB stick compatibility:
- Storage Capacity: Choose a USB stick with sufficient storage capacity to accommodate your recording needs. HD recordings, in particular, can consume a significant amount of storage space. Consider factors such as the length and quality of recordings you plan to make.
- File System: Most TVs support USB sticks formatted with the FAT32 or exFAT file systems. However, it’s essential to verify the supported file system for your specific TV model. Some TVs may have limitations on the maximum supported capacity or file size for USB storage devices.
- Speed Class: Higher-speed class USB sticks, such as Class 10 or UHS-I, are recommended for recording video content, especially high-definition recordings. These USB sticks offer faster write speeds, ensuring smooth and reliable recording performance.
- Compatibility Testing: If possible, test the USB stick with your TV before committing to recording. This can help identify any compatibility issues or performance limitations before recording important content.
Necessary Equipment
USB Stick Requirements:
When selecting a USB stick for recording TV content, consider the following requirements:
- Storage Capacity: Choose a USB stick with sufficient storage capacity to accommodate your recording needs. The required capacity depends on factors such as the resolution (SD or HD) and length of recordings. For example, a 1-hour HD recording may require several gigabytes of storage space.
- Speed Class: Opt for a USB stick with a high-speed class rating, such as Class 10 or UHS-I, to ensure smooth and reliable recording performance. Higher-speed class USB sticks offer faster write speeds, which are essential for recording video content without buffering or dropped frames.
- Durability: Look for a USB stick with a durable and robust design, especially if you plan to use it for frequent recording and playback. Choose a USB stick from a reputable manufacturer known for producing reliable and long-lasting storage devices.
- Compatibility: Ensure that the USB stick is compatible with your TV and supports the required file system format (e.g., FAT32 or exFAT). Check the specifications of your TV and the USB stick to verify compatibility before purchasing.
Cables and Adapters:
In addition to a compatible USB stick, you may need the following cables and adapters to connect the USB stick to your TV:
- USB Cable: Depending on the distance between your TV and the USB port, you may need a USB extension cable to connect the USB stick to the TV. Choose a high-quality USB cable with sufficient length to reach the USB port comfortably.
- USB Adapter: If your TV’s USB port is difficult to access or located in a hard-to-reach area, consider using a USB adapter or hub to facilitate connection. USB adapters can provide additional USB ports or extenders to make it easier to connect the USB stick.
- HDMI Cable (Optional): If you’re using an external DVR or set-top box to record TV content, you may need an HDMI cable to connect the device to your TV. Choose an HDMI cable of appropriate length and quality to ensure reliable signal transmission and high-definition playback.
Choosing the Right USB Stick
Capacity Considerations:
When selecting a USB stick for recording TV content, consider the following capacity considerations:
- Recording Length: Estimate the average length of your TV recordings to determine the required storage capacity. For example, if you plan to record one-hour TV shows, a USB stick with at least 16GB of storage should suffice for standard-definition recordings. However, for high-definition recordings or longer programs, you may need a larger-capacity USB stick.
- HD vs. SD: High-definition (HD) recordings require more storage space than standard-definition (SD) recordings due to higher video quality and larger file sizes. If you primarily record in HD, opt for a USB stick with a larger storage capacity to accommodate the larger file sizes.
- Storage Space Allocation: Consider how you intend to use the USB stick and allocate storage space accordingly. For example, if you plan to record a mix of TV shows, movies, and sports events, allocate more storage space for longer recordings or high-definition content.
- Future Expansion: Choose a USB stick with ample storage capacity to accommodate future recording needs. Selecting a USB stick with more storage than you currently need can provide room for growth and prevent the need for frequent file management or data deletion.
Speed Requirements:
In addition to capacity considerations, pay attention to the speed requirements of the USB stick for recording TV content:
- Write Speed: Select a USB stick with a high write speed to ensure smooth and reliable recording performance. Higher write speeds are particularly important for recording high-definition (HD) content without buffering or dropped frames. Look for USB sticks with a Class 10 or UHS-I speed rating for optimal recording performance.
- Transfer Speed: Consider the transfer speed of the USB stick when copying recorded content to other devices for playback or storage. Faster transfer speeds can significantly reduce the time required to transfer large files, such as HD recordings, to a computer or external hard drive.
- Compatibility: Ensure that the USB stick’s speed rating is compatible with your TV’s recording capabilities. Some TVs may have limitations on the maximum supported write speed or require specific speed classes for optimal recording performance. Check your TV’s specifications or user manual for guidance on compatible USB stick speed ratings.
Setting up your TV for Recording
Configuring Recording Settings:
Before you start recording TV content to a USB stick, you’ll need to configure the recording settings on your TV. Here’s how to do it:
- Access the Menu: Use your TV’s remote control to access the main menu. The exact method for accessing the menu may vary depending on your TV model, but it’s usually done by pressing the “Menu” or “Settings” button on the remote.
- Navigate to Recording Settings: Once in the menu, navigate to the section related to recording settings or PVR (Personal Video Recorder) settings. This section may be labeled differently depending on your TV brand and model.
- Enable Recording: In the recording settings menu, look for an option to enable recording to external USB storage devices. This option may be labeled as “USB Recording,” “PVR Function,” or something similar. Follow the on-screen instructions to enable this feature.
- Select Recording Quality: Depending on your TV model, you may have the option to adjust the recording quality or resolution. Choose the desired quality setting based on your preferences and available storage space on the USB stick.
- Schedule Recordings (Optional): Some TVs allow you to schedule recordings in advance using a built-in electronic program guide (EPG). If this feature is available, navigate to the scheduling menu and follow the prompts to set up scheduled recordings for specific programs or time slots.
Connecting the USB Stick to Your TV:
Once you’ve configured the recording settings on your TV, follow these steps to connect the USB stick for recording:
- Power Off Your TV: Before connecting the USB stick, power off your TV to avoid any potential damage to the USB port or data corruption on the USB stick.
- Locate the USB Port: Locate the USB port on your TV. Depending on your TV model, the USB port may be located on the side, rear, or bottom panel of the TV.
- Insert the USB Stick: Insert the USB stick into the USB port on your TV. Ensure that the USB stick is inserted securely and oriented correctly according to the USB port’s shape and design.
- Power On Your TV: After inserting the USB stick, power on your TV using the remote control or power button on the TV itself.
- Verify Connection: Once your TV is powered on, verify that the USB stick is recognized and detected by the TV. You may see a notification or prompt on the screen indicating that a USB storage device has been connected.
- Test Recording: To test the recording functionality, tune your TV to a live program or channel, and initiate a recording using the TV’s remote control. Follow the on-screen prompts to start and stop the recording process. After recording, verify that the recorded content is saved correctly to the USB stick.
Recording Process
Step-by-Step Guide to Recording:
Once you’ve configured your TV for recording and connected the USB stick, follow these steps to record TV content:
- Tune to the Desired Channel: Use your TV’s remote control to tune to the channel or program you want to record. Ensure that the program is currently airing or scheduled to start soon.
- Access the Recording Menu: Depending on your TV model, you may need to access a dedicated recording menu or simply press a button on the remote control to initiate recording. Look for options like “Record,” “Recordings,” or “PVR” on the remote control or TV menu.
- Start Recording: Once you’re tuned to the desired channel and ready to start recording, press the “Record” button on the remote control or select the “Record” option from the TV menu. Follow any on-screen prompts to confirm the recording.
- Monitor Recording Progress: While the program is being recorded, you can monitor the recording progress on the TV screen. Some TVs display a recording indicator or timer to show the elapsed recording time.
- Stop Recording: To stop the recording, press the “Stop” button on the remote control or select the “Stop Recording” option from the TV menu. Confirm the action if prompted.
- Playback Recorded Content: After stopping the recording, you can access the recorded content from the TV’s recording menu or playback library. Navigate to the recordings section and select the desired recording to start playback.
Troubleshooting Tips:
If you encounter any issues or errors during the recording process, try the following troubleshooting tips:
- Check USB Stick Compatibility: Ensure that the USB stick is compatible with your TV and meets the required capacity and speed specifications. Use a different USB stick if the current one is not recognized or causing recording errors.
- Format the USB Stick: If the USB stick is not detected or recognized by the TV, format it using the FAT32 or exFAT file system on a computer. Be sure to back up any existing data on the USB stick before formatting.
- Update TV Firmware: Check for firmware updates for your TV and install any available updates. Firmware updates may include fixes for recording-related issues or compatibility improvements with USB storage devices.
- Verify Recording Settings: Double-check the recording settings on your TV to ensure that recording to external USB storage is enabled and configured correctly. Adjust the settings if necessary and try recording again.
- Test Different Channels: If recording fails on a specific channel or program, try recording from a different channel to determine if the issue is channel-specific or related to the recording setup.
- Reset TV Settings: If all else fails, try resetting your TV to its factory default settings. This will revert all settings to their original state and may resolve any software-related issues affecting recording functionality.
Playback and Management
Accessing Recorded Content:
Once you’ve successfully recorded TV content to your USB stick, accessing and playback the recorded content is straightforward. Here’s how to do it:
- Navigate to the Recording Menu: Use your TV’s remote control to access the recording menu or playback library. This menu is typically labeled as “Recordings,” “PVR,” or “Media Library” depending on your TV model.
- Select the Recorded Content: From the recording menu, navigate to the list of recorded content on the USB stick. You should see a list of recorded programs, episodes, or events.
- Choose the Desired Recording: Select the recording you want to playback from the list. You may see additional information such as the program title, date/time of recording, and recording duration.
- Start Playback: Once you’ve selected the desired recording, press the “Play” button on the remote control to start playback. The recorded content should start playing on your TV screen.
- Playback Controls: During playback, use the playback controls on the remote control to pause, rewind, fast-forward, or skip through the recorded content. You can also adjust the volume and access additional playback options as needed.
- Exit Playback: When you’re finished watching the recorded content, press the “Stop” button on the remote control to exit playback and return to the recording menu.
Editing and Managing Recordings:
While some TVs offer basic editing features for recorded content, such as trimming or deleting recordings, more advanced editing may require additional software or tools. Here are some options for editing and managing recordings:
- Basic Editing on TV: Some TVs allow you to perform basic editing functions directly from the recording menu. This may include options to trim the beginning or end of recordings, delete recordings, or rename recordings.
- Transfer to Computer: To perform more advanced editing tasks, such as cutting, merging, or adding effects to recordings, transfer the recorded content from the USB stick to a computer. Use video editing software such as Adobe Premiere Pro, Final Cut Pro, or Windows Movie Maker to edit the recordings.
- External Devices: Consider using external devices such as DVD recorders, Blu-ray players, or media streamers with recording capabilities to edit and manage recordings. These devices may offer additional editing features and storage options for recorded content.
- Organize Recordings: To keep your recorded content organized, create folders or directories on the USB stick to categorize recordings by genre, date, or program type. This will make it easier to locate and manage recordings, especially if you have a large collection of recorded content.
Additional Tips and Tricks
Optimizing Recording Quality:
To ensure the best possible recording quality when using a USB stick, consider the following tips:
- Use High-Quality Settings: When configuring recording settings on your TV, choose the highest available quality settings for recording. This may include selecting the highest resolution (e.g., 1080p for HD recordings) and adjusting any bitrate or compression settings for optimal image and sound quality.
- Avoid Overcompression: Be cautious of overcompressing recordings, as this can lead to loss of detail and degradation in quality. If possible, avoid excessive compression settings that sacrifice quality for smaller file sizes.
- Optimize Recording Conditions: Ensure optimal lighting, sound, and signal conditions when recording TV content. Avoid recording in low-light environments or areas with poor signal reception, as this can affect the quality of recorded footage.
- Monitor Recording Quality: Periodically check the recorded content to ensure that the quality meets your expectations. Playback recorded content on your TV or other devices to verify image clarity, sound quality, and overall viewing experience.
Scheduling Recordings:
To schedule recordings in advance and automate the recording process, consider the following options:
- Electronic Program Guide (EPG): Many modern TVs come equipped with an electronic program guide (EPG) that displays a list of upcoming programs and their airing times. Use the EPG to browse upcoming shows, select the programs you want to record, and schedule recordings in advance.
- Timer Recording: Some TVs allow you to manually set timers to start and stop recordings at specific times. Use the timer recording feature to schedule recordings for programs that may not be listed in the EPG or to record programs airing outside of your viewing hours.
- Smart TV Apps: If your TV supports smart features or app integration, consider using third-party apps or services to schedule recordings remotely. Many streaming services and TV network apps offer DVR functionality that allows you to schedule recordings from your smartphone, tablet, or computer.
Protecting Recorded Content:
To protect your recorded content from accidental deletion, corruption, or loss, consider the following precautions:
- Backup Regularly: Create regular backups of your recorded content to an external hard drive, cloud storage service, or another USB stick. This ensures that you have a duplicate copy of your recordings in case of data loss or device failure.
- Enable Write Protection: Some USB sticks come equipped with a write protection switch or feature that prevents accidental deletion or modification of stored data. Enable write protection on the USB stick to safeguard recorded content from unintended changes.
- Label and Organize: Label your USB sticks and organize recorded content into folders or directories for easy identification and management. This makes it easier to locate specific recordings and reduces the risk of accidentally deleting or overwriting important content.
- Store in a Safe Location: Store your USB sticks containing recorded content in a safe and secure location to prevent physical damage, loss, or theft. Avoid exposing USB sticks to extreme temperatures, moisture, or direct sunlight, as these can affect the integrity of stored data.
Legal Considerations
Copyright and Fair Use:
When recording TV content to a USB stick, it’s essential to understand copyright laws and considerations related to fair use. Here’s what you need to know:
- Copyright Protection: TV programs, movies, and other audiovisual content are protected by copyright law, which grants exclusive rights to the creators or owners of the content. Recording copyrighted material without permission may infringe on these rights and lead to legal consequences.
- Fair Use Doctrine: Fair use is a legal principle that allows for the limited use of copyrighted material without permission for purposes such as criticism, comment, news reporting, teaching, scholarship, or research. However, the application of fair use depends on various factors, including the purpose and character of the use, the nature of the copyrighted work, the amount and substantiality of the portion used, and the effect on the potential market for the copyrighted work.
- Personal Use: In many jurisdictions, recording TV content for personal use, such as time-shifting or archival purposes, may be considered fair use. As long as you’re not distributing or profiting from the recorded content, you’re generally within your rights to record TV programs for personal viewing.
- Commercial Use: Using recorded TV content for commercial purposes, such as selling copies or distributing content without permission, is likely to infringe on copyright and may result in legal action.
- Streaming Services: Be aware of the terms of service and usage policies of streaming services or TV networks when recording content. Some services prohibit the recording or downloading of content for offline viewing, while others may allow it within certain limitations.
Privacy Concerns:
In addition to copyright considerations, be mindful of privacy concerns when recording TV content, especially if the recording includes individuals who have not consented to being recorded. Here are some privacy considerations to keep in mind:
- Consent: Obtain consent from individuals before recording or broadcasting content that includes their likeness, voice, or personal information. This applies to recording live events, interviews, or other situations where individuals may have a reasonable expectation of privacy.
- Public vs. Private Spaces: Understand the distinction between public and private spaces when recording TV content. Recording in public spaces where there is no expectation of privacy is generally permissible, but recording in private spaces, such as homes or private events, may require consent.
- Sensitivity to Subjects: Exercise sensitivity and discretion when recording content that may involve sensitive or private matters, such as personal conversations or confidential information. Avoid recording or broadcasting content that could harm the privacy or dignity of individuals.
FAQS
- Can I record TV shows directly onto a USB stick?
- Yes, many modern TVs come with a feature called USB recording or PVR (Personal Video Recorder), allowing you to record TV programs onto a USB stick.
- What do I need to record TV to a USB stick?
- You need a TV with USB recording capabilities, a USB stick with sufficient storage capacity, and the ability to select the program you want to record.
- How do I check if my TV supports USB recording?
- Refer to your TV’s user manual or look for features like “USB recording,” “PVR,” or “Time Shift” in the specifications. Alternatively, you can check the TV’s menu settings for recording options.
- What format should the USB stick be in for TV recording?
- Typically, TVs require the USB stick to be formatted in FAT32 or exFAT format for recording. Make sure to format your USB stick accordingly before using it for recording.
- How do I initiate recording on my TV?
- Tune into the program you want to record, insert the USB stick into the TV’s USB port, and follow the on-screen instructions to start recording. You may need to select the recording mode (immediate or scheduled) and specify the duration.
- How can I schedule recordings on my TV?
- Most TVs with USB recording functionality allow you to schedule recordings by accessing the EPG (Electronic Program Guide) and selecting the program you want to record. Follow the prompts to schedule the recording.
- How can I access the recordings on my USB stick?
- Once the recording is complete, you can access the recordings directly from the USB stick. Simply remove the USB stick from your TV and insert it into a computer or media player that supports the recorded file format to view the recordings.
- What if my TV doesn’t support USB recording?
- If your TV doesn’t support USB recording, you may need to consider alternative options such as using a standalone DVR (Digital Video Recorder) or connecting your TV to a set-top box with recording capabilities.
Conclusion
Recording TV content to a USB stick can be a convenient and enjoyable way to capture your favorite programs and watch them on your own schedule. However, it’s essential to be mindful of legal considerations, including copyright laws, fair use principles, and privacy concerns.
By following the tips and guidelines provided in this guide, you can set up your TV for recording, choose the right USB stick, and optimize recording quality while respecting copyright and privacy rights. Remember to configure recording settings on your TV, connect the USB stick securely, and monitor recording progress to ensure a smooth and reliable recording experience.
Additionally, consider scheduling recordings in advance, protecting recorded content from accidental deletion or loss, and being respectful of copyright and privacy rights when recording and sharing TV content. By taking these precautions and staying informed about legal issues, you can enjoy the benefits of TV recording while staying on the right side of the law.
Ultimately, recording TV content to a USB stick can enhance your entertainment experience and provide flexibility in how you watch and enjoy your favorite programs. With careful planning and consideration of legal and ethical concerns, you can make the most of your TV recording setup and preserve cherished moments for future viewing.

