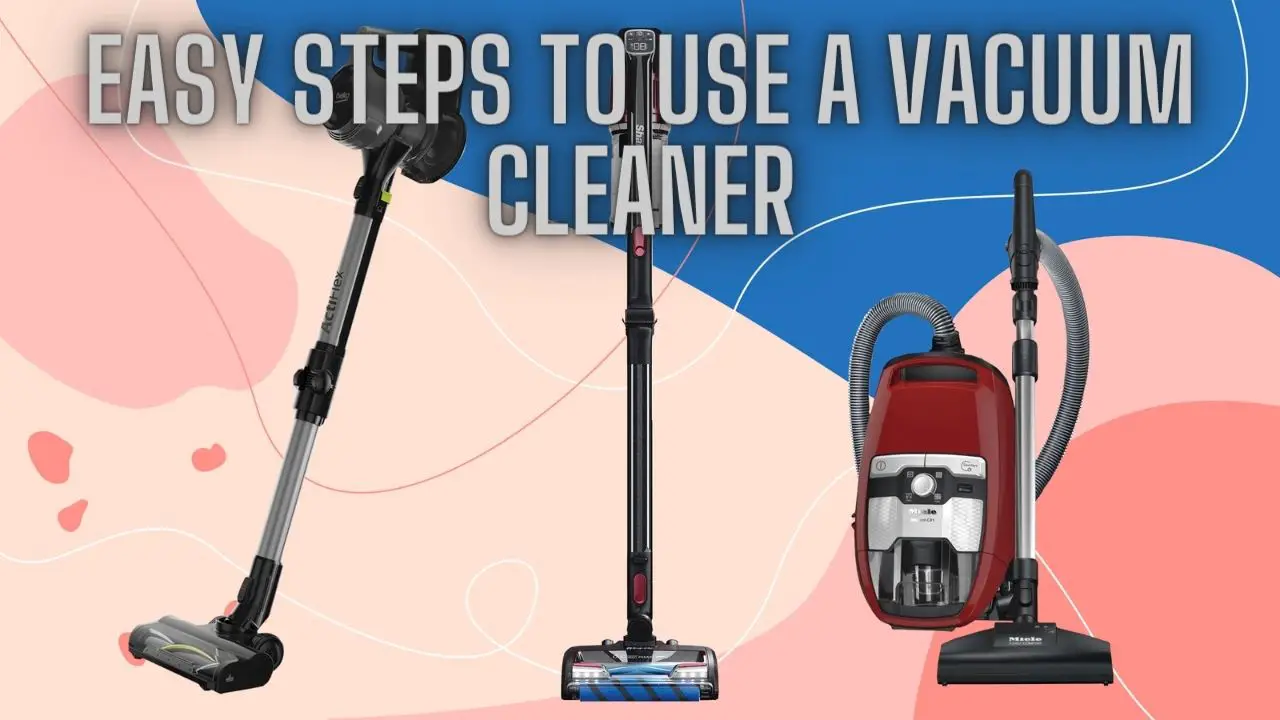
Easy Steps to Use a Vacuum Cleaner Effectively
Introduction
Using a vacuum cleaner is a straightforward and efficient way to keep your home clean and free of dust, dirt, and debris. Whether you’re tidying up carpets, hardwood floors, upholstery, or other surfaces, a vacuum cleaner can make the task quick and easy. In this guide, we’ll walk you through the simple steps to effectively use a vacuum cleaner, covering everything from preparation and understanding the components to vacuuming techniques for different surfaces. With these easy-to-follow steps, you’ll be able to achieve a spotless home in no time.
Preparation
Before using a vacuum cleaner, it’s important to prepare the space and gather any necessary supplies. Here are some steps to help you prepare:
- Clear the Area: Remove any large objects, clutter, or obstacles from the floor to ensure unobstructed movement while vacuuming. Pick up toys, shoes, and other items to prevent them from getting caught in the vacuum cleaner or hindering its performance.
- Declutter Surfaces: Tidy up surfaces such as tables, countertops, and shelves to prevent dust and debris from falling onto the floor during vacuuming. Clearing away clutter will make it easier to navigate around furniture and effectively clean the space.
- Check the Vacuum Cleaner: Inspect the vacuum cleaner to ensure it’s in good working condition. Check for any damage, clogs, or obstructions in the hose, attachments, or brush roll. Make sure the dustbin or vacuum bag is empty and properly installed.
- Plug in the Vacuum Cleaner: Locate a power outlet near the area you’ll be vacuuming and plug in the vacuum cleaner. Ensure the power cord is fully extended and free from tangles or knots to provide ample reach throughout the space.
- Select Attachments (if applicable): Depending on the surfaces you’ll be cleaning, choose the appropriate attachments for the vacuum cleaner. Attachments such as the crevice tool, upholstery brush, or dusting brush can enhance cleaning performance and reach difficult-to-clean areas.
By taking these preparation steps, you’ll create a clean and organized environment for vacuuming and ensure optimal performance from your vacuum cleaner. With everything set up and ready to go, you can proceed to effectively clean your home with ease.
Understanding Vacuum Cleaner Components
To use a vacuum cleaner effectively, it’s important to understand its various components and how they contribute to the cleaning process. Here’s an overview of the main parts of a vacuum cleaner:
- Motor: The motor is the heart of the vacuum cleaner, powering the suction mechanism that pulls in dirt, dust, and debris from surfaces.
- Dustbin or Vacuum Bag: The dustbin or vacuum bag collects the dirt and debris sucked up by the vacuum cleaner. Bagged vacuum cleaners use disposable bags that need to be replaced when full, while bagless models have reusable dustbins that can be emptied and cleaned.
- Filters: Vacuum cleaners feature one or more filters that trap fine particles and allergens, preventing them from being released back into the air. Common types of filters include HEPA filters, foam filters, and pre-motor filters.
- Hose: The hose is a flexible tube that connects the vacuum cleaner’s main body to the cleaning head or attachments. It allows for easy maneuverability and reaching tight spaces.
- Cleaning Head: The cleaning head is the part of the vacuum cleaner that comes into direct contact with the floor or surface being cleaned. It typically contains a rotating brush roll or beater bar that agitates carpet fibers and dislodges dirt for effective cleaning.
- Attachments: Vacuum cleaners come with a variety of attachments and accessories to tackle different cleaning tasks and surfaces. Common attachments include the crevice tool for tight spaces, upholstery brush for furniture, and dusting brush for delicate surfaces.
- Handle and Controls: The handle provides a comfortable grip for maneuvering the vacuum cleaner during use. It may also house controls such as power buttons, suction settings, and brush roll on/off switches.
- Wheels: Wheels or casters on the vacuum cleaner’s base allow for smooth movement across floors and surfaces without causing damage.
Understanding these key components will help you operate the vacuum cleaner effectively and make the most out of its cleaning capabilities. Whether you’re vacuuming carpets, hardwood floors, or upholstery, knowing how each part works together will ensure thorough and efficient cleaning results.
Choosing the Right Attachment
Selecting the appropriate attachment for your vacuum cleaner is crucial for achieving optimal cleaning results on different surfaces and in various areas of your home. Here’s how to choose the right attachment for the task at hand:
- Consider the Surface: Assess the type of surface you’ll be cleaning, whether it’s carpet, hardwood floors, upholstery, or tight spaces like corners and crevices. Different attachments are designed for specific surfaces to ensure effective cleaning without causing damage.
- Refer to the User Manual: Consult the user manual or manufacturer’s recommendations to identify the compatible attachments for your vacuum cleaner model. The manual may also provide guidance on which attachments are best suited for different cleaning tasks.
- Evaluate Cleaning Needs: Determine the specific cleaning needs of your home, such as removing pet hair from furniture, reaching high or low areas, or cleaning delicate surfaces. Choose attachments that address these needs and enhance the efficiency of your cleaning routine.
- Common Attachments and Their Uses:
- Crevice Tool: Ideal for reaching tight spaces and corners, such as along baseboards, between cushions, and around appliances.
- Upholstery Brush: Designed for cleaning upholstered furniture, drapes, and mattresses without causing damage or snagging fabric.
- Dusting Brush: Suitable for dusting delicate surfaces such as lampshades, blinds, and shelves, as well as removing cobwebs from corners and ceilings.
- Turbo Brush: Equipped with a rotating brush roll for deep cleaning carpets, rugs, and stairs by agitating fibers and dislodging embedded dirt and pet hair.
- Hard Floor Tool: Features soft bristles or a felt pad to gently clean hardwood floors, tile, and laminate surfaces without scratching or leaving marks.
- Extension Wand: Extends the reach of the vacuum cleaner hose for cleaning high ceilings, ceiling fans, and other elevated surfaces.
- Experiment and Test: Don’t hesitate to experiment with different attachments to find the combination that works best for your cleaning needs. Test each attachment on different surfaces and in various areas of your home to evaluate its effectiveness.
By choosing the right attachment for your vacuum cleaner, you can ensure thorough and efficient cleaning across all surfaces and areas of your home. Whether you’re tackling carpets, hardwood floors, upholstery, or hard-to-reach spaces, the appropriate attachment will help you achieve optimal cleaning results with ease.
Powering On the Vacuum Cleaner
Once you’ve selected the appropriate attachment and prepared the cleaning area, it’s time to power on the vacuum cleaner. Follow these simple steps to start cleaning:
- Locate the Power Button: The power button is typically located on the vacuum cleaner’s handle or main body. It may be labeled with symbols such as “On/Off” or a power icon.
- Ensure Proper Connection: Before powering on the vacuum cleaner, double-check that it is securely plugged into a power outlet. Ensure that the power cord is fully extended and free from tangles or obstructions.
- Adjust Settings (if applicable): Some vacuum cleaners have adjustable settings for suction power, brush roll rotation, or height adjustment. Set these settings according to the type of surface you’ll be cleaning and your personal preferences.
- Press the Power Button: Press the power button to turn on the vacuum cleaner. You may hear the motor start up, indicating that the vacuum cleaner is operational.
- Check for Indicator Lights: Some vacuum cleaners have indicator lights or displays that illuminate when the appliance is powered on. Verify that these lights are functioning properly to ensure that the vacuum cleaner is receiving power.
- Listen for Normal Operation: As the vacuum cleaner powers on, listen for any unusual noises or vibrations. A properly functioning vacuum cleaner should operate quietly and smoothly without excessive noise or rattling.
- Test Suction and Brush Roll: Once the vacuum cleaner is powered on, test the suction and brush roll rotation by briefly running the appliance over a small section of the cleaning area. Ensure that the vacuum cleaner effectively picks up dirt and debris and that the brush roll agitates carpet fibers (if applicable).
- Adjust as Needed: If necessary, adjust the suction power or other settings to achieve the desired cleaning performance. Experiment with different settings and techniques to find the optimal configuration for your cleaning needs.
By following these steps, you can safely and effectively power on your vacuum cleaner and begin cleaning your home with confidence. With the vacuum cleaner in operation, you’re ready to tackle dirt, dust, and debris on carpets, hardwood floors, upholstery, and other surfaces throughout your home.
Adjusting Height Settings (if applicable)
Some vacuum cleaners, particularly those designed for carpet cleaning, feature adjustable height settings to accommodate different carpet pile heights and flooring types. Here’s how to adjust the height settings on your vacuum cleaner:
- Refer to the User Manual: Consult the user manual or manufacturer’s instructions to determine if your vacuum cleaner has adjustable height settings and how to adjust them. The manual may provide specific guidance and recommendations for your particular model.
- Locate the Height Adjustment Dial or Lever: Look for the height adjustment dial or lever on the vacuum cleaner’s cleaning head or main body. It may be labeled with symbols such as “+” and “-” to indicate height adjustments.
- Assess the Carpet Pile Height: Evaluate the thickness and pile height of the carpet or rug you’ll be cleaning. Adjusting the height settings ensures that the vacuum cleaner’s cleaning head makes proper contact with the carpet fibers for optimal cleaning performance.
- Select the Appropriate Height Setting: Based on the carpet pile height and flooring type, adjust the height setting on the vacuum cleaner accordingly. Lower the height setting for shorter pile carpets or hard floors and raise it for deeper pile carpets or plush rugs.
- Test the Height Adjustment: After adjusting the height setting, test the vacuum cleaner on a small section of the carpet to ensure that the cleaning head glides smoothly and makes good contact with the carpet fibers. Adjust the height setting as needed to achieve the desired cleaning performance.
- Monitor Cleaning Performance: Pay attention to how the vacuum cleaner performs on different carpet types and adjust the height settings as necessary to optimize cleaning results. A properly adjusted height setting ensures thorough cleaning and prevents damage to the carpet fibers.
- Fine-Tune as Needed: Fine-tune the height settings based on your personal preferences and the specific characteristics of the carpet or flooring in your home. Experiment with different height settings to find the optimal configuration for each area you’re cleaning.
By adjusting the height settings on your vacuum cleaner, you can ensure effective cleaning performance on a variety of carpet types and flooring surfaces. Proper height adjustment not only enhances cleaning results but also helps prolong the life of your carpets and rugs by preventing excessive wear and damage.
Vacuuming Technique for Different Surfaces
To achieve optimal cleaning results, it’s essential to use the appropriate vacuuming technique for different surfaces in your home. Here are some tips for vacuuming common surfaces:
- Carpets and Rugs:
- Start by vacuuming along the edges of the room using a crevice tool or edge-cleaning attachment to capture dirt and debris that accumulate along baseboards and corners.
- Use a back-and-forth or overlapping motion to thoroughly vacuum the entire carpeted area. Begin in one corner of the room and work your way toward the opposite corner.
- For heavily soiled areas or high-traffic areas, use a slow and deliberate motion to allow the vacuum cleaner to agitate the carpet fibers and remove embedded dirt.
- If your vacuum cleaner has a rotating brush roll or beater bar, ensure that it is in good condition and properly adjusted to avoid damaging delicate carpet fibers.
- Hardwood Floors and Tile:
- Use a vacuum cleaner with a hard floor attachment or setting to prevent scratching or damaging the surface of hardwood floors and tile.
- Avoid using rotating brush rolls or beater bars on hard floors, as they can scatter debris and potentially cause scratches.
- Use a gentle back-and-forth motion or a straight-line motion to effectively pick up dirt and debris from hard surfaces. Pay special attention to areas near baseboards and furniture legs.
- Consider using a vacuum cleaner with a soft bristle brush or felt pad attachment to gently clean hardwood floors without causing damage.
- Upholstery and Furniture:
- Use a upholstery brush attachment or a soft brush setting on your vacuum cleaner to clean upholstered furniture, drapes, and mattresses.
- Start by vacuuming the cushions, arms, and backrests of furniture using a gentle back-and-forth motion. Pay attention to seams and crevices where dirt and debris may accumulate.
- For delicate fabrics or intricate details, use a low suction setting and avoid pressing too hard with the vacuum cleaner to prevent damage.
- Consider using a vacuum cleaner with a upholstery tool or fabric guard attachment to protect delicate fabrics and prevent snagging or pulling.
- Stairs:
- Use a handheld vacuum cleaner or a vacuum cleaner with a hose and attachment to clean stairs effectively.
- Start at the top of the stairs and work your way down, vacuuming each step individually. Use a crevice tool or upholstery brush attachment to reach tight spaces and corners.
- Use a steady and controlled motion to prevent the vacuum cleaner from falling or tipping over while cleaning stairs.
- Ceilings and Walls:
- Use a vacuum cleaner with an extension wand and dusting brush attachment to clean ceilings, walls, and other elevated surfaces.
- Work from the top down, starting with ceilings and working your way toward the floor. Use a gentle sweeping motion to remove dust and cobwebs without damaging paint or surfaces.
By following these vacuuming techniques for different surfaces, you can achieve thorough cleaning results and maintain a clean and tidy home. Adjust your vacuuming technique based on the specific characteristics of each surface to ensure effective cleaning without causing damage.
Vacuuming Carpets and Rugs
Vacuuming carpets and rugs is essential for removing dirt, dust, pet hair, and other debris trapped in the fibers. Here’s how to effectively vacuum carpets and rugs:
- Preparation:
- Clear the area of any obstacles, such as furniture or toys, to ensure unobstructed vacuuming.
- If possible, remove lightweight furniture or elevate it on furniture sliders to access all areas of the carpet.
- Select the Right Attachment:
- Use a vacuum cleaner with a rotating brush roll or beater bar for deep cleaning carpets. This agitates the carpet fibers and dislodges embedded dirt for thorough cleaning.
- If your vacuum cleaner has adjustable height settings, adjust the height to match the pile height of your carpet for optimal cleaning performance.
- Vacuuming Technique:
- Begin by vacuuming along the edges of the room using a crevice tool or edge-cleaning attachment to remove dirt and debris accumulated along baseboards and corners.
- Work from one side of the room to the other, using a back-and-forth or overlapping motion to cover the entire carpeted area.
- Slow down and make multiple passes over heavily soiled or high-traffic areas to ensure thorough cleaning.
- Pay special attention to areas where dirt and debris may accumulate, such as entryways, hallways, and under furniture.
- For plush or shaggy carpets, consider using a vacuum cleaner with a height-adjustable brush roll to prevent it from getting bogged down in the carpet fibers.
- Change Direction:
- Change the direction of your vacuuming strokes occasionally to ensure that you’re lifting dirt and debris from all angles.
- Alternating the direction of your vacuuming pattern helps prevent carpet wear and matting and ensures a more thorough clean.
- Spot Treat Stains:
- If you encounter stains or spills on the carpet, spot treat them before vacuuming. Use a carpet cleaner or stain remover according to the manufacturer’s instructions, then allow it to dry before vacuuming over the treated area.
- Finish with Upholstery:
- After vacuuming the carpeted areas, use the upholstery brush attachment to vacuum upholstered furniture, drapes, and curtains. This ensures a complete cleaning of the room’s soft surfaces.
- Empty the Dustbin or Replace the Vacuum Bag:
- Once you’ve finished vacuuming, empty the dustbin or replace the vacuum bag to maintain optimal suction and prevent dust and debris from accumulating inside the vacuum cleaner.
By following these steps, you can effectively vacuum carpets and rugs to remove dirt, dust, and allergens, leaving your home looking clean and fresh. Regular vacuuming helps prolong the life of your carpets and contributes to a healthier indoor environment for you and your family.
Vacuuming Hardwood Floors
Vacuuming hardwood floors is essential for removing dust, dirt, pet hair, and other debris without causing damage to the surface. Here’s how to effectively vacuum hardwood floors:
- Select the Right Attachment:
- Use a vacuum cleaner with a hard floor attachment or setting specifically designed for hard surfaces. Avoid using rotating brush rolls or beater bars, as they can scratch or damage the wood flooring.
- Preparation:
- Clear the area of any obstacles, such as furniture or rugs, to ensure unobstructed vacuuming.
- If possible, remove lightweight furniture or elevate it on furniture sliders to access all areas of the hardwood floor.
- Adjust Height Settings (if applicable):
- If your vacuum cleaner has adjustable height settings, adjust them to the lowest setting or to a setting suitable for hard floors. This ensures that the vacuum cleaner’s cleaning head makes proper contact with the floor surface for effective cleaning.
- Vacuuming Technique:
- Start at one end of the room and work your way toward the opposite end, using a back-and-forth or straight-line motion to cover the entire floor.
- Use a gentle and controlled motion to prevent scratching or damaging the hardwood surface. Avoid pressing too hard with the vacuum cleaner, as this can cause scratches or indentations.
- Pay special attention to areas near baseboards, corners, and furniture legs, where dust and debris tend to accumulate.
- Use Soft Bristles or Felt Pads:
- If your vacuum cleaner has a brush attachment, ensure that it has soft bristles or a felt pad to prevent scratching or damaging the hardwood floor.
- Alternatively, use a vacuum cleaner with a soft brush setting or a dedicated hard floor attachment designed for gentle cleaning on wood surfaces.
- Change Direction:
- Change the direction of your vacuuming strokes occasionally to ensure that you’re lifting dirt and debris from all angles.
- Alternating the direction of your vacuuming pattern helps ensure thorough cleaning and prevents dirt from being pushed around or missed.
- Finish with Edges and Corners:
- Use a crevice tool or edge-cleaning attachment to vacuum along baseboards, corners, and other hard-to-reach areas where dust and debris may accumulate.
- Empty the Dustbin or Replace the Vacuum Bag:
- Once you’ve finished vacuuming, empty the dustbin or replace the vacuum bag to maintain optimal suction and prevent dust and debris from accumulating inside the vacuum cleaner.
By following these steps, you can effectively vacuum hardwood floors to remove dust, dirt, and debris without causing damage to the surface. Regular vacuuming helps keep hardwood floors looking clean and well-maintained, contributing to a comfortable and inviting home environment.
Vacuuming Upholstery and Furniture
Vacuuming upholstery and furniture is essential for removing dust, pet hair, allergens, and other debris that can accumulate on fabric surfaces. Here’s how to effectively vacuum upholstery and furniture:
- Select the Right Attachment:
- Use a vacuum cleaner with a upholstery brush attachment or a soft brush setting specifically designed for cleaning fabric surfaces.
- Avoid using attachments with rotating brush rolls or beater bars, as they can damage delicate upholstery fabrics.
- Preparation:
- Remove cushions, pillows, and throws from upholstered furniture to access all areas for cleaning.
- If possible, use a handheld vacuum cleaner for smaller or delicate upholstery pieces, such as throw pillows or decorative cushions.
- Adjust Suction Power (if applicable):
- If your vacuum cleaner has adjustable suction power, reduce the suction level to a gentle setting suitable for upholstery and fabric surfaces. This helps prevent damage to delicate fabrics and ensures thorough cleaning without pulling or stretching.
- Vacuuming Technique:
- Start by vacuuming the cushions, arms, and backrests of the furniture using a gentle back-and-forth or overlapping motion.
- Use the upholstery brush attachment or soft brush setting to effectively lift dirt and debris from fabric surfaces without causing damage.
- Pay special attention to seams, tufting, and crevices where dirt and pet hair may accumulate. Use a crevice tool or upholstery brush attachment to reach these areas effectively.
- Use Care with Decorative Details:
- Take care when vacuuming around decorative details such as tassels, fringe, or delicate trim. Avoid pulling or snagging these elements with the vacuum cleaner attachment.
- If necessary, use a low suction setting and a gentle touch to clean around decorative details without causing damage.
- Vacuuming Drapes and Curtains:
- For drapes and curtains, use a handheld vacuum cleaner or a vacuum cleaner with a soft brush attachment to gently remove dust and debris.
- Start at the top of the drapery and work your way down, using a gentle sweeping motion to prevent damage to delicate fabrics.
- Spot Treat Stains:
- If you encounter stains or spills on upholstery or furniture, spot treat them before vacuuming. Use a upholstery cleaner or stain remover according to the manufacturer’s instructions, then allow it to dry before vacuuming over the treated area.
- Finish with Cushions and Pillows:
- After vacuuming the upholstered furniture, vacuum the cushions, pillows, and throws to remove any remaining dust and debris. Fluff and reposition the cushions as needed.
- Empty the Dustbin or Replace the Vacuum Bag:
- Once you’ve finished vacuuming, empty the dustbin or replace the vacuum bag to maintain optimal suction and prevent dust and debris from accumulating inside the vacuum cleaner.
By following these steps, you can effectively vacuum upholstery and furniture to remove dirt, pet hair, and allergens, leaving your upholstery looking clean and refreshed. Regular vacuuming helps maintain the appearance and condition of upholstery fabrics and contributes to a clean and comfortable living space.
Vacuuming Stairs
Vacuuming stairs can be a bit tricky due to their unique shape and angles. However, with the right technique and tools, you can effectively remove dirt, dust, and debris from staircases. Here’s how to vacuum stairs:
- Prepare the Area:
- Remove any objects, such as shoes or toys, from the stairs to ensure unobstructed vacuuming.
- If possible, use a handheld vacuum cleaner or a vacuum cleaner with a hose and attachments for easier maneuverability on the stairs.
- Select the Right Attachment:
- Choose a crevice tool or upholstery brush attachment for vacuuming stairs. These attachments are designed to reach tight spaces and corners, making them ideal for cleaning stair treads and risers.
- Start at the Top:
- Begin vacuuming at the top of the stairs and work your way down to the bottom. This prevents dirt and debris from falling onto already cleaned steps.
- Vacuum the Treads:
- Use the crevice tool or upholstery brush attachment to vacuum each stair tread individually. Start from the back of the tread and work your way towards the front, overlapping your strokes for thorough cleaning.
- Pay special attention to the edges and corners of each tread, where dirt and debris tend to accumulate.
- Clean the Risers:
- Once you’ve vacuumed the treads, move on to the risers. Use the crevice tool or upholstery brush attachment to clean along the vertical surfaces of the stairs.
- Angle the attachment to reach into tight spaces between the treads and risers, ensuring thorough cleaning.
- Work Methodically:
- Vacuum one stair at a time, moving from side to side as needed to cover the entire surface.
- Use a steady and controlled motion to prevent the vacuum cleaner from slipping or tipping over while cleaning the stairs.
- Be Mindful of Safety:
- Take care when vacuuming stairs to avoid tripping or falling. Hold onto the handrail for stability, especially when vacuuming higher or more challenging staircases.
- Finish with the Edges:
- Once you’ve vacuumed all the treads and risers, use the crevice tool or upholstery brush attachment to clean along the edges of the stairs and any molding or trim.
- Empty the Dustbin or Replace the Vacuum Bag:
- After vacuuming the stairs, empty the dustbin or replace the vacuum bag to maintain optimal suction and prevent dust and debris from accumulating inside the vacuum cleaner.
By following these steps, you can effectively vacuum stairs to remove dirt, dust, and debris, keeping them clean and free of allergens. Regular vacuuming helps maintain the appearance and condition of staircases and contributes to a cleaner and safer home environment.
Cleaning Corners and Edges
Cleaning corners and edges can be challenging, as dirt and debris tend to accumulate in these hard-to-reach areas. However, with the right tools and techniques, you can effectively remove dirt, dust, and debris from corners and edges. Here’s how to clean corners and edges:
- Select the Right Tools:
- Use a vacuum cleaner with a crevice tool attachment or a small brush attachment to reach into corners and along edges.
- Alternatively, use a handheld vacuum cleaner for greater maneuverability in tight spaces.
- Preparation:
- Clear the area of any obstacles, such as furniture or clutter, to ensure unobstructed access to corners and edges.
- Start at the Top:
- Begin by cleaning the upper corners of the room, where cobwebs and dust tend to accumulate. Use the crevice tool or brush attachment to reach into corners and along ceiling edges.
- Work your way down from the ceiling to the baseboards, focusing on one section of the room at a time.
- Vacuum Along Edges:
- Use the crevice tool or brush attachment to vacuum along baseboards, molding, and trim. Pay special attention to the gap between the floor and the baseboards, where dirt and debris often collect.
- Move the vacuum cleaner slowly and methodically along the edges to ensure thorough cleaning.
- Clean Floor Corners:
- For floor corners, use the crevice tool or brush attachment to reach into tight spaces where dirt and debris accumulate. Angle the attachment to effectively clean along the junction between the floor and the walls.
- Sweep or vacuum any loose debris out of the corners before using the crevice tool or brush attachment for deeper cleaning.
- Use a Damp Cloth (if needed):
- For stubborn dirt or sticky residue in corners and along edges, use a damp cloth or sponge to wipe down the surfaces. Avoid using excessive moisture, especially on wood or painted surfaces, as it can cause damage.
- Rotate Furniture (if possible):
- Occasionally, move furniture away from walls and corners to access hidden areas for cleaning. Vacuum or sweep behind and underneath furniture to remove accumulated dust and debris.
- Inspect and Touch-Up:
- After cleaning corners and edges, inspect the area for any remaining dirt or debris. Use the vacuum cleaner or a damp cloth to touch up any missed spots.
- Maintain Regular Cleaning:
- Incorporate cleaning corners and edges into your regular cleaning routine to prevent dirt and debris buildup and maintain a tidy home environment.
By following these steps, you can effectively clean corners and edges to remove dirt, dust, and debris, ensuring a thorough cleaning of your home’s hard-to-reach areas. Regular maintenance helps keep corners and edges clean and contributes to a cleaner and healthier living space.
Emptying the Dustbin or Vacuum Bag
Emptying the dustbin or vacuum bag is an essential part of vacuum cleaner maintenance, as it ensures optimal suction power and prevents dust and debris from accumulating inside the vacuum cleaner. Here’s how to empty the dustbin or vacuum bag:
- Turn Off the Vacuum Cleaner: Before emptying the dustbin or vacuum bag, turn off the vacuum cleaner and unplug it from the power source to prevent any accidents or injuries.
- Locate the Dustbin or Vacuum Bag: Depending on the type of vacuum cleaner you have, the dustbin or vacuum bag may be located on the front, back, or side of the vacuum cleaner. Refer to the user manual if you’re unsure where to find it.
- Remove the Dustbin or Vacuum Bag: If your vacuum cleaner has a dustbin, press the release button or unlock the latch to remove the dustbin from the vacuum cleaner. If it has a vacuum bag, open the compartment or access panel to remove the bag.
- Dispose of the Contents: Empty the contents of the dustbin or vacuum bag into a trash receptacle. Hold the dustbin or bag over the trash bin and gently shake or tap it to release the dirt, dust, and debris. Be careful not to spill the contents onto the floor.
- Check for Blockages or Clogs: While the dustbin or vacuum bag is removed, take the opportunity to inspect the vacuum cleaner for any blockages or clogs. Use a flashlight and a long, slender object, such as a straightened wire coat hanger or a pipe cleaner, to remove any debris lodged in the hose, nozzle, or brush roll.
- Clean the Dustbin or Vacuum Bag (if reusable): If your vacuum cleaner has a reusable dustbin or vacuum bag, rinse it with water and mild detergent to remove any lingering dirt or odors. Allow it to dry completely before reinstalling it in the vacuum cleaner.
- Replace the Vacuum Bag (if disposable): If your vacuum cleaner uses a disposable vacuum bag, dispose of the old bag in the trash and replace it with a new one. Follow the manufacturer’s instructions for installing a new vacuum bag, ensuring that it is securely in place.
- Reinstall the Dustbin or Vacuum Bag: Once the dustbin or vacuum bag is empty and clean (if reusable), reinstall it in the vacuum cleaner according to the manufacturer’s instructions. Ensure that it is properly seated and securely locked in place.
- Dispose of the Waste Properly: Dispose of the contents of the dustbin or vacuum bag in accordance with local regulations. Some areas may require you to seal the bag before disposing of it to prevent the spread of dust and allergens.
- Wipe Down the Vacuum Cleaner: Use a damp cloth to wipe down the exterior of the vacuum cleaner, removing any dust or dirt that may have accumulated during use.
By regularly emptying the dustbin or vacuum bag, you can maintain optimal suction power and ensure that your vacuum cleaner continues to perform effectively. Additionally, cleaning the dustbin or vacuum bag and inspecting the vacuum cleaner for blockages helps prevent issues and prolongs the life of the appliance.
Cleaning and Maintenance Tips
Cleaning and maintenance are essential for keeping your vacuum cleaner in top condition and ensuring effective performance. Here are some tips for cleaning and maintaining your vacuum cleaner:
- Empty the Dustbin or Replace the Vacuum Bag Regularly: Empty the dustbin or replace the vacuum bag when it’s full to prevent loss of suction and maintain optimal performance. For bagless models, empty the dustbin after each use or when it’s halfway full. For bagged models, replace the bag when it’s full or when suction begins to weaken.
- Clean Filters: Check and clean the filters regularly to prevent clogs and maintain airflow. Wash or replace filters as recommended by the manufacturer. HEPA filters may need to be replaced less frequently, but they should still be checked periodically for debris buildup.
- Inspect and Clean Brush Roll: Remove tangled hair, string, and debris from the brush roll regularly to prevent it from becoming clogged or damaged. Use scissors or a seam ripper to carefully cut away any hair or fibers wrapped around the brush roll.
- Clean Attachments and Accessories: Wipe down attachments, hoses, and accessories with a damp cloth to remove dust and debris. Rinse attachments that are washable with water and mild detergent, then allow them to dry completely before reinstalling them.
- Check and Clear Blockages: Periodically check for blockages or clogs in the hose, nozzle, and brush roll area. Use a flashlight and a long, slender object, such as a straightened wire coat hanger or a pipe cleaner, to remove any debris lodged in the vacuum cleaner’s components.
- Inspect and Replace Belts (if applicable): If your vacuum cleaner has a belt-driven brush roll, inspect the belt regularly for signs of wear or damage. Replace the belt if it’s worn, stretched, or broken to ensure proper brush roll rotation and effective cleaning performance.
- Maintain Brush Roll Height: Adjust the brush roll height settings as needed to accommodate different floor types and carpet pile heights. A proper brush roll height ensures optimal cleaning performance and prevents damage to flooring surfaces.
- Clean Vacuum Exterior: Wipe down the exterior of the vacuum cleaner with a damp cloth to remove dust and dirt. Pay attention to areas such as the handle, power cord, and wheels, where dirt and debris may accumulate.
- Store Properly: Store the vacuum cleaner in a dry, well-ventilated area to prevent mold and mildew growth. Avoid wrapping the power cord around the vacuum cleaner’s body, as this can cause damage to the cord and strain on the internal components.
- Schedule Professional Servicing: Consider scheduling periodic professional servicing for your vacuum cleaner, especially if you notice any issues or decline in performance. A professional technician can diagnose and address any problems and perform routine maintenance to keep your vacuum cleaner running smoothly.
By following these cleaning and maintenance tips, you can prolong the life of your vacuum cleaner and ensure that it continues to perform effectively for years to come. Regular maintenance helps prevent issues and keeps your vacuum cleaner operating at its best, contributing to a cleaner and healthier home environment.
FAQS
How often should I vacuum my home?
- The frequency of vacuuming depends on factors like the level of foot traffic, the presence of pets, and personal preferences. Generally, vacuuming high-traffic areas and common living spaces once a week is a good starting point. However, you may need to vacuum more frequently if you have pets or allergies.
Can I vacuum different floor types with the same setting?
- It’s essential to adjust the vacuum cleaner’s settings according to the floor type. Use higher settings for carpets and lower settings for hard floors. Some vacuum cleaners have automatic height adjustment features, making it easier to transition between floor types.
Do I need to empty the dustbin or replace the bag every time I vacuum?
- You don’t have to empty the dustbin or replace the bag after every use, but it’s a good practice to check them before you start. If they are full, it’s best to empty or replace them to ensure optimal suction and cleaning efficiency.
Can I use the same attachment for all cleaning tasks?
- Vacuum cleaners typically come with various attachments for different cleaning tasks. It’s recommended to use the appropriate attachment for each task. For example, use a crevice tool for tight corners and a brush attachment for upholstery. Using the right attachment can improve cleaning results.
Should I vacuum in a specific pattern?
- Vacuuming in overlapping straight lines is a common and effective pattern. Start at one end of the room and work your way to the other end, slightly overlapping each pass. This ensures thorough coverage and helps pick up more dirt and debris.
Can I use a vacuum cleaner on wet spills or liquids?
- Most vacuum cleaners are not designed to handle wet spills or liquids. Attempting to vacuum up liquids can damage the machine and pose electrical hazards. Instead, use a wet vacuum or mop for liquid spills and follow the manufacturer’s recommendations.
How do I maintain my vacuum cleaner for optimal performance?
- To maintain your vacuum cleaner:
- Regularly clean or replace filters, as specified in the manual.
- Clear clogs from hoses or attachments.
- Keep the brush roll or beater bar clean and free of tangled hair or debris.
- Check and tighten any loose parts or screws.
- Store your vacuum cleaner in a dry and cool place.
Can vacuuming help with allergies and dust mites?
- Yes, regular vacuuming can help reduce allergens and dust mites in your home. Use a vacuum cleaner with a HEPA filter to capture small particles, and focus on areas where dust tends to accumulate, such as carpets, rugs, and upholstery. Emptying the dustbin or replacing the bag promptly is also crucial to prevent allergens from escaping.
How long should I expect my vacuum cleaner to last?
- The lifespan of a vacuum cleaner varies depending on its quality, usage, and maintenance. A well-maintained vacuum cleaner from a reputable brand can last anywhere from 5 to 10 years or more. Regular maintenance and following the manufacturer’s guidelines can extend its life.